Free shipping on orders over $100! **After discounts have been applied & Continental US only

Jennifer

Getting Funky with some Painted Jeans

So call me a little Funky, a throwback to the 70’s or whatever… BUT I love my painted Jeans!

Talk about fun!!  They are fun to wear and even more fun to paint!!  So grab yourself some jeans and if you don’t have any to paint, head to your favorite Good Will (or your favorite thrift store) store to find a pair at a great price!  This is even a great idea for some practice and playing around.  I picked up several pairs for only $5 to $7 each!!


I love using my rollers to paint on the jeans (I’m currently looking for a denim jacket for another project) and both of the rollers styles can be used.  But for the most consistent application, I like to use the Stamping Rollers.

When using the rollers for painting on fabric there are a few things that you need to know first.  Many different paints can be used, but I have found that fabric paints do work the best.  The main reason is that you are only rolling the paint over the fabric and not working it into the fibers so we need something that is meant for fabric painting.

Even spray a light mist of water over the area you are going to paint – this will help the paint to soak into the fabric.  Make sure to allow the paint to dry for the recommended time and then heat set.  Heat setting can be done several ways: you can bake them in an oven on low, throw them in the dryer for about 30 minutes on high heat or iron using a pressing cloth.  All these methods will work for heat setting the paint.

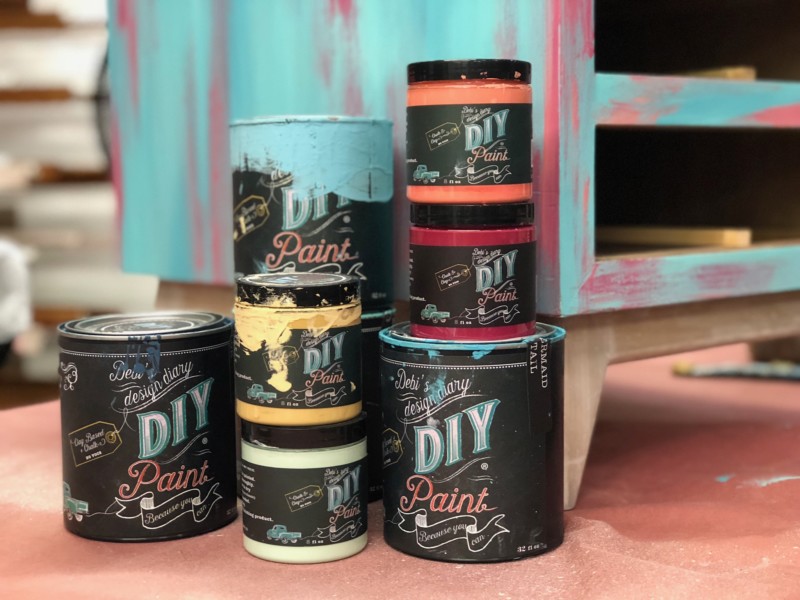
I have used Plaid Fabric Paint and have also used DIY Paints, General Finishes Milk Paint with adding a Fabric Medium to both of them… BUT the Fabric Paint did wash the best.

So get out your rollers and a pair of those old jeans hanging in your closet and make some wearable art!!

Come on girls, get funky with me!!!

All Things Rust & Patina – Exploring the Possibilities

I have been using the Modern Masters Patina finishes for many many years!  Some of you may remember a few others they used to have like “Baroque”.  YES, I’m as sad as you, I wish they still had that one too!!  But, from what I understand, it had an issue with exploding… LOL!!  Yeah, that is the reason Baroque is gone!!

But my personal LOVE of all things Patina and Rust has been going strong for some time now; maybe close to 20 years 🙂  I have been obsessed with the incredible amount of variations one can achieve using these materials and I always feel like the “mad scientist” when creating with them!!

So, I’m taking a day (well approximately 5 to 6 hours) on August 8th (don’t worry if you can’t be there for the Live taping, you can watch any time it’s convenient for you) and going to share all I know about these materials and how they react, how to get different reactions and even introduce other materials they react with.  Not only will you learn all about the products (so that you become an expert “reactor”) but you will also be learning 3 of my most popular finishes.  YES, 3 of my favorite and amazing finishes will be added to your portfolio and wow all your customers.

Now, this is a fabulous deal!  Stay at home and watch all this good stuff going on, ask questions during the process and have a private room that you will have access to for continued support!!

These finishes are totally “drool” worthy and I’m sure with all your new Rust & Patina knowledge, you will create many new “drool” worthy finishes on your own!

Make sure to sign up soon for this workshop by July 20th to save $30!!  Early Bird Special is $107 after July 20th class fee will be $137……

This workshop will provide all the knowledge you need to become your own “mad scientist” and understand how the products react, the different variations of the reactions and how to control them as much as possible (some of it just happens)!!

Looking forward to sharing my knowledge with all of you so that you can have as much fun as I do with all of these materials by Modern Masters – Metal Effects.

Also, one lucky student will receive a Rust Kit (16oz bottles)  that includes Iron Paint, Rust Activator, Primer and PermaCoat, valued at over $80!!  WooHoo, baby, that’s good stuff!!


Multi-Medium Canvas Art

I personally have a ton of stretched canvas (new ones still in the plastic). You just never know when you might need one.  And who can pass up a fabulous sale on them, you know what I mean, Hobby Lobby, Michael’s or Aaron Brothers – they just have to tempt us!!!

So, I’m sure like many others I have a pile of unused canvas just laying around and occasionally I find some time to play.  This particular one had been started once before and never finished.  But, I had an inspiration that I thought would look awesome.

The first layer on this canvas was my Texture Medium troweled on thin and then I used the Tiger Roller.  I rolled through the wet material creating three passes.  I allowed the Texture Medium to dry and then sanded down the high points.  At this point, I’m really not sure what the “inspo” was, but it was painted in a Coral color… Hmmm, not sure why and couldn’t remember that particular inspo, so I went with the new inspiration that was rolling through my head!!!

I grabbed some paint and stencils, then decided to share my idea with all my Facebook Peeps and turned on FB Live!  Why not??  I think it’s always more fun painting with friends than by yourself.  With the camera rolling, I shared what I had done and was starting to work on.  The canvas was repainted with General Finishes Milk Paint Coastal Blue (I love this Navy color) and then I used the stunning new stencil La Provence and stenciled it with Modern Masters Metallic Paint Warm Silver and Champagne and created a layered look.  Once the two repeats were completed with the La Provence stencil, it was a hard decision to either stop or add one more element… I couldn’t help myself, so I added another layer.

I had to add the Hampton Medallion stencil embossed with Glass Bead Gel mixed with Glitter. So yummy!!

This beautiful painting has it all, texture, metallic, stencils, glitter and Glass Beads!!!  One beautiful piece of ART!

A canvas can be a place to create fabulous art or even a place to experiment with techniques, products, and styles.

Grab a canvas and get exploring!! Let the Artist in YOU come alive!!

Blessings,

Jenn

Ins & Outs of Debi’s Design Diary DIY Paint

If you know me at all, you know that I LOVE DIY Paint!!

Let me tell you why I love this paint so much and how to use it.

First off, it is all natural and that makes me a happy person considering I’m in it a lot and sometimes, it’s all over me! LOL! Also, this product only has 9 ingredients and has absolutely NO VOCs!!

Second, it’s a little thicker than most paints on the market and holds its form. This is called tooling, meaning it will hold your brush stroke or for me, it holds the roller pattern. I love that I can brush on one generous coat and roll my patterned rollers through the paint and the pattern stays without self-leveling. It’s also thicker than most paints so that I gain a little texture and depth from the roller patterns. This is great for your wax or glazes to set down in and add even more depth to your project!

Third, the colors! I can’t say enough about the color selection!! I’m in love with this palette and they mix so well together to make new colors I want! Yes, I know that I have been a little stuck on the Teal palette, but how can you go wrong with Mermaid Tail, Seaglass and Old 57? They are just fabulous 🙂

So, let’s move on to some techniques you can do with these paints 🙂

Creating a “smooth” finish can be achieved with the following methods:

Option #1 – Wet your brush first with water, but not dripping. This will allow your paint to be a little diluted and thinned out. After several brush strokes, dip you brush into water again and brush back over that area you just painted.

Option #2 – Pour some paint into a separate container and add a small amount of water and mix thoroughly until you have created a thinner consistency. Make sure it is not too watery. The DIY Paint is highly pigmented and this will not affect the color with the little amount of water added.

Use either technique for applying your paint and apply 2 to 3 coats of paint, allowing each coat to dry completely between layers. Also, you will need to sand with a fine sandpaper or a paper bag between coats to smooth out any unwanted texture or brush strokes. You will need to finish with either DIY Wax or Big Top to protect the paint.

Creating a “textured” finish can be achieved with the following methods:

I love how thick DIY Paint is straight out of the can and how easily it can build texture on any surface. Just apply paint directly to the surface from the can, using less if any water at all. Apply your strokes in one direction or in an “X” pattern.

When the first coat of paint has dried completely, you can apply a second coat using the same color or a different color. Paint on the second coat using the same brush strokes, creating even more texture.

For some extreme texture, get out your putty knife and dig into the paint in places before the last coat has dried completely.  This will expose the colors underneath and create a very weathered worn look.  You can also use the putty knife to apply colors randomly by pouring some paint into another container and allowing it to sit out for a while and thicken up!

Again, you will want to finish off with either DIY Wax or Big Top.

The possibilities are endless!!  Let your creative spirit fly and make a masterpiece with these amazing paints!  You can check out the complete line on my website, in my studio or my second location in San Clemente, California, La Casa Verde de Granada!

Be Blessed and Paint!!


Family Vacation – Hawaii for Eight

In this day and time, it’s almost insane for a family of EIGHT to think they can take a family vacation and Hawaii has to be out of the question!!!

But our story began in February/March of 2017 when Dan and I finally were scheduled to go to Hawaii for my 50th birthday! We were only two and half years behind schedule! LOL!

A lot of planning and finally just booking everything, we were on our way to our first “real” vacation. Seven days in paradise!  Bags packed, everything organized and off to LAX to catch our plane 🙂  We were flying Virgin American for the first time and didn’t know if this was going to be good or bad. As we were sitting around waiting for our section to be called to board the plan, people started suddenly coming off of the plane!!  After a few minutes, they let all the passengers know that they were overweight and needed for 20 passengers to opt for a different flight… LOL!

Well, we sat there not offering to give up our seats just yet.  Waiting to see how high they would go and what “our” seats were worth, we finally decided that if they got up to $1500 we would go for it and take the later flight.  So, guess what, we took the $3000 in flight credits and boarded a later flight.

We did lose our first day in Maui, butttt we made the most of this amazing trip.  It had been at least 15 years since I was in Maui and it was a well-deserved trip (or at least I felt it was)!!

This was the very start of a crazy idea that popped into my head… Why not try and bring all the kids for a trip to Maui later in the year??  A family vacation for this blended family of eight!  We actually do have the “Brady Bunch”, three boys and three girls 🙂  and we are very blessed that they all get along!  I have to say that Dan was not on-board with this family vacation.  He wasn’t sure why he and I were not going back alone!!  LOL!!

As I started to plan this adventure, I was looking for every way to make it work.  We had $3,000 in flight credits but at $600 a pop that was eaten up fast.  So I checked with Dan’s kids on using their flight benefits through their mom (this was tricky and I will just leave it at that)!!  But, if the kids could use their flight benefits and my $3000 in credits, I would have everyone’s airline tickets covered!!  WooHoo!!

Now for accommodations… Yup, we needed a place to stay for 7 days and that is pretty dang tricky with eight people.  I checked into just about everything, but they weren’t big enough for eight people and I wanted everyone together.  YES, all of us in one condo!  So I finally checked with a friend and she was willing to let me purchase her Time Share at the Westin Condos… You don’t know how excited I was!!  They had condos large enough for all of us and it was affordable 🙂  We only had one hiccup, we could only get the place for 6 days and I already had booked some of the plane tickets.  We all decided to fly in together and just make due with whatever I could find for one night. And yes, we all did match and wear Hawaiian shirts on the flight there 🙂

It was pretty funny, eight people trying to sleep in a condo for maybe five people was definitely pushing it!  But the location was fabulous and the kids had the most amazing morning swimming in the ocean with a bunch of sea turtles.  What a great experience we had in Kihei, Maui!

Finally, we were off to our place at the Westin. I knew it was going to be nice, but (WOW!!) I was blown away by how fabulous this place was!  We were staying in a three-bedroom condo with an incredible ocean view!  This place was fantastic and enough space for everyone.  The master bedroom and bathroom was my fantasy suite… I could have moved in forever!

One of the things that we agreed upon (with such a  large group) was the fact that we were going to be cooking 90% of our meals.  Feeding this group of eight at a restaurant for a cheap meal would be no less than $200.  This meant a trip to Costco with eight people when we got to the island!  Trying to get through Costco with eight people is a really crazy experience and the most I have ever spent at Costco in one trip.  But, we still had another trip to the grocery store, again with all eight of us 🙂  Never again, too many people with too many opinions shopping together.  Tyler, my son, took on the task of head chef with the assistance of Hunter, Dan’s oldest son.  They are pretty great in the kitchen together and made some amazing meals for us!!  Meals were planned, shopping was done and it was time to enjoy this trip…

The only thing that I wished had been a little better was the weather.  I would have loved to see a little more sun but we can’t complain too much, Maui is Maui and we were blessed to all be together on this fabulous island for 7 days.

I even rented two vehicles for the purpose of not wanting everyone to feel like that had to do everything together.  This was their trip and we wanted them to do whatever they wanted to do.  Butttt we pretty much did everything together.  Family meals, trips to the beach, other areas of the island, it was an extremely tall large group of people!!

Never let anyone tell you, you can’t do something! Because if I can pull this off, anything can be done!  I personally have some the best memories of this group together and having our first family trip with everyone!  Feeling very blessed to have had the chance to take all 6 of our kids on a great trip and the total cost was around $5000 (not including the flight credits).

Let’s get FOILED

FOILS…

What the heck are they and why is everyone so excited about them?

First, let me try and describe what foils are and how to use them.  Foils are a metallization on the back of plastic and create a bright and shiny surface.  The most brilliant metallics will always be Leafing, but Foils are not far off and much easier to work with or maybe I should say not as messy.

Foils come in soooo many different colors, patterns, and holograms, that you have a ton of options!

The process is also pretty simple. It is simply applying a Foil Adhesive, allowing it to tack up and then transferring your foil.  Okay, I will give you a little more details and step-by-step, but it really is that easy!!

First, you do need a Foil Adhesive for this process and I have a fabulous Foil Adhesive for you.  You need to apply the Foil Adhesive to your surface and allow it to dry to a firm tack.  You can brush or roll this onto your surface, but all your application marks can show through the foil.  Make sure to roll or brush in one direction to minimize your roller marks or brush marks.  Allow the Foil Adhesive to dry for at least an hour before trying to transfer the foil.  The Foil Adhesive that I sell does not dry beyond a firm tack, meaning it is sticky for life.

Once the Foil Adhesive has dried for at least an hour and is a firm tack, you will apply your foil over the surface.  You want to make sure that the shiny bright side is facing you when you apply it.  Use a terry rag or any soft rag and rub the foil into the adhesive surface. Don’t use your hands because they can leave marks.  Always peak underneath the foil and determine how much you want to transfer before removing the foil completely.  There is no standard or correct application, you can transfer as much or as little as you would like to see.  If rubbing with a terry rag is not transferring enough foil for your liking, then get out a scrub brush.  Make sure to scrub the surface up/down, do not scrub in a circular motion.  Again, the scrubber marks may show in your application, so make sure you are scrubbing up and down.  Once you have transferred as much foil as you desire you can remove the plastic.

Due to the fact that the foil adhesive never dries past a firm tack, you will want to apply a top coat not only to seal in the tack but also to protect the foil finish.  Foils are delicate and can scratch easily, so you want to make sure and protect them.  It’s best to make a sample board with a foil transfer and then section off areas to apply different top coat sheens and determine which one you like the best.  Anything in a top coat below Gloss will alter the sheen of the foils.  Sometimes we want to keep them bright and shiny and other times we want to dull the high sheen using a lower sheen top coat, like satin.

Grab yourself some foils and foils adhesive and just play!!  They are easy and fun to work with!!  Just go get creative and create something bright and shiny!!