Free shipping on orders over $100! **After discounts have been applied & Continental US only

Jennifer

Simple Decorative Finish with a Patterned Art Roller 

Decorative Finish using a Fauxy Art Roller


Like most people, you probably have a piece of furniture or two lying around the house that could use a makeover. And today I want to show you how easy it can be for you to make it happen. 

Over the years some of my favorite projects have been when I am able to upcycle the furniture around my own home!! From custom dining room chairs for my two kiddos, to the living room coffee table and our nightstands, I have re-done a lot of the furniture around our house. 

coffee table makeover

The photo above is the Coffee Table makeover I did! I created a wonderful textured surface to the top using the Crocodile Roller and people have loved it. To learn more about this makeover, click here!

A project like the one above can seem a little daunting if you are just getting started with creating textured surface projects. But, today I want to show you truly how easy it can be to make your furniture to die for!


Creating A Textured Surface  


Texture Medium Application

So… What is Texture Medium you ask? Texture Medium is a low VOC tintable plaster, or paste, that has a matte finish. I created this product to be used with Patterned Paint Rollers to create interesting textures and patterns on furniture, cabinetry, walls, and more.

To start, you will need a trowel or flat spatula. You could also use an old hotel key if you don’t have either of those.

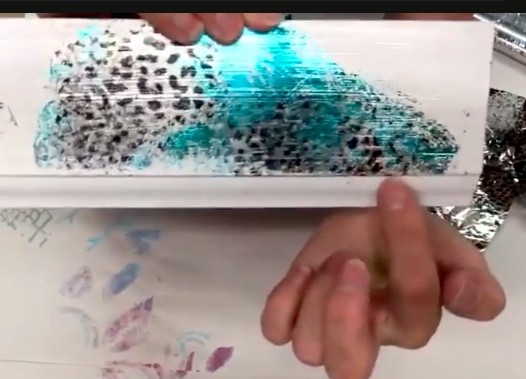
Now, you will trowel on this marshmallow like paste to

Applying texture medium 2your project. You will want it to be a 1/16 to 1/8 of an inch, so make sure you keep it on the thinner side. It should look similar to this photo.


Rolling Through the Texture


Before you start “rolling”, you will want to make sure your Texture Roller is spinning “freely” on the handle. If it isn’t rolling perfectly, take the roller head off and spray the metal part of the handle with a little pam or any greaser you have lying around the house. 

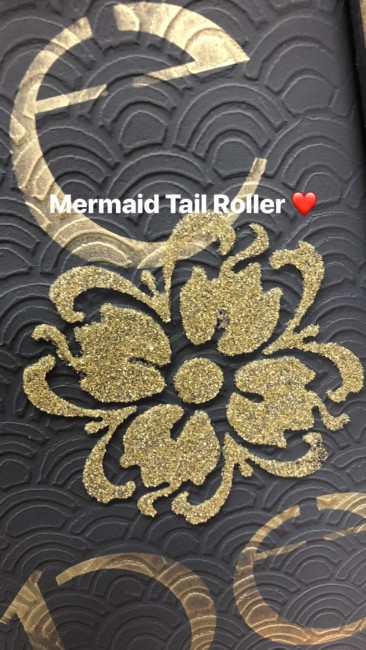
Once you are “freely” spinning, using your favorite Decorative Art Roller, you will roll through the Texture Medium to create your beautiful pattern.

Rolling through texture medium

If it doesn’t look exactly how you want it to, you can trowel back over and try again. But you have to remember that art isn’t perfect and that’s okay. Let your Texture Medium dry completely. This will take a couple of hours.


Sanding

Once your project is dry, you will see that some of the edges of the pattern will be slightly raised. We will want to knock those down with a little sanding. 

Using 150 grit sandpaper and a sanding block you will want to sand down the “highs” and “peaks” of the Texture Medium. If you want the pattern to be a little more subtle you can sand more. Sanding texture medium


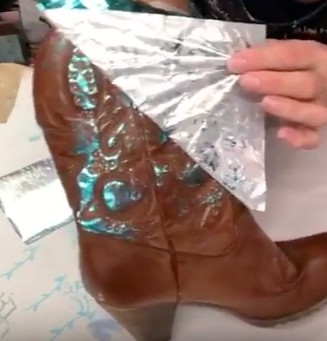
Create the Finish You Desire


At this point, it’s up to you where you take the project, so use your imagination!

For the purposes of this post we will keep it simple and easy. I am going to show you how you can paint right over the textured surface and how to add some distressing.


Paint with DIY Paint


Let’s start with painting your project. You will want to paint on one complete layer of paint. Any paint will work just fine but I prefer to use chalk based paints! 

My favorite Chalk Paint to use is Debbie’s Design Diaries DIY Paint. I have found this chalk paint to be great because it covers really well in one coat. Because we are going to distress this project, our painting doesn’t need to be perfect. Now you will need to allow the chalk paint to dry completely.

Painting textured surface with DIY paint


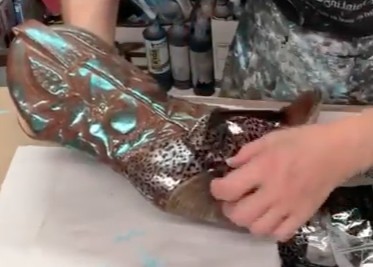
Distressing with Cheese Cloth


Cheesecloth

Once your project is dry, you are going to start the distressing process. You will create a little pad with the cloth and spray with some water. Cheesecloth is great because it has a little texture and will grab the pattern and remove some of the paint. This will bring the edges of the pattern out and expose them. How muchor how little you choose to distress is up to you! After you let it dry, you will see how the color changes considerably with chalk paint.

Cheesecloth distressing


Waxing to Make the Finish Pop! 


Next, you will need clear wax, a glove, and some cheesecloth. You will want to grab some of the wax out with the cheesecloth and then rub on a foam plate to get the wax into the cloth. Then once your cheesecloth is ready, you will rub the surface in a buffing motion.

You will want to keep it thin when applying so it dries properly. If you are looking to have a thicker wax profile you will want to do it layer by layer. Again, as the surface drys, it will lighten up slightly. 

In the photo below you can see how well the wax and distressing have made the texture surface pop!   (photo before fully dry)
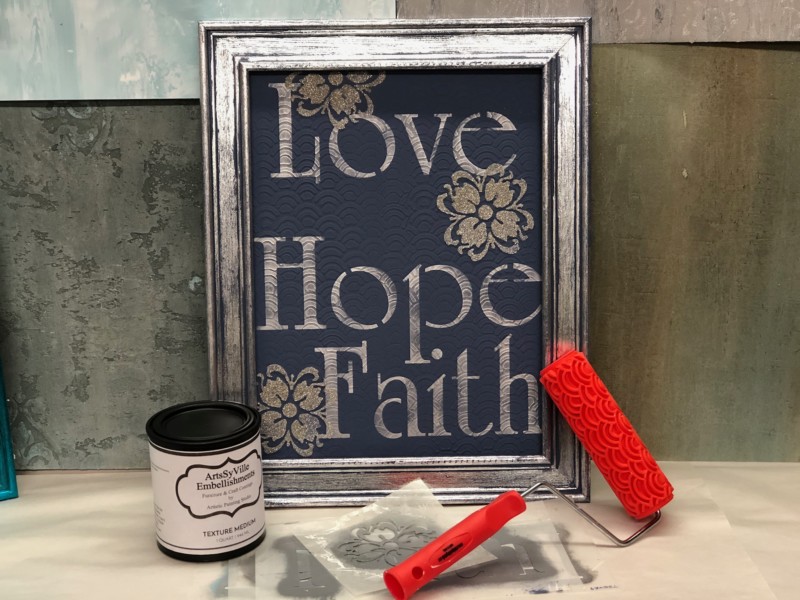
After waxing


Things You’ll Need:


Final Thoughts

This is such a simple and easy technique that anyone can do no matter your skill level!

I hope this has inspired you to get creative and start using Texture Paint Rollers on your next project.

If you have any questions please feel free to reach out!


Here is my How-To video for you visual learners!

Transform Your Cowgirl Boots using Metallic Foils

Transform Your Cowgirl Boots Title Photo


Are you looking to add some personality to your cowgirl boots?  

Do you have an old pair of country boots that are hidden away in the back of your closet?

If you are tired of your boring brown boots, like the pair below, then get ready to see how easy it is to make them look amazing!

Brown Cowgirl Boots

Whether it’s an old pair that you don’t wear anymore or you are looking to stand out, it’s time to transform your country boots into a pair of beautiful boots like these.. 

Cowgirl Boots with Metallic Foils

Are you curious how I was able to make my boring cowgirl boots look so fabulous?

You can do it too! It’s really not as hard as you may think.

All it takes is a creative imagination, Metallic Foils, and some Foil Adhesive to create your own cute cowgirl boots.

Before Starting

Before we jump into how exactly we make these gorgeous cowgirl boots happen, you need to have a vision of what you want to create.

Start by exploring all the different Metallic Foil options we have at Artistic Painting Studio here. We have a variety of decorative foils that come in different color variations and patterns to inspire and highlight your unique creativity.

While exploring your creative side, start envisioning what you want your country boots to like when they are all done. You can use your favorite color or combine multiple as I did on this pair!

Metallic Foils:  What Are They?

Now you may be wondering what exactly are Metallic Foils?

They’re like the foil in your kitchen! Just kidding, these decorative foils are very, very different.

Metallic Foils are a metallization on the back of cellophane. This metallization on the cellophane is the color or pattern that will be transferred to your project!

To get the metallization to transfer onto a surface, the surface must be extremely sticky. After getting fed up with the ‘foil glues’ out there, I created my own called, Foil Adhesive. This foil adhesive dries stickier than anything else out there and allows the deco foils to transfer easily.

*Tip – Once the metallization has been pulled off of the cellophane, make sure the cellophane does not touch any areas that are still sticky because it will get stuck!


Cowgirl Boots Makeover – Let’s Get Started!

Prepping The Boots

Are your boots real leather? If yes, then you can skip this first prep step. Yay!

For those of you like me, with fake leather boots, our first step is to seal the surface of our cowboy boots. All you need to do is paint on a layer of Top Coat to the surface. Allow this to dry, roughly about an hour, and then you can get started.

Now we are all on the same step – Applying Foil Adhesive!

With your favorite brush, paint on a layer of the Foil Adhesive where you want the Metallic Foils to transfer. I choose to put foils on my entire boot, so I brushed the adhesive on the entire boot.

Adding Foil Adhesive to the Boot

But, if you are looking to only add foils to part of your boots, just brush on the Foil Adhesive where you want to apply your foils. You can always come back and foil the other areas later.

After you have applied adhesive, you need to wait a minimum of 30 to 60 minutes to allow it to set-up to a firm tack. It will never dry beyond a firm tack; so don’t worry if you wait even longer before getting to the next step.

Testing Your Vision

As you wait and allow the Foil Adhesive to dry, test out what you have been envisioning prior to adding it to your boots. I always to do this first!

Testing the Foils

I will usually use a scrap piece of wood for testing, but you can really do it on anything you have lying around. Just add a layer of Foil Adhesive to it prior to brushing it on the boots so it has time to tack up.


Different Techniques for Transferring Foils

As with most things, there is more than one way to transfer Metallic Foils. The two techniques I use are Flat Lying and Crinkle.

With both of these techniques, always make sure the color/pattern side is facing up because the metallization is on the back!

With Flat Lying you want to cut off a piece of foil and keep it smooth. Lay it on the surface and transfer the metallization by rubbing the foil with a terry rag or scrub brush. You can pull the foil up a bit and peak to see how well it transferred. If it hasn’t transferred enough foil, simply lay it back down and rub it with a little more force.

You can also take your piece of foil and crinkle it up. Once crinkled, you will want to dab it around the area you want it to transfer to. When using this technique I prefer to use solid color foils rather than pattern because the pattern will be lost without the even pull from the adhesive.

Combining Colors and Designs

If you are looking to create truly unique boots, don’t be afraid to layer on different foils.

Whether it’s adding a color to a design you like or blending two colors, let your creativity take over.

Now play around on your sample board with the different techniques and a few different foils until you create exactly what you want!

Foil Testing Creation


Transferring Metallic Foils onto the Cowgirl Boots

After testing my designs, I decided I wanted to use Silver Leopard and Seafoam. The bottom section would only have the Leopard foil, while the top would combine the two.

Turquoise Cowgirl Boots

Whether you start on the bottom or top section is up to you! I started off by adding the Seafoam to the top section. Because I knew I was going to come back over with Leopard, my goal was not to create a 100% transfer with the Seafoam.

Seafoam Foiling showing transfer

Using the Flat Lying technique and my scrub brushed, I rubbed the foil onto the boot. I started off with a lighter pressure when rubbing because of not wanting the full transfer. After a little rubbing, I lifted a corner to see how much of the turquoise had transferred.

I thought it needed a little more. So I simply laid it back down and added a little pressure to my scrubbing. Remember you can always transfer more, don’t go overboard to start!

Silver Leopard Transfer

Once I had the right amount of Seafoam covering the boot, it was time to add the Silver Leopard foil. With the bottom section still being extremely sticky and not wanting any foil to accidentally get stuck to it, I started there.

With the lower section having some weird angles to it, I went ahead and cut my Metallic Foil into smaller pieces. This does two things, it allows me to get the pieces to lay flat and also allows me to get the most out of each piece!

Piece by piece I added the Leopard around the boot going for a full transfer this time. After it was all covered, it was time to move to the top again.

Since the turquoise had been transferred to a lot of the high points on the boot and not really any of the stitching areas, my goal was to get the Leopard to transfer there. With all those nooks and crannies, this turned out to take a little more effort.

Rather than being able to rub the brush on the foil to get it to transfer, I used my fingernail! Lying the foil back on the boot, I rubbed my nail over the stitching with a good amount of pressure and it transferred just how I wanted it to.

Finishing Touch – Sealing

Once I was done transferring the foil over the entire cowgirl boots, it was time to seal them. This has to be done or the foil could rub off, and we don’t want that!

When sealing, you want to make sure you are using a product that will stay flexible and not get stiff. You don’t want your boots to crack.

I have used both Final Coat and Golden Paintworks (Lifestyle Finishes) Top Coat, and they both work wonderfully.

Where to Wear Your Custom Cowgirl Boots?

Anywhere! Anytime!

As my friend from Texas told me, “Your boots are an expression of your personality and they don’t need to match!!”

I love me some country music! So you will be able to catch me wearing these at my next country concert. And Stagecoach is still a few months away, so there’s plenty of time to get a pair ready. You could be a crowd stopper with a pair of your own Foiled Cowgirl boots!

Or maybe you or someone you know is getting married soon and isn’t really the heel type of girl. Imagine what you can do to a pair cowgirl boots for a wedding. My mind is running with so many fun ideas. Silver, White, a bright color, or we could get out the Glitter and rhinestones! The options are endless!


Final Thoughts

Wow! Sometimes you start a project and you’re not exactly sure if your idea will turn out as well as you imagine. This time, it exceeded my expectations!!

I hope this has inspired you to get creative and make your own pair.

If you have any questions please feel free to reach out!

Lastly, if you do end up making a pair, please share! I would love to see what y’all create!

Here is my How-To video for you visual learners!

Artistic & Creative Inspiration

I love teaching, it truly is my passion!  Having the opportunity to be able to teach several times every month makes me so happy and excited.

Sharing my knowledge of techniques, products, and finishes and seeing my students take that information and create with it is my reward.

Okay… Did y’all know that I have this really cool place to hang out and learn my fabulous Signature finishes??? Well… This group is called Artistic & Creative Inspiration Painting Group and it’s about to hit its one year anniversary.

Being a member of this group has a ton of benefits. Each month you learn two new finishes and these finishes can be applied to just about any surface. I’m always trying to make sure I’m mixing it up and sharing finishes that can be applied to many different services: walls vs. furniture.

I come into this group on the 1st and 3rd Monday of every month and teach a new finish to an amazing group. Most of the time, it’s a Facebook Live so that you can watch it live, as well as ask questions during the process. Once in a while, you will have a pre-recorded video if I’m going to be out of town.

Besides learning really cool finishes in this group… I’m always encouraging all members to ask questions, post pictures of projects they are needing advice on, and share their finished projects with the group. We love for everyone to participate in the group, which builds a fabulous supportive community!

I have also shared a few extra bonus videos in the group during the past year and these will be a part of a new section to the group that will be added in November.  Yes!! We are working on adding more resources to our members. We are officially adding a Library to the group!! These will be training videos that will remain in the group and as long as you are a member, you will have access to these additional trainings.

All of this for only $37/Month

SIGN ME UP

**You will be billed every 30 days**

No contract, month-to-month, cancel anytime.

Or $370/Year (2 Months Free)

SIGN ME UP

**You will be billed every year**

Yearly membership is non-refundable.

To keep this community strong and supportive, I have decided to close the group to new members as of October 31st. This means if you want to be a part of this amazing community, you better join soon! So if you have been thinking about it, now is the time! We are not sure when we will be opening it back up for new members again.

Not quite ready to join, but want to learn a new finish?? Grab the instructions to this beautiful finish for free HERE.

For those that have traveled to take classes in the past, this is a fabulous offer! During a 12 month time you will have over 24 new finishes, which is a minimal investment of $370 if you pay annually. That’s just a little over $15 per finish!! This is an amazing steal of a deal and the level of finishes are incredible! Everything from a simple two-step to an advanced multi-layer finish. But… I always keep it simple with my training and explain every step in detail.

Joining this online training group will save you a ton of money! Say goodbye to the travel costs of taking a workshop… Also, you can watch these trainings in your PJs in the comfort of your own home 🙂 Which I like to call a Win-Win!!

November is our Anniversary month and you won’t want to miss out on the amazing new features we will be adding during this month! I will also be doing a Live Furniture painting training during the month of November. I will be teaching you something new and applying it to a piece of furniture. I’m very excited about this live training and transforming a project with all of you.

New things coming to the group:

  • As this group continues to grow and we get to know each other better, I have decided that I will be adding some BIZ Tips for the group.
  • We are adding a Library Recourse to the group: videos, written instructions, and biz tips.
  • Bonus LIVE training, refinishing a piece of furniture (during November)

Here are some of my Signature Finishes:

This past year our members have received over 26 finishes, with another bonus training coming up this month! 🙂

You don’t want to miss being part of this community, so join now before it’s too late.

All of this for only $37/Month

SIGN ME UP

**You will be billed every 30 days**

No contract, month-to-month, cancel anytime.

Or $370/Year (2 Months Free)

SIGN ME UP

**You will be billed every year**

Yearly membership is non-refundable.

PS: Did you snag the FREE formula for this amazing finish below yet?? Grab the instructions HERE.

Hope, Love and Faith

I have really been enjoying creating some fun “works of art” lately. I’m planning on having these “works of art” for sale on my website in the next few weeks and I will even be gifting a couple during this upcoming holiday season! 

I must have found a great price on these boards and picture frames because I discovered that I have a few of them… Not sure what I intended to do with all of them, but I’m sure having fun with them now!

The frame is cut from Pine and the center plaque is a pressed wood.  Great for creating some Mixed-Media art! 

This art piece was inspired by the Stencils… Hope, Love, and Faith. 

I started with the pressed wood piece and troweled on my favorite product, Texture Medium.  Now, I always say to keep it thin because you don’t need much and it avoids excessive sanding!  But, this board wasn’t completely level and I was having an issue getting a complete print from the roller.  So… I actually put on more Texture Medium (than I would normally use) and it solved the issue!  There are times you need to have the Texture Medium a little thicker… but, no one loves sanding, Ugh! More often than not, you will want to go with the “thin wins” application, other than this instance 🙂

Trowel on a layer of the Texture Medium as thin as you can, maybe somewhere between 1/16” to 1/8” and while it’s wet, you want to roll the roller pattern through it.  I used the Mermaid Tail pattern for this project.  Once the Texture Medium is dry, you will need to sand off the “high’s” that the rollers create and sand down as much you personally desire (it may depend on what you are working on).  I brushed and wiped it clean after all the sanding and then I was ready for some paint.

I actually painted the sign and the frame with General Finishes Fjord Blue, two coats, allowing dry time in between.  Once the paint was dry, I applied a layer of Foil Adhesive to the entire frame and allowed this to set-up for at least 30 minutes or longer.  When the Foil Adhesive was at a dry firm tack, I was ready to transfer my foil.  I used Bright Silver foil and cut it into manageable stripes.  Placing one piece at a time and transferring the foil to the surface.  I first used just a terry rag to rub the back-side of the foil and if that wasn’t enough transfer, then I used a scrub brush.  I transferred foil to the frame one-side at a time until it was complete.  Because I allowed some of the Fjord Blue to “peak” through and not have 100% coverage, I still felt the foil adhesive’s stickiness.  In this case, I would apply one to two coats of my favorite top coat (make sure to test sheens) and then the frame is done. 

Getting back to our art piece, the next thing I did was to figure out the positioning of the stencils.  I stenciled them in Metallic Silver by Modern Masters and used a dry-brush technique for the stenciling. 

Then I had to get out a little more “bling” and decided to use my Glass Bead Gel, Silver Glass Glitter, and Silver Glitter to emboss the Bali Flower Stencil.  I positioned the stencils to my desired location and used the Color Shaper Tool to spread the Glass Bead Mixture over the stencil design. 

I hope you enjoyed this project as much as I did. I would love to hear what you think I should create next. Always feel free to email me at jennifer@artisticpaintingstudio.com with any questions or suggestions you may have 🙂

Project Materials:

Glitter & Mica Flakes

DID YOU KNOW…

Not all glitter is created EQUAL!

When I first started adding glitter to products, I purchased some from the local craft store. However, I soon found that the glitter did not hold up in the various mediums I was working with. This is because the glitter was not SOLVENT resistant. The glitter would melt or bleed into the mediums. For this reason, it was necessary to find an alternative and more superior glitter.

With a little research and digging, I found a fantastic GLITTER to add to my collection. As a result, we can now ADD glitter to products like GLASS BEAD GEL. This really enhances the sparkle when you Stria or trowel the Glass Bead Gel!

One of my FAV things to do with this mixture (Glass Bead Gel and Glitter) is to trowel it over a stencil to emboss the design. Talk about STUNNING!!  There are so many different color options to use and you can even mix your glitters for custom colors. 🙂

I also love to add the glitters to other products like Weathered Granite, Adobe Texture, and Metallic Texture. The glitter just adds a hint of sparkle!  Even though I like to add glitter to these other materials, the glitters will show up best in your clear mediums like Glaze, Glass Bead Gel, Top Coats, etc.

You can even apply them over my Foil Adhesive… Believe me, anything will stick to my Adhesive! You just need to apply a top coat and you are good to go.  Just let your mind think outside the box and the possibilities are endless!

So… Let’s not forget about those wonderful MICA FLAKES!  These Flakes come in many different sizes, from almost “dust” to big 1″ natural flakes.  BUT… What do you do with these beautiful flakes??

I personally love to add them to my Glass Bead Gel and Glitter mixtures. This is extremely pretty, blingy, shiny fabulous stuff!  One of my favorite combos is embossing a stencil with The Color Shaper ToolThe Color Shaper Tool applies the Glass Beads very nicely over a stencil. No more popping beads everywhere!  You can even do the same process with the Mica Flakes, which makes the possibilities endless! I like to use the two together whenever possible. This means the project I am working on is an Extremely Blingy project! 🙂  You can also adhere the Mica Flakes to a surface with my Foil Adhesive, but you will have to put something over the top to protect them.

Make sure to check out the collection of Glitter and Mica Flakes on my website.  We have some really pretty colors in both collections.  Take your Glass Beads to the next level and add some color to them!

Products:

Glitter
Mica Flakes
Glass Bead Gel
Color Shaper Tool
Foil Adhesive
Glazing Medium
Weathered Granite
Adobe Texture
Metallic Texture

My Passion for Decorative Art Rollers

My Love and the popularity of Decorative Rollers continues to grow as more people discover these wonderful tools.  So, I’m here once again to share more of my Tips & Tricks for using these rollers and making your projects easy and fun!

My collection continues to grow with over 50 different patterns to choose from, so your first task is trying to figure out which pattern you want to play with.  For some people this is the hardest thing, choosing which roller to start with!

If you are wanting to learn different techniques on how to use your rollers, you will definitely want to check out my YouTube Channel. I have tons of tutorials showing you how to use your new roller.

Check out my YouTube Channel Here

One of the easiest techniques for using the rollers is a “negative” technique.  Let me try and explain what I mean… These rollers are designed to make an “impression” into wet material.  Like in my videos, I demonstrate applying Texture Medium, paint or glaze for you to roll into/through.  This creates a negative impression of the pattern into the wet material.  You can see this in action on my YouTube Channel!

Glaze is one of the easiest materials to work with.  This medium stays wet for a long time and will allow you to apply the glaze and have plenty of time to roll through while it’s wet.  I actually like to let the glaze “set-up” for a few minutes after applying to the surface. Otherwise, your roller may “slide” in the wet glaze.  Also, make sure that your roller head is spinning freely on the handle before you use it.  If it’s not “lube” the bar with a little Pam Cooking Spray.  This stuff works great!

Paint is another medium that you can roll through. I really love using DIY Paint!  Application is the same as glaze, but you will not have as much “working time” because paint dries faster.  If you are using paint and the surface area is larger, you can add some clear glaze to your paint to help it stay wet longer.

My favorite medium to roll through is my Texture Medium by ArtsSyVille Embellishments.  I have worked very hard on creating a texture medium that is easy to roll through and this stuff is AMAZING!  One thing that is really important when rolling through an applied texture, is to keep the application “thin”.  I always say to my students ‘Thin wins’!  If you have applied the texture too thick on the surface it just clogs up the roller and you will have to wash it more often…. And that’s not any fun!  Also, having more than one roller for a larger project is a good idea 🙂

For more information on these amazing rollers, you will definitely have to visit my YouTube Channel.  If You don’t have any plans tonight, just grab some popcorn and watch a video or two 🙂 You will love learning these amazing techniques.

I sure hope that you will give the Decorative Rollers a try and please let me know if there is any additional information that you need before you get ROLLIN’!