Free shipping on orders over $100! **After discounts have been applied & Continental US only

Jennifer

Dana’s FIRST Stamping Roller Project

The Before Picture

I love that my customers share pictures of their projects with me and that we get to feature them all on our different social platforms!  And this one I felt deserved to be featured on my blog 🙂

First off, I feel it is very important for you to know that this was her first project with my Stamping Rollers and she rocked it!

Heirloom Pattern Stamping Roller

Here is Dana Killi’s story about this nurses cabinet:

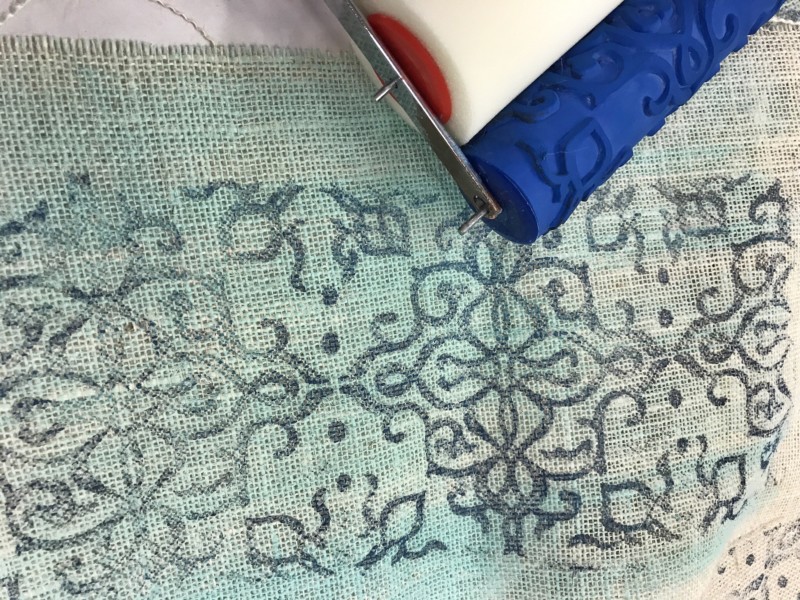
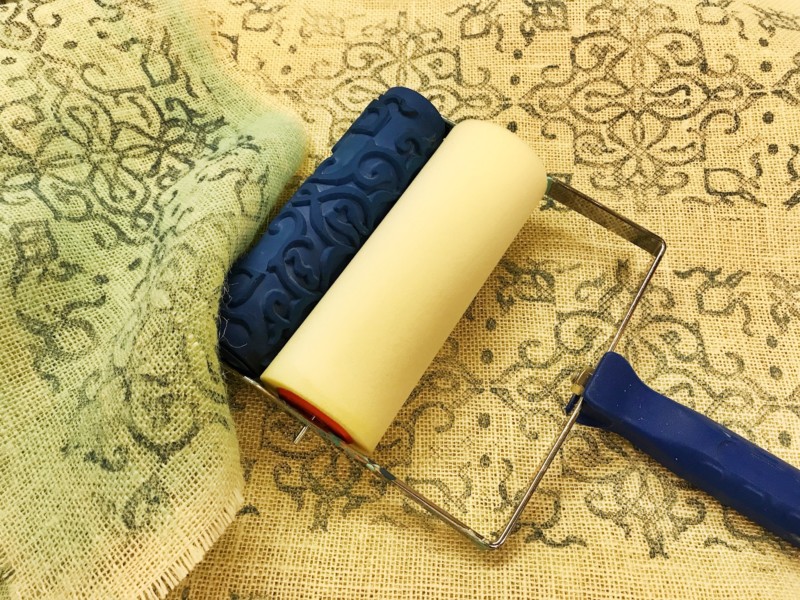
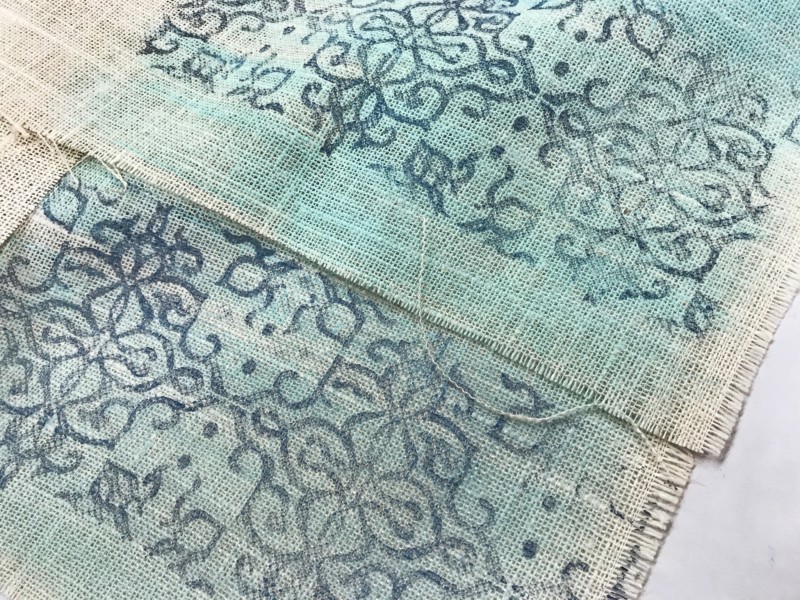
“I finished my first APS Stamping Roller project this weekend!  Earlier this Summer, I spotted a really old, pretty run down nurses cabinet at a yard sale.  Not sure why I stopped because I wasn’t looking for a project, but I felt like it needed saving and a new start.  In addition to needing paint, it had broken/missing molding in several spots, missing knob (so opening the door was tricky) and several chunks and chips out of the wood.  I repaired the molding and made a new decorative accent for the area around the door pull and started painting with the end goal of a driftwood look.  I used Debi’s DIY Paint Weathered Wood & Vintage White and the Heirloom Pattern Stamping Roller.  So fun and surprisingly very relaxing. I may have a new hobby!

Thanks for a great product, your beautiful talent and for sharing it in all of your wonderful videos!

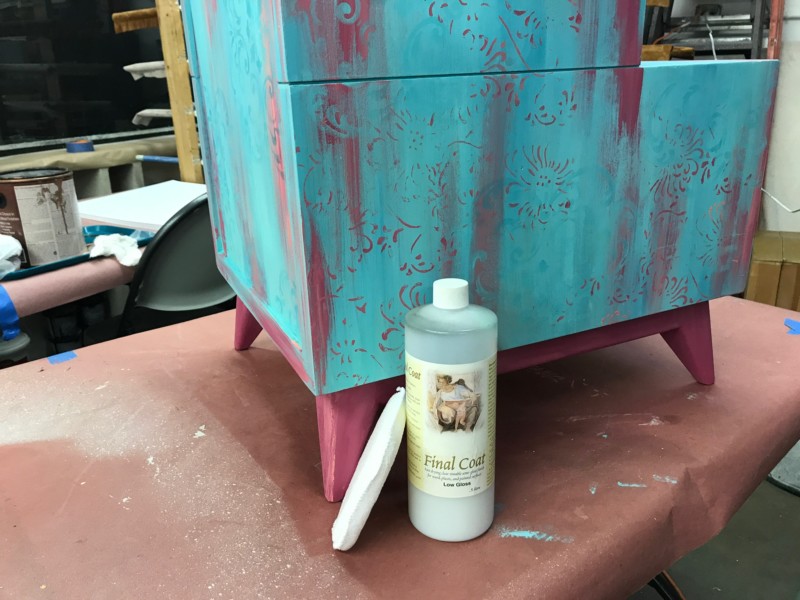
Here are a few Before, during and After photos of the old (and new again) nurses cabinet!!!

Dana Killi”

This is the inside of the cabinet before the shelves were installed.
The Finished Transformation Nurses Cabinet

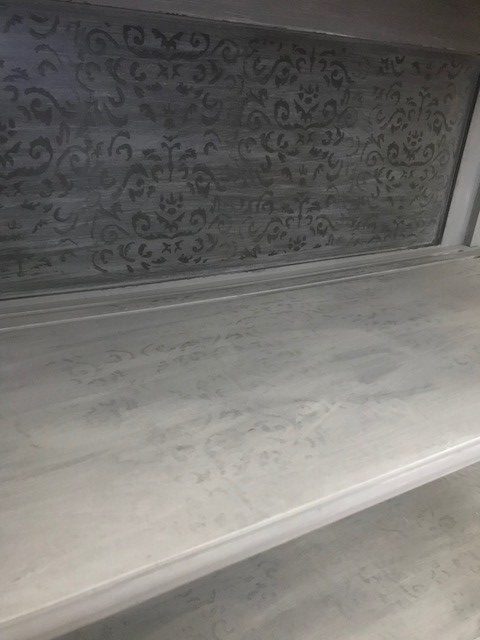
One this last photo, Dana wanted to share a technique that she used to create this look on the shelves.

“After the shelves were painted (in the lighter color), I liked the contrast but decided I wanted to add a little “pretty” to them.  So I used the Heirloom pattern roller on them as well but this time I wiped it back so the finished product had just a light hint of the roller pattern.”

We love Dana’s project and all her creativity she poured into this cabinet!  She did a fabulous job with the Heirloom Stamping Roller and if you would like to see the complete collection of rollers, please check out our website.  Also, make sure to check out our video collection for many application inspirational ideas.

Blessings to all and keep rollin’ 🙂

Links:

DIY Paint

Decorative Art Rollers

YouTube Channel 

Let’s get Organized

Well, I think most of you know that I’ve been in business for almost 30 years and to stay in business this long, a girl has to be organized!

Sometimes it might not look like I’m organized but it just happens to be an organized mess occasionally. LOL! But I can always find everything I need!

I want to share one of the main reasons I do stay organized with all that is going on each and every day.  It’s my amazing Day Designer Planner 🙂

I have to write things down on paper. I can’t put them in my phone like some people. I will never remember! I need paper and a pen (or pencil) and I have to make lists and check them off.  I need to see my monthly schedule as well as my daily list of things to do, and my wonderful Day Designer lets me see both which is amazing.  This has been the best day planner I have ever had.  I don’t think there is a page that’s not written on. 🙂

If you are a list maker, note taker, detailed scheduler, the Day Designer is for you as well!  This baby keeps me focused on not only my day to day schedule but also reminds me to be grateful each day 🙂 It has a little section to write it down each day.

Being business owners (or side hustlers), we have to stay on top of the day to day tasks, know what our weeks look like (for the big picture) and then focus on each day as well.  As our businesses (and side hustles) continue to grow, so do the tasks that have to be managed and having great team members in place is so important.  And… being extremely organized is crucial!

Take it from me, if your life could use a little organization, then check out the Day Designer and get focused and organized with me!

**This post contains affiliate links. All this means is I will receive a little commision if you purchase an incredible Day Designer Planner. Prices are the same for you whether you use my link or not.

Rollers & Fabric

If you haven’t figured it out yet, this girl is in LOVE with rollers!! I mean, the applications just seem to be endless… Having so many options, my creative juices start flowing and my head starts spinning!

One of my favorite ways to use my Stamping Rollers lately is to “Stamp” fabric. There are so many different types of fabric to use and so many different DIY projects you can create!  I’m just going to touch on a few ideas to inspire you today, but I’m sure there will be even more blog posts to come in the future on this subject.

Recently I was playing around with some burlap and so many ideas and uses for painted burlap came to mind.

I was playing around on a Facebook Live the other day and I was trying to see if it was easier to: paint the burlap first before rolling a pattern or if it would work painting over the rolled pattern.  Well… GUESS WHAT!! Either way worked just as well… Yay!!

But, isn’t it nice to know that after you rolled a pattern on the fabric and you decided that you wished you had painted a different color for the background that all is not lost and you can paint right over what you have already done!

Okay… Now onto the project 🙂

Just grab your Stamping Roller handle, sponge/foam roller and your favorite roller pattern and let’s get started.

Using a “serving tray” as my paint tray, I cover it with Press-n-seal (that’s so I don’t have to clean it later) and pour out my favorite color of paint. I have to say I love working with my DIY Paints and I used Old 57 and Hey Sailor on this project.

All paints have different consistencies and if the one you have chosen, like the DIY Paints, is a little thicker, then you may want to add a little bit of water to the paint before loading it on the foam roller. Thinner paints seem to soak into the foam much easier.

Insert the foam roller into the small holes that are closest to the handle and roll it into the paint. Make sure that the roller is completely covered with paint. This way it will apply paint to all sections of the pattern roller where needed.

Once the foam roller is loaded with your favorite paint, then you will insert the pattern roller of your choice into the holes on the end of the U-shaped handle. You will now want to get out a piece of practice paper and roll onto the surface.  This will load the paint onto the patterned roller and make sure everything is “rolling” correctly!

From here, I just laid out the Burlap and rolled from one end to the other, skipping about an inch in between my passes.

It takes more time to load the roller than it does to paint your project most of the time.  You can have your fabric project painted so quickly, it’s crazy!

I am thinking that this project will make a nice rustic table runner and who knows what else I will decide to do with the rest of this burlap!

I would love to know what ideas you have going on in your head!  Please share your ideas and uses for Painted Burlap with me!

Check out the Facebook Live I did here:

Products Used:

Stamping Rollers

DIY Paint

Burlap (affiliate link, no extra cost to you 🙂 )


One of the best hires I made this past year…

As a Business owner for almost 30 years, you find that you wear way too many hats most of the time.  The “juggling” act can become very interesting as your business grows. And you find yourself at different points in your journey needing help in different areas of your business.

The great thing about today’s technology is that we have the opportunity to not only hire team members that can work for us at our place of business, but we can also hire team members that can work remotely!

As my business has grown again over the past couple of years, I have found it necessary to increase the team physically here at the studio as well as finding a special person to handle my Social Media.

With that being said, I was blessed with the opportunity to hire my daughter this past year.  She was leaving her current job and living in Nashville (me in California), and it felt like the right time to hire her. I’m a firm believer in things happening for a reason and this has been life changing for both of us!

Ashley came onboard as my Virtual Assistant and Social Media Manager, still working from Nashville. Things quickly changed for her and she decided to create her own  Social Media and Marketing company, Wanderlust Marketing + Social Media, so I ended up hiring her company.

As I started delegating more and more of the managing of all my social media platforms to Ashley’s company, it freed up time for me to be more involved, once again, in the creativity of my business.  She now handles Facebook, Instagram, Pinterest, email, etc.

We have created channels that allow me to see everything she is working on and what’s scheduled so that I’m still involved in the topics and content being provided to my following/tribe.

Finding someone that can handle all of this is a blessing.  Finding someone that is very dependable and understands your industry is also a key to creating a good match.  I don’t think Ashley ever knew growing up with a creative mother would lead her down her own entrepreneur path, but her creative upbringing has made her a true asset to the creative industry and helping other creatives with their social media and marketing.

As a creative business person (and I’m a total control freak) we have to let go of things that keep us from doing the stuff that will make us money and let us be creative.  Every business needs to have a social media presence and it can be a time-consuming task.  The best thing I have done for my business these past few years is hiring more team members to keep my business growing and providing the best products, teaching, and content for our customers.

If you are on the fence, feeling totally overwhelmed with all the hats you are wearing, it’s time to investigate hiring.  It can be someone next door or in another state, but help is just around the corner with today’s technology.

Make sure that as your business grows that you bring on the best team members you can and your business will continue to grow.  For those of you thinking you can’t afford a VA, believe me, you can’t afford not to hire one.

If you are interested in growing your business or turning your side hustle into a business, make sure to check out my coaching group.  We cover every aspect of a business, from social media to brick and mortar, and how to help you manage and grow that business.

Proceed to Lifestyle Finishes – Rebranding

I’ve been a distributor for Proceed for the past six years and I am very proud to distribute their product line!  If you didn’t know, Proceed is actually manufactured by Golden’s Artist Colors. Golden’s Artist Colors makes a fabulous line of materials for artists!

Well… Golden’s Artist Colors has decided it is time to “re-brand” the entire Proceed line.  I completely understand, especially being in business for the last 30 years I have always said that we have to re-invent ourselves every couple of years. We have to stay fresh and on top of our industry especially with the constantly changing trends!

With that being said, Proceed has morphed into Lifestyle Finishes!  Most of the products are the same, but names and labels have changed quite a bit.  We are still getting used to all the new names and I know it can be confusing to you as customers. So… stick around until the end of this blog post and you can snag the Cheat Sheet I created for you (and me LOL).

We love all of the new names and obviously love the fabulous products that we have depended on for many years.  With the “rebranding”, we have been blessed with a few new products as well.  We LOVE the new Venetian Plaster, Metallic Slate, and Protective Sealing Wax.  I always love new materials to play and create with! Makes a creative girl very HAPPY!!

Did you know we ship worldwide and have a full stock of products at all times?? Yup, we try to never run out of anything!!

If you are interested in learning all about these wonderful products, you will definitely want to join me for a full day of learning, creating and understanding the Lifestyle Finishes line.  I will cover each product, what it’s used for and how to use it, you will learn different techniques to apply these products, and you will also learn a couple different finishes to put into practice.

This workshop will be online in a Private Facebook Group.  The training will be Live on October 3rd,  BUT you can watch anytime if you aren’t available on the 3rd.  The videos will be hosted in the Private Facebook Group which will also be a continued learning group for the Lifestyle Finishes Products and Training.  So, no matter if you can make the Live date or not, you can be a part of this training and ongoing educational group.

CLASS DETAILS:

Date: October 3rd

Time: 9 AM – 4 PM (We will have an hour lunch break at noon.)

Cost: $29 per person (Such a fabulous deal to receive this type of training and knowledge!)

Early Bird Special Pricing: $25 per person (Sign up by August 31st and save some money!)

SIGNUP HERE

PS: Grab your Proceed to Lifestyle Finishes conversions “Cheat Sheet” here.


All Funked Out!!

Every once in a while you get to do something for yourself and don’t care what anybody thinks!!!  Well, here is one of those pieces, my funky little end table 🙂

I picked up a pair of these super cute end tables on the side of the road…  Don’t you love it when you find something and it’s FREE?? Yeah?? Me too!!

As usual, they sat around my studio (for many months I might add) until I found a moment to get started.  You know, that dreaded prep time…  I hate sanding, have I said that enough?  LOL!!  I need to find a studio assistant (ASAP!!) to do all this prep work for me!!  But, this piece went out the back door and received a good sanding and cleanup.  Yup, the spider webs and all had to go!! Oh the things you get to deal with during prep.

Now, the fun started and yes I think the primer is fun! Or at least the assurance it gives me to know that my paint will adhere and may prevent any bleed through.  Then… the real FUN began and it was time to break out the DIY Paints!!!  WooHoo… and of course the fun colors 🙂

Talk about a fun palette to use: Old 57, Mermaid Tail, Kissing Booth and Cowgirl Coral … I love getting to play with all these colors.

I started the base with Old 57 and Mermaid Tail – haphazardly applying both at the same time, using a little water to blend the colors.  You can add water to your brush or use a spray bottle and mist.  Once the base was dry, I decided to get a little crazy with my colors and basically dry brush on both the Kissing Booth and Cowgirl Coral.  I really didn’t try to blend these two colors, just more of a random application.

Then on to some pattern and design!  Breaking out my stencils and rollers here 🙂  Don’t you just love adding pattern with stencils? It is such a fun and easy technique to add so much character to a project!

I stencilled the Hampton Medallion pattern randomly and in a distressed look.  Not trying to define all the detail and letting it be faded in the background design.  I stencilled with Americana Acrylics – Sea Breeze and Desert Turquoise (these colors were a close match to the Old 57 and Mermaid Tail).

Once all the stenciling was accomplished, I decided to randomly roll on the Chrysanthemum pattern.  I brushed the paint onto the roller using the Kissing Booth and Cowgirl Coral (at the same time) and just rolled where ever I felt I wanted a little more interest.

This beautiful piece was protected with the Final Coat wipe on varnish.  This stuff is amazing and so easy, just wipe it on with a staining pad.  It dries really fast because you are wiping it on super thin and I just layer about 3 to 4 coats depending on the surface and use!!  Super cool stuff 🙂

Painting is one of my passions and it’s so fun to just let the artist in you out and have fun with a project.  Nothing to match, no one’s opinion, just letting your creativity explode!!

Project Materials:

DIY Paints: Old 57, Mermaid Tail, Kissing Booth, Cowgirl Coral

Chrysanthemum Roller

Hampton Medallion Stencil

Primer  ** affiliate link, no extra cost to you, I will just make a couple dollars **

Americana Acrylic Paints: Sea Breeze, Desert Turquoise  ** affiliate links, no extra cost to you, I will just make a couple dollars **

Final Coat