Free shipping on orders over $100! **After discounts have been applied & Continental US only

Jennifer

7 Color Trends of 2019

Hello, 2019! Y’all, this month is just flying by for me. I can’t believe it’s already the 11th of January! 

Since it’s a new year, I have put together a list of some of the trends I see coming for the hottest colors of the year! I’ve been doing some research on the forecasting of the hottest colors for 2019 and am so excited to share the exciting palette.

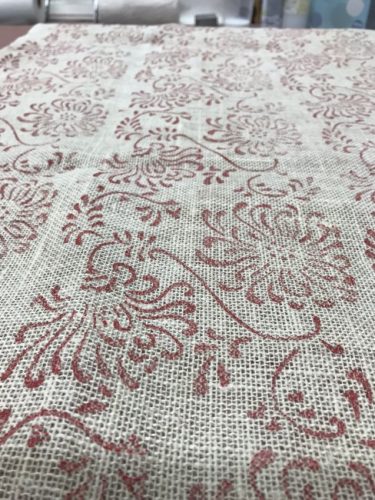
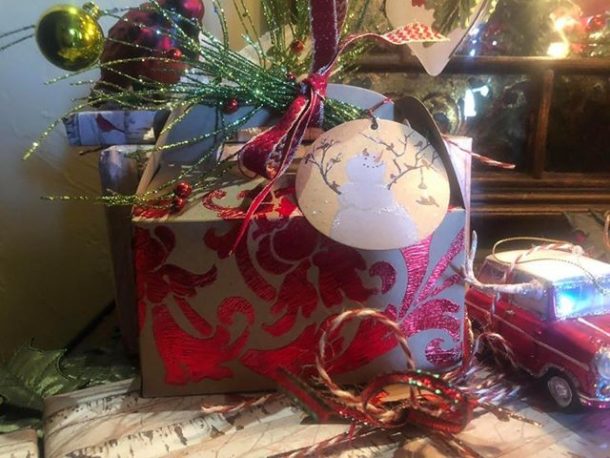
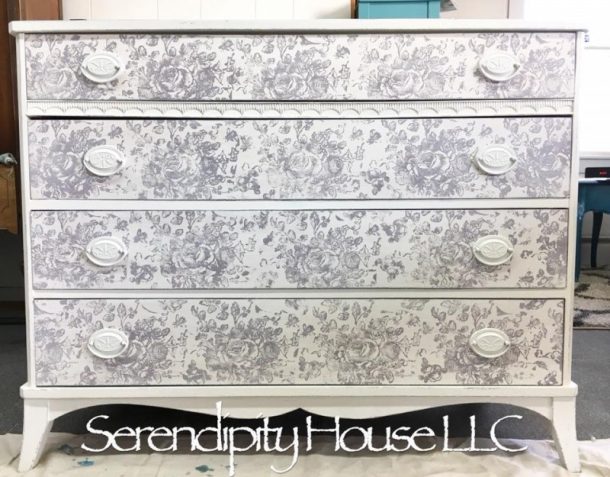
I am so excited to share some amazing projects that were created by my fellow DIY Paint Retailers using these beautiful colors of 2019! 

2019 Color Trends I Am Loving:

Warm White & Cream

2019 is a year of earthy colors starting with beautiful warm whites and creams. The DIY Paint collection has a couple of colors that fall into this category: Crinoline and Sandy Blonde.

Leah Noel Design Co. created this beautiful piece of furniture using Faded Burlap and Gravel Road DIY Paint.
Redoux Interiors created this stunning storage space using DIY Paint Sandy Blonde and the panels were done in Dark n Decrepit Patina.
Jayne Belk from Funkiture Gifts & DIY Studio created this amazing piece using DIY Paint Crinoline.

Gray Undertones

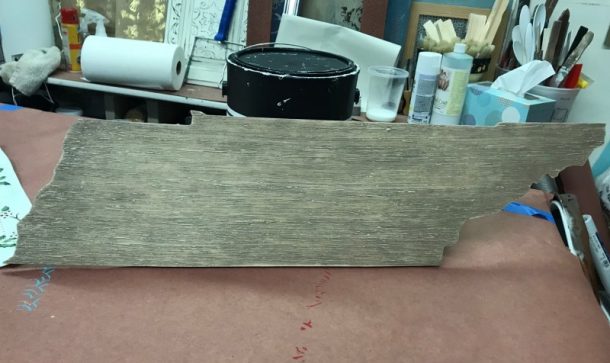
Gray is here to stay! Navys, purples, and browns with gray undertones are definitely “in” in 2019. You can also “warm up” your gray with these awesome DIY Paint colors: Faded Burlap and Gravel Road.

Aspen Staples-Wendler created this stunning piece using Bohemian Blue, Faded Burlap, and Letterpress Gray DIY Paint.
Serendipity House LLC created this stunning dresser using French Millenary and White Swan DIY Paint.

Hunter Green/Dark Green

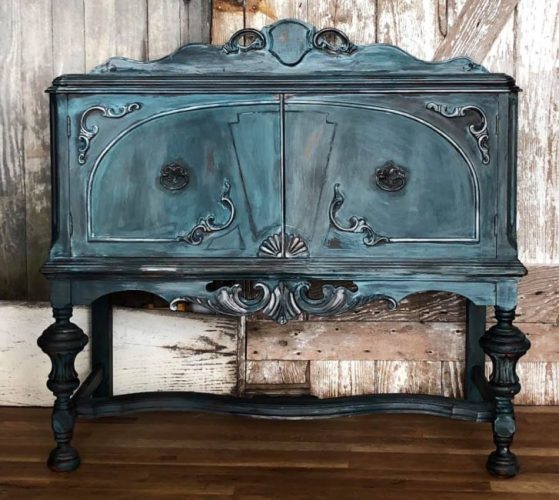
Another trend this year is Hunter Green. But, we are seeing more of a dark Blue/Green. You can find this color palette with DIY Paint: Bohemian Blue. 

The Rusty Nail Home Market created this incredible piece using Old 57, Queen Bee, Bohemian Blue, Mixed Kissing Booth and Boho Blue to create a custom color, and Clear Waxed.


Muted Pastel

Muted Pastels are on trend this year as well. A couple of DIY Paint colors to work with are French Millinery, Mint chip, and Petticoat Pink. 

The Rusty Nail Home Market created this beautiful buffet using Petticoat Pink, French Millinery and White Swan
Manage DIY Paint.
The Turned Leg created this pretty desk using Prom Queen (on the drawers) and Vintage Linen DIY Paint.

Soft Clay

A soft clay or terracotta is also going to be a big hit this year. You can create this custom color with DIY Paint colors Cowgirl Coral and Crinoline mixed together. Or you can even mix Summer Crush and Crinoline together as well. 

Midwest Archaeology Co. created this amazing dresser using DIY Paint colors Cowgirl Coral, Golden Ticket, and Boho Blue.
Elsie Lane Boutique created this stunning desk using DIY Paint colors Summer Crush and crinoline, with Dark and Decrepit as well.

Blue

Blues are all the rage! I really think you can’t go wrong with blue, it’s timeless. If you are going to create a blue look take a look at these DIY Paint colors: Hey Sailer, Peddle Pusher and Prom Queen. 

Furniture by Anastasia created this beautiful piece using Old 57, Bohemian Blue, and Carnival Red DIY Paint.
Redoux Interiors created this incredible piece using DIY Paint colors Hey Sailor, Boho Blue, Cowgirl Coral, and Golden Ticket.

Mist

Mist is another color that you will see a lot of this year. The DIY Paint collection has a beautiful mist called Apothecary. 

The Pickled Pair created this super cute end table using Apothecary DIY Paint.
Fat Sparrow created this amazing “misty” nightstand using Apothecary, French Millinery, and Faded Burlap DIY Paint.

The colors I will never stray from…

Regardless of the trends for 2019, you will never see me stray from my favorite DIY Paint palette: Old 57, Seaglass and Mermaid Tail!

Debi Beard of Debi’s Design Diary & DIY Paint created this stunning piece using my fav color palette!
Millers Crossing Interiors created this amazing chair using DIY Paint colors Mermaid Tail and Black Wax.
Nicole Nichols of Rusty Barn Creations with Paint created this beautiful piece of furniture using DIY Paint Bohemian Blue, Old 57, Mermaid Tail, Cowgirl Coral, and Dark Wax.

I don’t want to say that I’m an expert on color trends, but with all my research and 30 years of painting experience, I would say these colors will be seen everywhere in 2019 and beyond.

Many thanks to all the artists, DIY Paint Retailers, that contributed their incredible artwork to this post.

Make sure to sign up for my email list below so you will never miss a new blog post!


Final Holiday Project

Today I am working on another fabulous table runner to help spark some creativity for you to create a “show-stopper” holiday centerpiece for your next party. Now, I will have two different options to choose from for all the holiday parties this season!

This table runner is a little different than the last one I created. This time I am going to be using multiple techniques on this table runner, including stenciling and painting.

Stenciling is such a fun and simple way to express your creativity. If you have never stenciled before, head to this BLOG or you can purchase my Stipples & Swirls Instructional Stenciling Video for only $5 to get more extensive training on the art of stenciling.

Alrighty, let’s get started with this DIY Project!

Step 1 – Prepping Your Table Runner!

First, you will want to get out your iron. This will help the linen table runner lay a little bit flatter and make it easier to paint and stencil. Next, you will want to spray a thin piece of cardboard with some Stick It Stencil Spray. This adhesive is repositionable, which makes it perfect for this project. Stick It will help to keep the table runner flat and keep it from moving around while you are painting and stenciling. You will need to respray your cardboard after 1 or 2 uses to keep it sticking properly. I would highly recommend spraying it outside to eliminate the fumes and toxins indoors. (You don’t want to be breathing this stuff in!)

Once you have the cardboard sprayed and your table runner smoothly laid out, you are ready to get started painting!

Step 2 – Let’s Get Painting!

Next, you will start by painting the outer edge of the table runner. I am going to be using my favorite “chalk type” paint DIY Paint in the color Apothecary. You can grab some DIY Paint HERE. To get the “washed” look I was going for, you will start by watering down the paint. Make sure you grab enough paint to finish the entire project so that your “wash” is the same throughout the entire table runner. Grab a paper towel to see how diluted your color is. If it is not diluted enough, then you can add a little more water to dilute it more. This mixture is about 70% water and 30% DIY Paint. You will want to use a stiff bristled brush, this way you can scrub it into the fabric. You can grab a Filbert Brush HERE. This type of brush also allows you to create a straight line along the stitching. Since we are using very watered down paint, it will take about 24 hours to dry. Allow this to dry overnight before you move on to the next step.

Step 3 – Now You Are Ready To Stencil!

You will want to continue to use your cardboard sprayed with Stick It, but you will also want to tape down your stencil as you move along your table runner.

Start creating a “background” using your checkboard stencil in the middle of the table runner. I wanted to use a lighter color since I am keeping this stencil more in the background, so I went with the colors Bleached Sand and Light Buttermilk by Americana. (You can use any colors you prefer!)

I also mixed in a little bit of Fabric Medium to allow the paint from getting too stiff and it also allows your fabric to wash better if you plan on washing your table runner. (I highly recommend dry cleaning your table runner.) You will want to “offload” some of the paint onto a paper towel so that you are working with a mostly dry brush. Fabric can be a little more forgiving than a regular project, but you definitely don’t want to be working with too much paint on your brush. Allow drying completely before moving onto your next step.

Step 4 – Adding All The Extras!

I decided I wanted to add a little something extra, so I am using my Holly Vine stencil. This is a super cute two layer stencil design. You can purchase it HERE. The easiest way to figure out where you want to place the design without using the registration marks is to layer them up and place it where you think it looks good. Then you will tape it down.

Now to the stenciling! I am using Americana Paints in Napa Red, Plantation Pine, and Burnt Umber. I am also using some Fabric Paint Medium mixed in once again. Once you load your brush, you will then want to “offload” most of that paint onto a paper towel creating a Dry Brush technique. To create some shading, you will want to go over the whole leaf section and then build a little more color along the edges. This creates some dimension in the stencil. Reload your brush as you run out and then make sure you “offload” again as well. I prefer to stencil layer 1 and then layer 2, and so on. I think it makes it much easier to line up, rather than doing all layer 1s around the border and then layer 2s. Nothing has to be perfect and you should line up the stencil how you see fit!

Final Thoughts

I absolutely loved creating this beautiful table runner for my upcoming holiday gatherings! I hope this has inspired you to get creative and make your own table runner this season. If you have any questions please feel free to reach out! Lastly, if you do end up making a table runner, please share! I would love to see what y’all create!

Are you more of a visual learner?? Check out the full video tutorial below!

Completed Christmas Projects: Post #2

Hi everyone! You know what time it is… It’s time to decorate your Christmas Tree!! Today I am going to show you how to make your own DIY Christmas Ornaments and your own Stamping Roller Table Runner 🙂

I am going to be using air-dry molding clay that takes about 24 hours to harden. You can grab some here: https://amzn.to/2QnKjWs

Let’s get started…


 DIY Christmas Ornaments

Step 1 – Molding Clay!

You will start out by tearing off some molding clay. To prevent it from sticking to any surface, I decided to work on a serving tray covered in Press’n’Seel. I even wrapped my rolling pin in Press’n’Seel to prevent it from sticking as I rolled out my molding clay. Now you will go ahead and roll out the clay like you are rolling out cookie dough! I rolled the dough to about ⅛ of an inch but you can leave the clay a little thicker if you’d like to.

Step 2 – Let’s Roll!

After you have rolled out a chunk of clay, you will want to roll through with one of my Decorative Art Rollers. You will want to use a little bit of pressure as you roll through so that it leaves a nice impression into the clay. The first roller I use in this video is one of the new patterns I just got in, Mermaid Tail. I have about 40 different options available on my site. You can find them at: https://shop.artisticpaintingstudio.com/collections/decorative-art-rollers

Step 3 – Cookie Cutters!

After the pattern is rolled through your clay, you are going to want to grab your cookie cutters! Again, just press into your clay like you would with cookie dough. Wiggle the cutters a little bit to separate the cutter from the excess clay.

If you rolled out enough clay, you may be able to cut out a couple of shapes. After you have cut out your shapes, you can remove the excess clay. Save the excess to reuse and reroll out to make more shapes. I got the cookie cutters I am using from Hobby Lobby. You can also snag some here: https://amzn.to/2QmI5qh

Step 4 – Hanging Your Ornaments!

You won’t be able to hang these beautiful ornaments on your Christmas Tree without this step! After removing the excess clay, you will want to make sure you add a little hole in the top of each of your ornaments so that you can hang them. I was able to use one of my stencil brushes to cut out a tiny hole in the top of each ornament. Since not everyone will have one of those lying around, you can really use anything around your house: like a pencil, straw, toothpick, etc.

Step 5 – Dry Time!

Wait for the clay to dry! The instructions say 24 hours, but you can speed up the process a little by placing them next to a fan, portable heater, or even baking them @ 200 degrees.

Step 6 – Paint & Decorate!

Now it’s time to paint and decorate your ornaments! This part of the creation is completely up to you. I painted each ornament with a base coat before adding extra details. Then I used DIY Paint by Debbie’s Design Diary: Gypsy Green and Carnival Red.

After I have painted all of my ornaments a base color, I want to add some extra details. In the video, I add some red dots using an embossing tool and give the tree a decorated look. For the gift, I added some white paint to give it the look of being wrapped with a bow on top.

I hope you enjoyed the video, now it’s time to go create your own! Get your family together, grab the kids or grandkids and get creating!

Are you more of a visual learner?? Check out the entire step-by-step video below!


 Stamping Roller Table Runner

Are you looking for something to make your table stand out this Christmas? Let’s get to making that happen with a custom, self-made Christmas Table Runner. Today I am going to show you how easy it is to make a beautiful table runner with one of my Patterned Paint Rollers (Chrysanthemum Pattern) and some burlap.

Step 1 – Grab your burlap!

I got my burlap from a local fabric store, but you can grab some here: https://amzn.to/2PzNiWJ Because burlap does not lay flat, you will want to tape down the edges. This way it won’t move too much as you are rolling.

Step 2 – Thin down your paint!

To allow the paint to soak into your roller sponge easier, we want to thin down our paint a little bit. Start by pouring out your paint into your paint tray. I am using DIY paint, Carnival Red, and a serving tray covered in Press’n’Seel in the video above. Don’t have a paint tray or Press’n’Seel?? You can grab them here: https://amzn.to/2QrW0v8 & https://amzn.to/2QpnjWV

After you have poured some paint into your tray, you will want to add a little bit of water. You can use a spray bottle or just add a little from a water bottle.

Step 3 – Load the Roller!

Before adding paint to your sponge roller, you will want to load the roller into the handle. You will want to place the sponge pin into one side, place that side onto the table and then lift the other side of the handle to get the other pin in.

I also like to spray my sponge with a little bit of water when loading it up with paint. Now grab your sponge roller and roll it through the paint.

Depending on the size of your project will determine how much paint you need to load onto the sponge.

Step 4 – Insert Patterned Roller and Test it Out!

In the video, I am using the Chrysanthemum roller. Again like adding the sponge, you will want to load the Patterned Paint Roller head by placing in the bottom pin first and then lifting and sliding in the other pin.

Now that the Handle is all loaded up, you will want to roll on some scratch paper to get the Patterned roller all loaded up. It doesn’t take much pressure when rolling with these Stamping Rollers because the blue rubber is a softer rubber. If you press too hard you may get the paint onto the base of the roller and not just onto the pattern.

Step 5 – Roll onto Burlap!

Now that everything is prepped, it’s time to roll! My biggest goal is to roll as straight as I can. On the first roll, I picked out a seam to follow and it worked out well. On my other rolls, I looked at my previous roll and tried to keep a consistent distance as I rolled down the table runner.

Wow, that was really easy. Once everything is prepped it only takes a few minutes to actually roll onto the burlap!

Are you more of a visual learner?? Check out the entire step-by-step video below!


I hope you enjoyed these fun and simple holiday tutorials!! Subscribe to my email list below to be the first to know when a new blog post is up 🙂


**This post contains affiliate links! 🙂

Completed Christmas Projects: Post #1

Painting & Foiling Christmas Blocks


Christmas Blocks on my table runner.

My first little project is creating Christmas blocks!!

I found these little blocks on Amazon. You can find them, HERE! I am thinking they will be perfect to scatter around the table setting for Christmas dinner or just scattering around in groups around the house!

How to make them:

Step 1 – Painting:

The first step will be painting the blocks. In the video, I am using Debbie’s Design Diary DIY Paint, a chalky based paint, in the color Carnival Red. This is the perfect Christmas red!

Painting blocks is a little tricky cause you have to hold them and paint. So I started out by painting each block on four sides while holding the top and bottom and leaving those sides unpainted for now.

After painting each block on the four sides, I let them dry for about 30 minutes. Once dry, I went ahead and painted the two unpainted sides.

Depending on the paint you use, you may need to go back over and paint on a second coat so that you have 100 percent coverage.

Step 2 – Design:

Deciding what you are going to put on the blocks will be the second step. Because the blocks I bought are pretty small, I decided to use the Holly Berries stencil from my stencil collection. If you would like to see all of the stencils I have for sale check out my website, HERE.

While most of the time stencils are used to be painted on, this time I decided to use them to add Foil Adhesive so I could come back and foil on the Holly Berries leaves!

I decided to use Metallic Silver foil so that it would pop nicely against the red paint. And after adding the foil, I would come back and emboss the berries with Metallic Gold paint from Modern Masters.

Step 3 – Foil Adhesive:

Now it’s time to apply the Foil Adhesive. For this, I decided to use a dry brush and a pouncing technique.

To apply the adhesive, you will want to start by swirling a little Foil Adhesive onto your brush. Then you will want to dab your brush a couple of times on a paper towel to create a dry brush.

Now you can pounce with your brush over the stencil openings. This is a great technique to use because it applies the adhesive evenly and it won’t leak under the stencil.

You will want to add two quick coats so that there is enough adhesive to get a good transfer!

I found it best to do three sides on each block at a time.

Now you need to let the adhesive dry and tack up for at a minimum of 10-15 minutes. The longer you wait for the better!

Step 4 – Applying Foil:

Let’s get to foiling! First, you will want to cut your foil into some smaller pieces so they are easier to manage. Then you will place the foil onto your block.

I started by trying to rub a rag and my finger over the foil to see how well it would transfer but it wasn’t quite enough. So I used my handy-dandy scrubbing brush! And it helped to get a full transfer (you could also try a toothbrush).

Along with the full transfer on the holly leaves, it added little speckles on the block. You can either leave those speckles, as I did, or you can rub them off using a rag.

Step 5 – Adding Berries:

Instead of using the stencil to add the berries, I decided to use an embossing tool. This tool is great for adding a dimension to a project!

The color I used on the berries is Metallic Gold from Modern Masters. I dipped my embossing tool into a little of the paint from the lid and then dabbed on three little berries which create raised dots.

You will probably want to do this step after you have transferred foils to all sides of your blocks because the paint will take longest to dry.

Are you a visual learner?? Check out the entire step-by-step video below!


Creating an Easy Weathered Wood Finish


Weathered Wood Tennessee present

Creating a super special Christmas present for my daughter, Ashley! She lived in Nashville, Tennessee for six years and just moved back to California, so I am going to paint this Tennessee wood cutout for her.

Step 1 – Texture Medium: 

First, we are going to get out some Texture Medium. You will want to put some on the surface of the wood and use your mini trowel to spread it 100% on the entire surface. You can always go back and clean the edges with your finger or sand them down later. It doesn’t have to be perfect!

For this project, we are going to use the Corduroy Tool, so you can leave the Texture Medium a little thicker. It can be closer to an 1/8 of an inch.

Step 2 – Corduroy Tool:

Now let’s grab our Corduroy Tool! This tool creates a beautiful broker Stria, which will help us create our Weathered Wood finish. You will take your Corduroy Tool and go back and forth across the Texture Medium to create a wood finish.

You will want to stay in straight lines with your Corduroy tool to create this look. If too much Texture Medium gets on your Corduroy Tool, you can pounce it back on your wood and then go back and forth to create the wood finish.

Step 3 – Sanding: 

Once your Texture Medium is dry, you will want to sand the edges. Dry time will take about an hour or so. You will want to smooth out the texture, so you don’t have any “highs”.

Step 4 – Glazing:

We are going to create a custom glaze color. I am going to use Golden Paintworks Glazing Medium and Modern Masters colorants. When you are starting to create a custom glaze color you will want to start with a smaller amount of glaze, about a 1/4 cup. This way you are not wasting any product! Add a little color at a time to reach the color you want. I usually use 1 cup of glaze to 3 tbs of colorant.

I am going to start with a darker umber and then add white to lighten it up.

Step 5 – Cheesecloth:

Grab a chip brush of your choice. If you need to invest in one, you can find one HERE. Dip your brush in a little bit of glaze and brush onto your piece of wood. A little goes a long way. Once your glaze is on, you will have a little “working time”. You will grab some cheesecloth and make a “pad” with your cheesecloth. Take your cheesecloth, and rub in the same direction as the Stria to make your finish as light or dark as you want.

Step 6 – Top Coat:

I am not going to top coat this project because it is not going to be something that is touched often. If it was something that was going to be touched more often I would definitely want to top coat the project.

Are you a visual learner?? Check out the entire step-by-step video below!


**This post contains affiliate links.

Christmas Projects – DIY Christmas Decorations, Ideas & Gifts

Can you believe it’s already December and Christmas is only a few weeks away?? I don’t know about you, but 2018 has flown by for me!

Hearing Christmas music being played the day after Thanksgiving made me realize how close to we are to 2019.

I have been working on a few Christmas Projects over the past couple weeks and I wanted to share them with you. I also wanted to give you a preview of a couple of DIY projects I have on the calendar for the upcoming weeks! 🙂

Join our Email list (at the bottom of this post) to be the first to know when they are all complete! 

The projects below include DIY Christmas Decoration ideas with Christmas Blocks, a Christmas Table Runner, and Homemade Christmas Ornaments. In addition to decorations, I wanted to share some DIY Christmas gift ideas with Custom Picture Frames and Creative Gift Wrapping!

Completed Projects…

Painting & Foiling Christmas Blocks

My first little project is creating Christmas blocks!!

I found these little blocks on Amazon. You can find them, HERE! I am thinking they will be perfect to scatter around the table setting for Christmas dinner or just scattering around in groups around the house!

Aren’t they so cute?? Find out how to make them… HERE!


Weathered Wood Tennessee Cutout Christmas Present

Creating a super special Christmas present for my daughter, Ashley! She lived in Nashville, Tennessee for six years and just moved back to California, so I am going to paint this Tennessee wood cutout for her.


Find the step-by-step directions for all these awesome projects, HERE!


Upcoming Projects…

Want to know when these projects are complete?? Join our Email list (at the bottom of this post) to be the first to know when they are all complete! 

Holiday Table Runner

Coming to your inbox next Tuesday, December 11th… Make sure to join our email list to be the first to know when this tutorial is ready for you 🙂

Christmas Table Runner

You can never have too many table runners around the holidays! I hope you’re excited to learn how to make this fun table runner 🙂 This tutorial will be released next week!

Want to create a table runner with me?? Grab yours, HERE!!


DIY Christmas Ornaments

Tomorrow I will be LIVE on the DIY Paint Facebook Page teaching you how to create some super fun DIY Christmas Ornaments. Come join me for some fun at 5:45 pm PST / 8:45 pm EST.

Are you as excited as I am?? Go give the DIY Facebook Page a “follow”, so you don’t miss me!! Find the DIY Facebook Page, HERE!!

Custom Picture Frame Christmas Presents

Are you looking for something special to give your loved ones this holiday season?? How about a custom picture frame?? I am going to be creating some picture frames next week using paint, foils, rollers! You never know what we are going to play with, so you don’t want to miss this one!

Gift Wrapping with Foils

Here is a photo of a wonderful gift box Kay Hargrove shared with me! She created this beautiful design with one of my Stencils, Foil & Foil Adhesive! I cannot wait to create some of my own Creative Gift Packaging in the coming weeks 🙂


**This post contains affiliate links.

Jennifer’s 2018 Holiday Gift Guide

Jenn's Holiday Gift Guide

It’s the most wonderful time of the year! And that means it’s time to start thinking about what gifts to choose for the loved ones in your life. You want to be able to find the perfect gifts for everyone on your holiday shopping list and with this gift guide, you will be able to find something for everyone on your list from the health fanatic to the book nerd and everything in between.

These thoughtful gifts for all the men in your life would earn the top mark on their Christmas wish list, that is if they ever gave you one (LOL). Whether you are shopping for your boyfriend, fiance, husband, dad, son, brother, uncle, grandpa, or friend we’ve got you covered!
HyperChiller
Old Fashioned Whiskey Glasses
Beard Grooming Kit
Juicer
Apple Air Pods
Ugg Slippers
Young Living Essential Oil Premium Starter Kit
Toiletry Bag
Personalized Whiskey Decanter
Hanging Toiletry Bag
Cordless Drill
Fitbit Smart Watch
Leader Eat Last
Building a Story Brand
Herschel Backpack


These thoughtful gifts will eliminate the stress when you are shopping for your favorite lady this Christmas season. Whether it’s your girlfriend, fiance, wife, mom, sister, daughter, aunt or friend, you will find something she will love on this list!
Stainless Steel Water Bottle
Wine Glass Holder
Juicer
Girl, Wash Your Face
Apple Air Pods
Young Living Essential Oil Premium Starter Kit
Moscow Mule Mugs
Cork Opener
USB Tassel Keychain
Instant Pot
Leader Eat Last
Building a Story Brand
Day Designer Planner
Weekender Duffel Bag


**This page contains affiliate links.