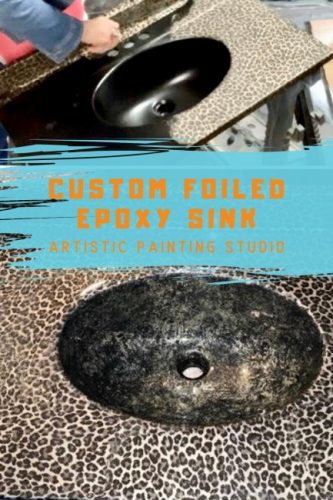
Custom Foiled Epoxy Sink by Donna Miller
She took this plain jane black sink and took it to THE NEXT LEVEL… WOW, it turned out stunning!
Let’s get started…

First, she grabbed her ArtsSyVille Embellishments Foil Adhesive. This is the foil adhesive I created to get the best release with my foil line. You only need one coat, which saves you time and money.
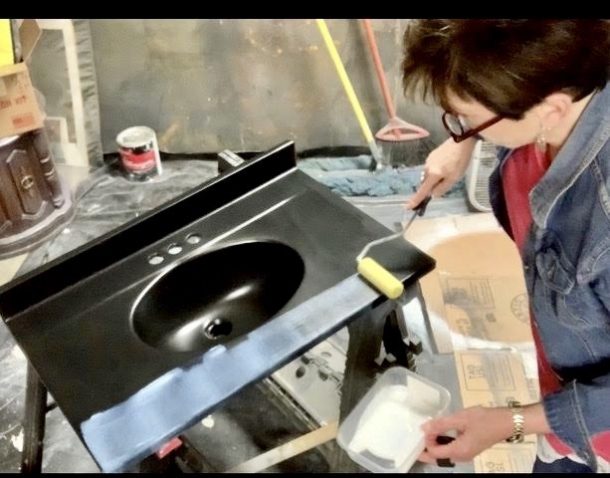
So… She applied her one coat using a low-nap roller and allowed it to dry to a firm tack. This will approximately take 1 to 2 hours. The longer the better and it will take longer in high humidity areas.
Now for the fun part… FOILS!


Don’t you just love that you can make something your own with such a simple and fun tool??
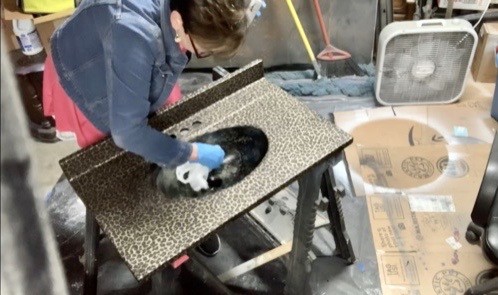
And viola… She has completed her beautiful leopard sink. Well, at least the foiled part anyways. She still has to seal her foil with some epoxy.

Isn’t this sink stunning?
Donna sure did an amazing job taking this plain sink and making it her own. I absolutely love how the leopard print turned out!
Donna’s next step!
As I mentioned above, Donna isn’t quite done yet. She needs to seal her foils with epoxy. If you want to learn more about how to apply epoxy, check out this project I created not too long ago.
Have you created a fun foiled project?
I would love to see it and share it with all of my customers, clients, and followers! Please share your projects with me over on my Facebook groups: Foil Everything by Artistic Painting Studio and Fauxy Rollers by Artistic Painting Studio. You can also email me your projects at jennifer@artisticpaintingstudio.com.