Free shipping on orders over $100! **After discounts have been applied & Continental US only

Jennifer

Tie Dye Faux Granite

Two things I love working with: Metallic Foils and Epoxy. I am so excited to share with you the process of my Tie Dye Faux Granite. Keep reading to learn this simple and easy faux granite look that will WOW your friends.

Tie Dye Granite

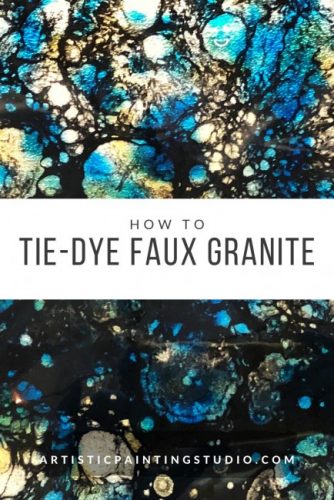
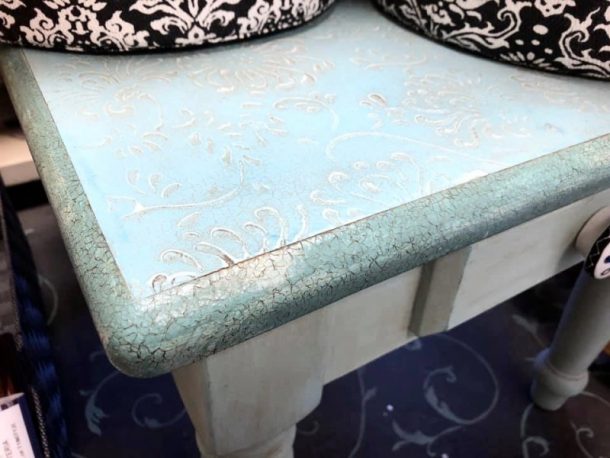
Tie-Dye Faux Granite

Tie-dye metallic foil comes in several colors, and all of them will make a fabulous impact on this finish.

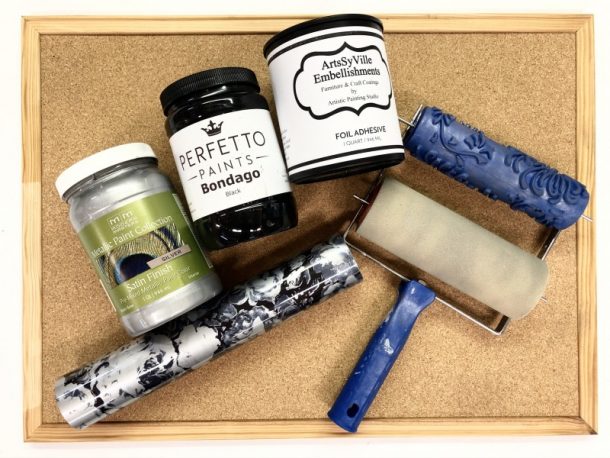
First, base coat your surface with a color that will compliment your foil. When in doubt, just use a black base coat.  In this sample, I used black or a color that is really close to black as my base.

Next, we are going to Foil…

Once your base coat is dry, you will apply my ArtsSyVille Foil Adhesive with a low nap roller (1/4”). Apply one layer and allow it to dry for at least an hour or more. You will want it to dry to a firm tack.

Next, you will grab your favorite color of Tie Dye Foil. In this sample, I used the Blue Tie Dye foil.  You will transfer the foil to the surface with the pattern side facing up (facing you) and use a scrub brush to get as much transfer as possible.

Now for the fun Epoxy portion…

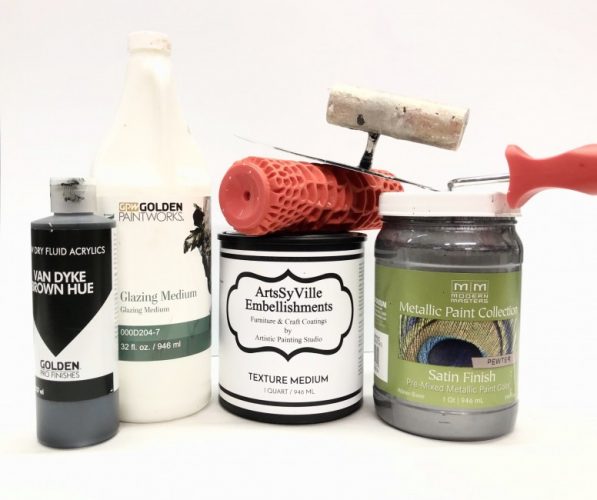
You are now going to mix up your epoxy using your Liquid Glass. Make sure to mix equal parts of A & B. First, pour B, and then pour A into the same container. Make sure to measure as close as possible and stir for at least 2 minutes.  Scrap the sides and bottom of the container and mix very well, this should ensure that your epoxy will harden correctly.

Once your epoxy is mixed up well, pour the epoxy onto your surface and using a “gloved” hand spread it out across the surface and onto the sides.

Using your Blow Torch, go across the surface approximately 8 to 10 inches away and bring all the bubbles up to the surface, clearing the epoxy.  You may want to do this several times, waiting a couple of minutes in between if the epoxy still looks hazy.

Tie-dye faux granite

Then take the Black Rustoleum 2X Spray Paint and spray the surface approximately 8 inches away in a high fog to cover the surface.  This will not be opaque.

Now you will put the 91% isopropyl alcohol in a spray bottle and test the spray nozzle. This will allow you to decided if you want a mist or large droplets of the alcohol.  Spritz over the surface about 8” away, do not overspray the alcohol.  Allow the alcohol to do “its thing” and create interesting patterns and design exposing the Metallic foil under.

Allow the epoxy to set up for several hours. After about 12 hours, you can do a light sanding if necessary and then clean the surface. Apply another layer of epoxy doing the flood coat.

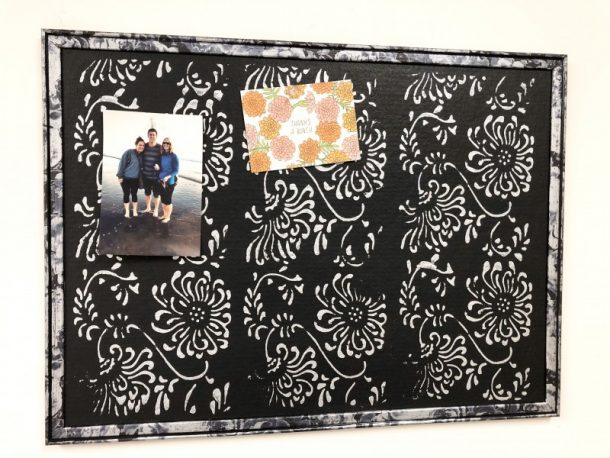
The possibilities are endless with epoxy and foils. Just think of all the finishes you can create using different foils and different colors of spray paint!

DIY Stenciled Tissue Box Cover

Join Jenn as she shows you how to create a DIY stenciled tissue box cover!
DIY Stenciled Tissue Box Cover
Tissue box covers are a wonderful DIY project customizable to any room in your house. In this video, Jenn decides to use her Rosie Posies flower pot stencil along with craft acrylic paints to create a pretty and full tissue box cover!
You can find the Rosie Posies stencil and more, HERE.
Thanks for watching and if you have any questions please ask below!

Holographic Foil

So y’all must know by now that I’m having a love affair with Foils.  Yes, it’s a complete obsession and I don’t think it’s going to end anytime soon! Today, I am going to tell you all about holographic foil 🙂

Foils are amazing and can be incorporated into just about any art, craft, surface, or project you are creating. I’m just blown away by our customers and all their amazing projects.

Holographic Foil

Holographic Foil

So… I thought we would explore some of the different types of foils. Today is all about holographic foil.

What is Holographic Foil?

Holographic foil is made in the same way as metallic foils, but they include an embossed pattern that diffracts the light and shows the colors of the spectrum at different angles. There are many patterns and colors within the holographic foil collection.

Holographic Foil

With Holographic foils, somehow photography exaggerates the effect of the hologram, and the actual colors don’t always show up very well in the photos.

There are two basic types of holographic foils, the first one is seamless.  This means there is no pattern or shape in the hologram and the colors simply blend into each other.  We carry these foils in gold, silver, and blue. We also have a directional effect foil referred to as Pillars and/or Rainbow.

Holographic Foil

The second type of holographic foil is patterned which indicates a large variety of shapes and designs in the hologram. Glitter, shattered glass, stars, squares, confetti, lines, sequins, and flowers to name a few.  We actually have a very large collection of the holographic foils to choose from.

Holographic Foil

With all of our foils, we always suggest creating a sample first to determine the best base color to apply under the foil.  Apply our amazing Foil Adhesive and allow it to dry for at least an hour. Then transfer your favorite foil (color/pattern side facing up) by rubbing/scrubbing the backside of the foil.

The possibilities are truly endless! What are you going to be creating with foils next?? I cannot wait to see your projects 🙂

Custom Crocodile Skin Table

This table has been around here for a while and it seems like it keeps getting a new look every couple of years! This time I turned it into a custom crocodile skin table and I must say it turned out pretty fabulous!

Not sure if this will be the last make-over it gets but it is staying like this for a while now 🙂

Custom Crocodile Skin Table

Custom Crocodile Skin Table

The last finish I did on this table had a crackle finish going around the entire edge of the table. I decided to save the crackle finish because using a roller over a curve is a little more challenging, so I taped off the edge to save it and make the project simpler.

Before the Makeover
Before the Crocodile Skin Patter

Once everything was taped off, I troweled on a layer of my Texture Medium. Make sure to keep this thin.  It only takes about 1/16 to 1/8 inch thickness to see the patter. I used my favorite Japanese trowel (it’s the #165) which is great for small projects.

Custom Crocodile Skin Table
The Tools & Products

While the texture medium was wet, I rolled the Crocodile Fauxy Roller across the surface butting each pass up to the next one until I had the surface all rolled.  These rollers are so easy to use and create the most fabulous projects!

Watch the Entire Process Below!

Now, you have to allow the Texture Medium to dry.

This could take several hours depending on how thick you applied the medium.  Once it’s dry, you will want to sand off the high areas so that it is smooth to the touch as well as even to set things on.  I used 120 grit sandpaper to smooth out the surface and then dusted off the surface well so it was ready for paint.

Custom Crocodile Skin Table

I chose one of my favorite metallic paints and colors Metallic Silver by Modern Masters. This paint covers so well, but you will still want to apply two coats to make sure you have complete coverage.  Then allow the paint to dry and next we will add a layer of glaze!

I mixed up a glaze using Golden Paintworks Glazing Medium and Van Dyke Brown Hue Colorant.  My mixture is about three tablespoons of colorant to 1 cup of glaze. You will want to mix up however much you need for your project.

Custom Crocodile Skin Table

Brush the glaze over the surface using a chip brush and make sure to get 100% coverage. Then while it’s wet, you will wipe off the excess using Cheesecloth.  Use a soft touch and wipe back in forth to allow the glaze to remain in the low areas, while you wipe off the higher areas and create depth.  Allow your project to dry overnight.

Custom Crocodile Skin Table

Lastly, you will want to make sure and protect your project with a great topcoat. I used Golden Paintworks Topcoat in Satin and applied several coats. But who knows… I may end up doing an Epoxy pour over the top. We will see 🙂

Stenciled Graffiti Wall

This Stenciled Graffiti Wall has been one of my favorite projects I have created in the past few years! I was totally inspired by a few canvases that I had created with a similar look and I wanted to take this look to the wall!

A brown wall will intricate stencilled designs in shades of gold.

Stenciled Graffiti Wall

I wanted a fun texture in the background of this finish, so I started with my Texture Medium and the Tiger Skin Roller.  Using a Japanese Trowel, I troweled on one section at a time and while the texture was wet, I rolled the tiger roller through it in different directions making it look more organic.  I then cleaned off the side of my trowel and using a soft hand, I knocked down the high points to give it even more organic look.

I continued across the wall until it was completely covered with the Texture Medium and tiger roller patter.  You would never know that this was the Tiger Skin Roller, it just looks leafy and organic.

Once your texture medium is dry…

Check to make sure there aren’t any rough spots that need to be sanded down. There may be a few and you can smooth them out with some sandpaper.

Stenciled Graffiti Wall

Then you will grab a can of Rust-Oleum Milk Paint in Navy and roll it on. It will take a few layers, as does any dark color, to achieve the darkness needed. Three coats later and it will look fabulous! Dark base colors really make metallics pop!

Now For The Fun Part

Picking out stencils for this project was so much fun. We actually just added some new designs to my collection. For my stenciled graffiti wall I chose the following designs:  La Provence, Harlow, Donatella Damask, Splendor, and Sultan Swirl.

Stenciled Graffiti Wall

You will add each design, one at a time, using different Metallic paint colors from Modern Masters.  Silver, Warm Silver, Champagne, Rose Gold, and Nickel are the colors I chose.  I used some of the lighter colors in the background stencils and layered the darker colors over the top.

Place one stencil at a time, step back to see the placement, and stencil in the openings.  Make sure to use a dry brush technique to make sure you don’t bleed under your stencils.

Art of Stenciling Tutorial

Keep layering one stencil at a time until you are happy with the look. This is a great look for a focal point wall, a statement room, or can be a fabulous canvas project!

Find all the products you need below:

Japanese Trowel

Tiger Skin Roller

Texture Medium

Rust-Oleum Milk Paint Navy

La Provence Stencil

Harlow Stencil

Donatella Damask Stencil

Splendor Stencil

Sultan Swirl Stencil

Modern Masters Metallic Paint Colors:

Silver, Warm Silver, Champagne, Rose Gold, and Nickel

Custom Cork Bulletin Board

A corkboard can be a useful message center for your home or office, but sometimes they are not the most attractive décor for your room. But… we can create a custom cork bulletin board that will work perfectly!

Custom Cork Bulletin Board

Custom Cork Bulletin Board

Let’s create a custom cork bulletin board that will fit perfectly in your home!

Watch it come together in one minute!

I found this cork bulletin board at my local office supply store, but you can order one from Amazon HERE (affiliate link).

I started customizing this board for my personal home office.  Since I currently have a black and white theme going, I decided to paint the entire surface black using my favorite black paint, Bondago.

Custom Cork Bulletin Board

Using a low nap roller, I applied the paint to the corkboard and brushed the paint ont0 the frame. I applied two coats to make sure I had complete coverage.  Then, I allowed the board to dry completely.

Next comes the fun part…

Break out one of your favorite rollers, I chose the Chrysanthemum Stamping Roller and your favorite paint color, I chose some Modern Masters Metallic Paint in the color Silver.  These rollers are such easy and fun tools to use.  They also help you complete your project quickly!

Load your paint onto the sponge applicator and then insert the roller pattern of your choice.  You always want to pre-roll onto some scratch paper so that your pattern is completely loaded with paint.

How do you avoid getting the roller pattern on the frame?

You will tape off the top and bottom of the frame and measure to find the center.  Then you will roll on the pattern with as many repeats that will fit on the surface area.

Next, allow the paint to dry completely and then tape off the cork so that you can foil the frame with one of your favorite patterns.

Custom Cork Bulletin Board

Apply a layer of the Foil Adhesive to the frame and then allow it to dry to a firm tack. This will take at least an hour, the longer the better. Foil Adhesive will never dry past a firm tack.

Do you love foils as much as I do? 

As you know, I’m foil obsessed! Next, you will grab one of my favorite foil patterns, I chose Dominic Flowers in Grey.  Then cut sections of foil that will be long enough, and then cut them into smaller stripes to maximize your foil. You don’t want to waste anything.

You will lay the foil over the tacky foil adhesive with the pretty side facing you.  Smooth out the foil and then use a plastic bristle scrub brush to scrub the surface of the foil as you transfer the foil to the frame.

Do you have to protect your foils?

Once you are done transferring the foil, you will want to apply a layer or two of topcoat to protect the foil!

Custom Cork Bulletin Board

Now it’s time for you to create your own custom cork bulletin board for you home or office!!

How are you going to customize your cork bulletin board? Which foil are you going to use?

Let me know in the comments below! 👇