

Why do I like to paint under my foils? Well, let me tell you why base painting under foils is so important!
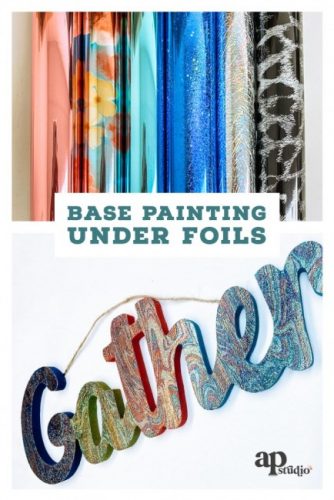
Base Painting Under Foils
Foils are a thin metallization that looks better over complimentary paint colors. This is because the foils will never release 100%, so there is always a little of the base color peeking through. This makes picking the base coat color very important in the foil application process.
When trying to decide what color would look best under a foil…
You can easily create a sample board to determine for yourself. We all have different tastes, and this will allow you to create something smaller before you start your project.

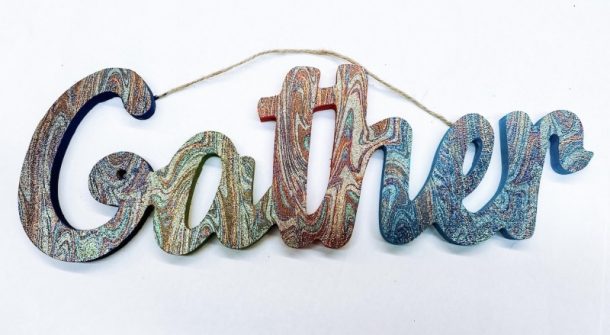
When I am picking a base color for my project…
I pick the colors I think would look best by matching the colors of the foil I am using. I also always check to see how Black will look under the foil because it looks good under most foils. I will then create a small sample board by painting all the different colors on a styrene board (about a 1” square of each color).
Allow the paint to dry and then apply a layer of Foil Adhesive over all the different colors of paint. Allow the foil adhesive to dry for at least an hour and then transfer your foil.
Each color will slightly change the look of the foil…
Which is what I mean when I say the foils “read” or “look” different over different base coat colors.
When you’re not sure and don’t have time to test, just grab the black paint. Black will always look better than white or a light color.
If you have a solid color foil and want it to look as flawless as possible, pick a color that is as close to the foil color as possible. This way if you have any base paint showing, most of the time you will not notice it at all.


 Once you are done foiling your pumpkin, make sure you protect your beautiful pumpkin with a topcoat. We want you to enjoy your pumpkins for as long as possible! My go-to topcoat is