Free shipping on orders over $100! **After discounts have been applied & Continental US only

Stenciling

BYOB: Wine & Art Workshop

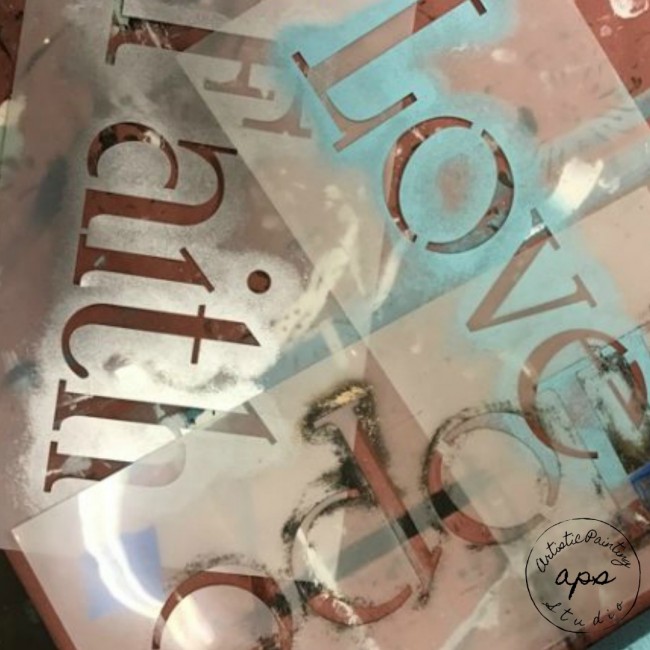
Over the past year I have added a fun group of classes called the BYOB: Wine & Art Workshops.  This has been a fun way to introduce the Art of Stenciling and the Art of Faux Finishing during a 90 minute class.  The atmosphere is relaxed, students are encouraged to bring something to drink and/or eat………come by yourself or bring a friend along.  I provide everything else – cups, cork screws, paints, brushes, canvas, glazes, stencils – etc!!!

The BYOB: Series of Classes are posted on my web site @ www.artisticpaintingstudio.com and are updated regularly………come join the fun and release the inner artist within you!

Just a few possibilities combining the Arts of Stenciling and Faux Finishing – the options are endless.   Learn these wonderful art forms while enjoying yourself with some friends and relaxing in a creative environment.

More Painted Furniture

I would like to continue on the subject of painted furniture. Morey indicated that she was inspired by Martha Stewart. My personal inspiration was Mary Engelbreit and McKenzie Childs.  I’m one that loves the sophistication along with a touch or two of Whimsey, well maybe a whole lot of whimsey with a touch of sophistication. I discovered the art of stenciling on 1988 and started playing around with painted furniture in the early 90’s and my favorite thing to paint was our chairs!  I feel that you can give any item personality or work with the natural charm of the piece of furniture.

Once I started painting chairs it was totally addictive! I couldn’t stop painting or stop buying them. At one point I had 35 chairs waiting in my warehouse (it was a hell of a yard sale).  Most of the time when I start a project, I hadn’t exactly figured out the entire design layout ahead of time. It usually took on a personality of its own and the ideas just keep coming.

As you can see in my work I love to layer patterns, designs and incorporate a lot of colors and create something fun.  I believe the layering of pattern, colors and design adds a lot of depth to your painting. It also allows you to mix and match different styles of a pattern.  Mixing fun, whimsey patterns with sophisticated design elements.

Painting furniture is one of my “true” loves. I recently started looking through the warehouse to see what there was left around to still paint, feeling the need to be creative with a piece of furniture.  Hope that my “funky” style inspires you to create something for your home!

A very creative suitcase….

Ever since the digital cameras have been around, I tend to not print pictures anymore. We just enjoy them on the computer and sharing them with others in the same form. Well at the first of the year, I spoiled myself with a new computer and in moving everything over to the new computer I had a lot of fun going through the photo albums that I was transferring. WOW!! I think I had actually forgotten about some of these projects that I had painted over the years……The Whimsey Suitcase!

Over the years I think I have just about painted everything I could find, including a suitcase.  This was a fun project that I had created for the studio and eventually one of my customers had to have it!  No surface is safe around me, I have painted buckets, flower pots, toasters (yes, toasters) and have had so much fun just being creative.

This project takes me back to my “dumpster diving” days! I loved stopping at every (yes – every) antique store, flea market and anyplace off the side of the road that just looked like it would be fun to dig through!  I have a stash of stuff that is still waiting for its turn to be transformed into a wonderful painted item. I even started to dig through my warehouse the other day to see what was left and ready to paint.

Whether you are whimsy or sophisticated, you can have fun painting just about any item and transform it into a wonderful painted treasure!

Have fun painting everything and anything you can find!!

Polka Dots for Amy!

I’m not sure how long Amy and I have known each other but, it does go back a few years! Amy and her husband, Don have opened their house several times for me when I have traveled to PA to teach for their local chapter of the IDAL group. Talk about incredible hosts – Amy and Don make you feel so welcome, cook amazing food for you and even let the guest bet them at WII…..I Knocked Amy out!!  (Only in the game…LOL)

Amy Scheg is the owner of Stensational Walls in Lebanon, PA and has been painting for 12 years.  Her decorative painting business encompasses many facets of the arts and one of her loves has always been stenciling.  You can find her online @ Stensational Walls.

One of Amy’s favorite projects are Babies and Children’s rooms – Amy indicated that usually she is given a budget and is told “do whatever you want, we trust your judgement”!  Now, that is a dream client!!!  Recently she had a project in where she had taken the bedding for the room, traced several of the elements and cut her own stencils by hand (now that’s a lot of work!) – but, she had a dilemma in the fact, she needed a Polka Dot stencil and she knew should could not cut perfect little circles the size she had desired.  So this is where I entered the picture on this project……..Amy called my studio after seeing several posts by me indicating that I was offering Laser Stencil Cutting services. Amy provided me with the details of the design she needed and I had my associate Ron create the stencil.

This room is absolutely adorable – Amy worked with the palette of colors from the bedding, a couple of pinks, white, green and chocolate-brown.  One wall was created like the bedding and the other walls she scattered flowers, leaves and bugs randomly around the room.  Then she painted two 1 inch chocolate-brown stripes around the room at chair rail height, about 6 inches apart and put the Polka Dots in the middle of the stripes…..she also created a French Wash below the Polka Dot border.

Amy said my Polka Dot stencil was amazing – it only took her about an hour to paint the entire border.  She indicated that polka dots are very popular in children’s bedding right now, so this stencil will come in handy!  I want to “thank” Amy for sharing this fun project with us and allowing me the chance to create a fun stencil!

Have fun Stenciling,

Jenn

Stencil Give-Away WINNERS!

I first want to thank everyone that participated in my “Share the Love of Stenciling” stencil give-away!  I allowed the contest to go an extra week, considering I sent out word about the give-away to my email list and wanted to give a few more people a chance to win.  This was sure a fun way to get people to share their love of this wonderful art form……..I have had a passion for stenciling for more than 22 years and still love it! 

Stenciling is something that I think everyone can learn and it’s such a great way to discover the inner artist in those that never thought they could paint anything.  I think once you have tried stenciling, that all it takes to become addicted to this art!  I appreciate all of you that share this love of mine and that you will continue to share this art with others………

As promised, I have three (3) winners – each person will receive a stencil of their choice up to a $40 value.  So, the winners are:

Sarah Hines – Ruth Mowry and Heather of 5th Wall Surface Design. 

I am thankful and delighted that so many people stopped by my facebook pages, blog and web sites.  Hope everyone will continue to find something to stencil………

Congratulations winners!!!

Back to the Basics

The Art of Stenciling;

Stenciling is a remarkably easy painting technique and here are some basic instructions for the art form.

Positioning the Stencil …..

Position your stencil, locating its open design elements exactly where you’d like the painted design to appear.  Then tape the outer edges of the stencil to the project with Blue painters tape.

Loading the Stencil Brush……

Pour a little paint onto your palette (painters palette or plastic plate), add one to two drops of an extender, and use the handle end of your stencil brush to mix the extender into the paint.  Next, holding your stencil brush straight up, pick up a small amount of paint with the tips of the brush bristles.  Then work the paint into the bristles swirling them in a circular motion on a clean section of the palette.  One trick to successful stenciling is keeping a “dry” brush – this is accomplished by removing the excess paint from the bristles.  Hold brush upright and with a firm, circular motion, rub the bristles onto a clean paper towel.  If the brush is too wet, the paint will bleed under the stencil edges. I suggest practicing on paper before attempting your project.

Applying the Paint…….

For a smooth stenciled surface, “swirling” is the best technique to use.  Hold your stencil brush perpendicular to the surface and apply the paint by moving the bristle ends in tiny circular motion.  To add texture and depth to a stenciled design, hold the brush perpendicular to the surface, but instead of swirling the bristles, apply the paint by dabbing the brush straight up and down; a process known as “stippling” or “pouncing”.  Whether you’re swirling or stippling, always start with a light touch and increase pressure as needed to transfer the paint to the surface.

To create shading within each stenciled design area, first create sharp, crisp edges by applying paint lightly all the way around the outer edges of the design opening.  As you work, blend the paint into the inner design area but apply less pressure to the brush and less paint.  By varying the pressure you apply to your brush and the amount of time you spend stenciling a given area, you can achieve a wide range of values with a single color.

For added contrast within a design, use more than one color.  Let each color dry before applying the next, use a different brush for each color, and leave the stencil in place until you’ve applied all the colors.  (Once you’ve removed the stencil, it’s very difficult to replace it in the exact same position.)  To keep the paint-dampened bristles of your brushes from drying out as you work on a project, place the brushes in a small plastic bag with a dampened paper-towel, until you need to use it again.

Here’s one important tip:  When you’re stenciling on top of a dark base-coat color, stencil the entire design in white paint first.  Then apply your colors over the white.  This technique is referred to as “Whiting-out” and helps to allow your colors to “pop” off the dark surface.

Stenciling of Fabric……

To hold fabric flat as you stencil it, apply repositionable spray adhesive to a piece of smooth cardboard.  (The cardboard doesn’t have to be as large as your fabric piece – just reposition the fabric as needed.)  Gently press the fabric onto the adhesive-coated board, and tape your stencil in place.

Mix one part fabric painting medium with two parts acrylic paint on your palette.  Using stencil brushes, stencil the designs as instructed in the basic stenciling directions above.  Make sure that the stencil is positioned over the area of fabric that is attached to the cardboard – this will keep the fabric from moving or stretching while you are trying to stencil.  After the paint has dried completely, heat-set the paint by placing a press cloth on top of the fabric and pressing the cloth with a warm iron.

Cleaning and Storing Stencils and Brushes……….

After using a stencil, clean it as soon as possible.  The longer the paint stays on the stencil, the harder it will be to remove.  One of the best products I have found in years is Dawn Power Dissolver!!  This product works better than anything else I have ever used.  If the paint has been there for a while or many many layers, spray with Dawn and let it soak for a while before trying to clean it off – then once it’s clean, do a final rinse with clean water and allow to dry.  Be careful when cleaning – this is when you can damage your stencil.

To clean your stencil brushes, scrub the brush over a brush scrubber under running water to remove as much paint as possible and then use Masters Brush Cleaner to clean out the remainder of the paint……lay them flat to dry.

Have fun with Stenciling and some of the best advice I can give, is to practice, practice, practice!!!