Free shipping on orders over $100! **After discounts have been applied & Continental US only

Stenciling

Let’s Chalk it up!!! Creation of a Chalk Board wall….

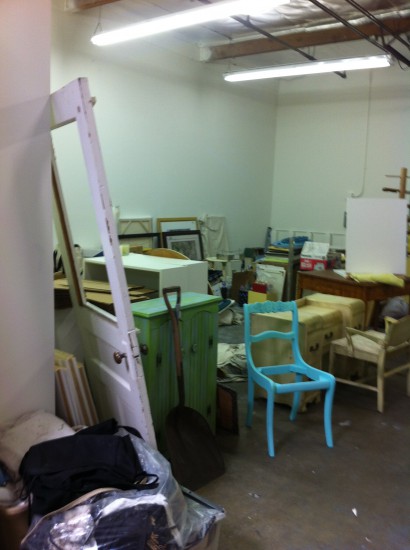
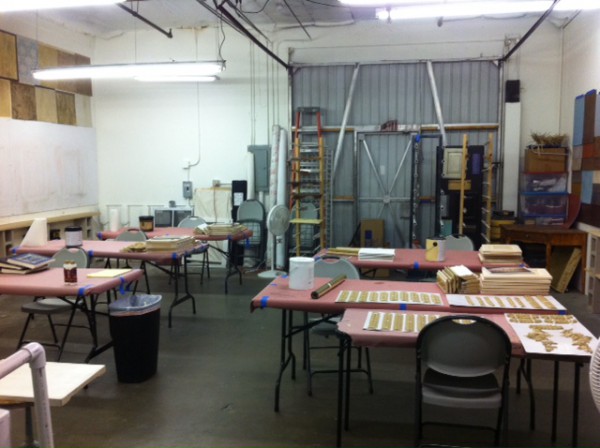
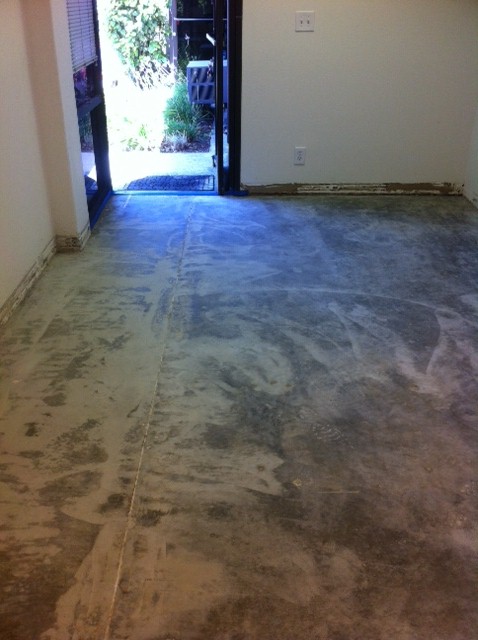
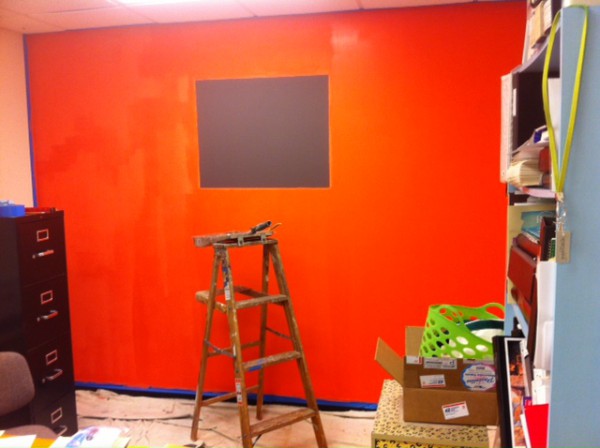
I have only been in my new studio space for little over a year (4th studio space in 25 years) – so it’s still a work in progress for me!  Time doesn’t always permit for me to complete a painting projects for myself.  But a few months back, I decided that I needed to clean up my office and one thing lead to another…….LOL  While I was cleaning up the floor area behind my desk – I decided that “NOW” was a great time to paint that wall!

office wall
office wall

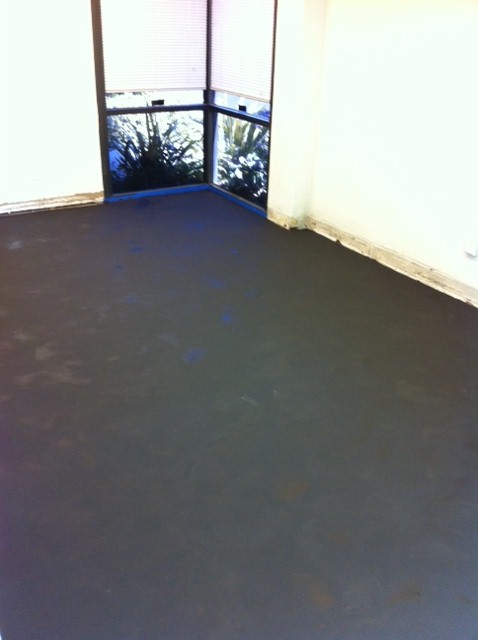
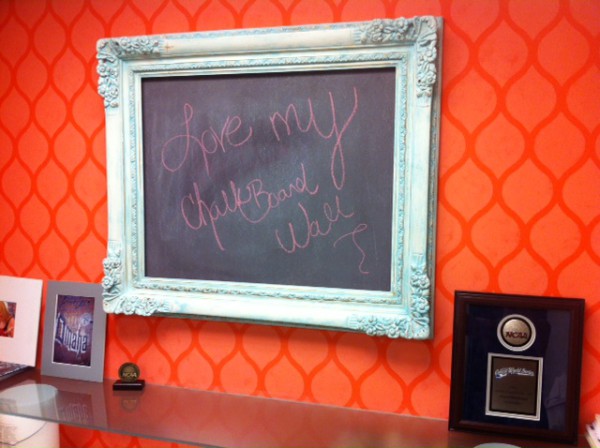
I had this idea running through my head for awhile and had wanted to create a Chalk Board Wall using the American Paint Company’s Chalk/Clay/Mineral based paints.  So, with the way things get done around here – I went into my studio and found a color spoke to me at that moment –  CORAL REEF🙂  and also Wild Horse’s for the center “framed Chalk Board”.

office2

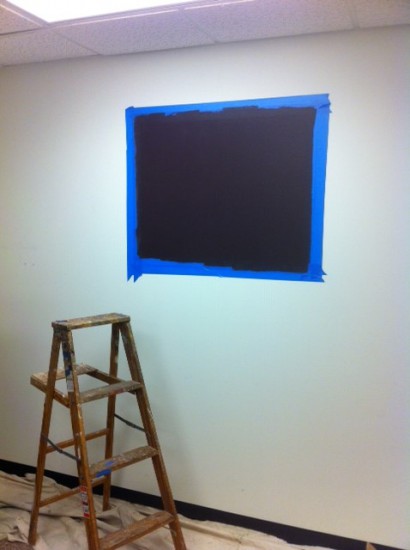
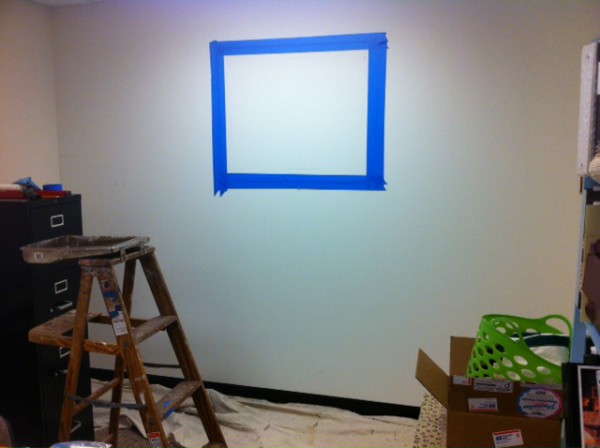
I grab some tape, a pencil and the frame I wanted to use.  Marked off the area for the Chalk Board and painted Wild Horses – I applied three coats, knowing I would season this area and use it as a Chalk Board.  While I was waiting for that to dry, I taped off the rest of the wall so I could paint the Coral Reef color.  I love painting with the APC paints – I had great coverage in one coat with the Coral Reef paint.

wall

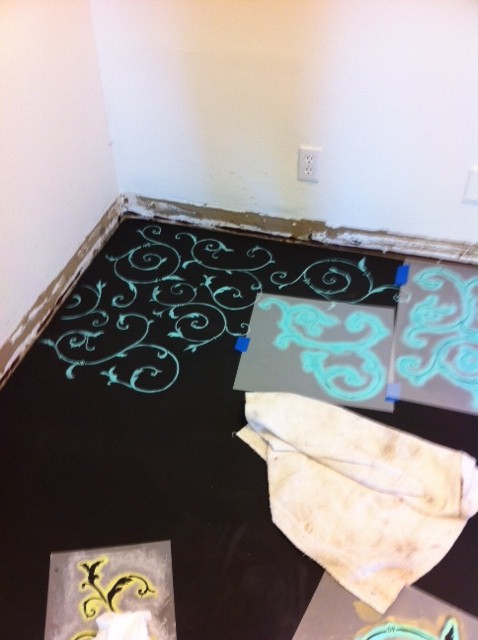
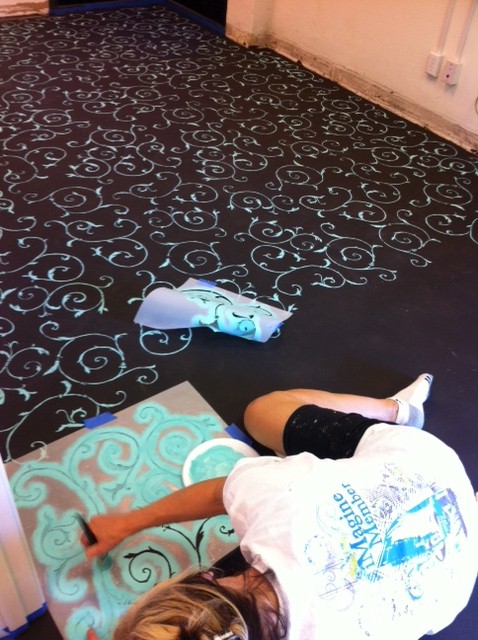
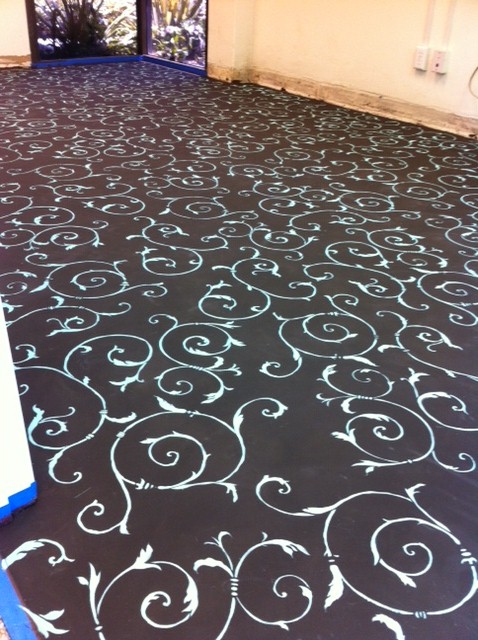
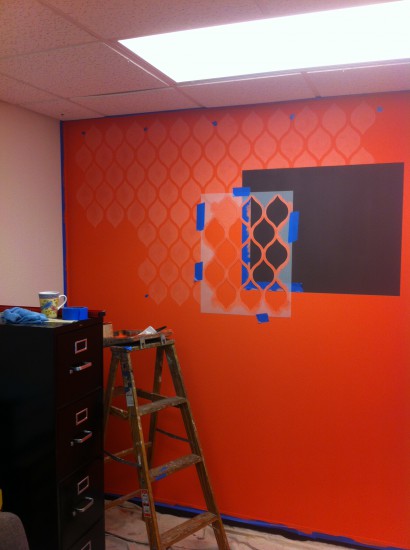
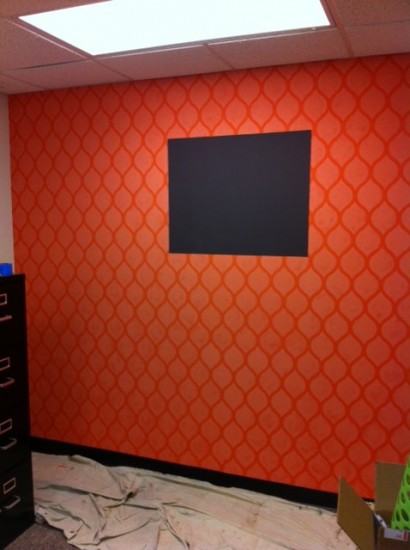
Now – I just couldn’t stop at that point 🙂 I went digging through my stencil designs and decided to pull out one of my newest patterns – Contempo Modern and stencil an all-over-repeat design.  I wanted a tone-on-tone look, so I took the APC Coral Reef and added some Home Plate to lighten it up – maybe around a 75/25 mixture for the stencil color.  The stencil pattern has registration marks to that you can work from right to left and top to bottom – so I just kept stenciling in every direction until I finished out the entire wall.

August 2014 170

wall1

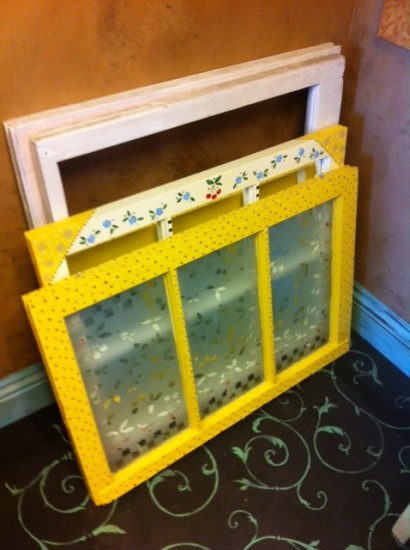
Then came the Frame project – this was a frame that I found at a wonderful little shop I like to stop by once in a while and just see what wonderful little finds she has hidden a away for me!!!  I like creating contrast for interest – so I went looking through my colors and couldn’t help but pick one of my favorite combinations – Surfboad and Home Plate.

frameframe2August 2014 232


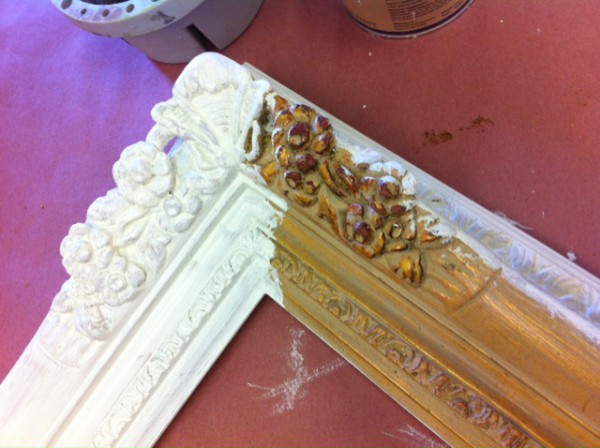
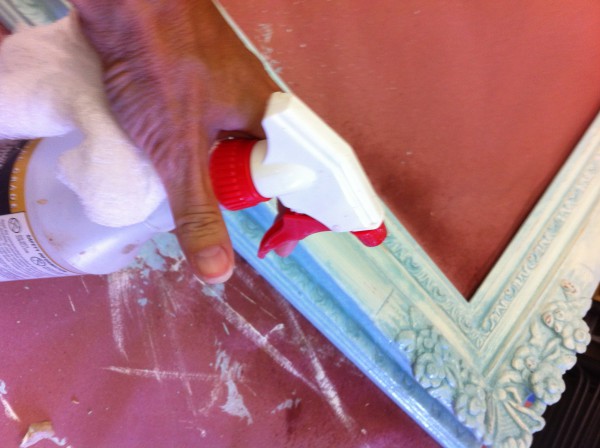
I started out by painting on two coats of the Home Plate – allowing each layer to dry in between and then painted on the Surfboard in a “hap-hazard” fashion (very messy looking).  Allowed this to dry and then came in with my “wet-blending technique” and blended the bad paint job of the Surfboard into the Home Plate – using wet cheesecloth.  I will even spray water onto the surface and blend the colors together.   As I was wet blending, I happened to expose some of the original frame color for some highlighting.

August 2014 229August 2014 236

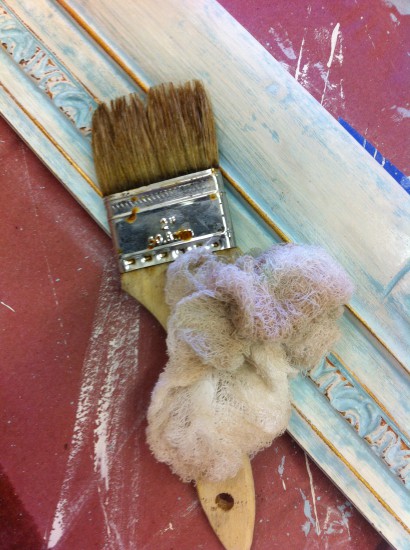
Once everything was dry – I wiped/brushed on a mixture of the Clear and Dark Waxes to create a medium tone wax finish.

Everyone that walks into my office loves the wall – they all say it makes them smile.  I’m not sure if I’m done with this project yet or not – time will tell if I execute the rest of my ideas floating in my head 🙂

chalk wall


Chalk it up Peeps!!!

Dumpster Diving – TrashFormations

I think there are many different things they call it these days – but I always referred to it as “Dumpster Diving”!  Not that I actually ever dove into a dumpster – but I have been known to look carefully through a few to find a “treasure” or two…..
Recovered "junk" to repurpose
Recovered “junk” to repurpose
I personally have been “junking” for at least the past 20 years. I think it’s kind of an addiction – once you get the BUG, it’s very hard to pass up a Yard Sale, Antique shop, Thrift Store or something that was “kicked to the Curb”……I like to say, I’m Junking 🙂 I started Junking with a friend many moons ago – we both loved to paint and felt the NEED to transform everything we bought. Our Junking days lead to a couple of books that we wrote together – Painted ChairsPainted WhimsiesTrashFormations and Painted Fabric Fun.
TRASHformations
TRASHformations
Painted Chairs was the first book I wrote and chairs had always been one of my favorite pieces to paint……I started collecting chairs with the vision to transform them all and write a book.  I was lucky enough to “score” the deal and Painted Chairs was published.  BUT, my addiction to buy chairs just couldn’t stop……at one point I had to rent a storage unit to store them all!  LOL  I finally had to give up and had the biggest YardSale of the neighborhood back in 2008…..most people assumed it was a multi-family event (but it was just my obsession to buy everything I saw)!!!
Old chair - ready for transformation
Old chair – ready for transformation
My Junking days had to be spread out – after letting go of the storage unit and Paying to store my “great finds” – I realized there just wasn’t enough hours in the day to paint all my junk and I had to quit buying everything I found!!!
Big score on frames!
I do have a few weaknesses – Old Sash Windows – Vintage Doors and Frames……these items are always hard to me to pass up!  I think part of my love for Junking is the search for something unique that speaks to you – whatever that may be.  Searching through Antique shops, yard sales, Vintage shops – Good Will and Salvation Army are two of my FAVS!!!
Old Sash Windows
Old Sash Windows
I have made myself a promise that I can’t buy anything else until I paint two items I already have…….I’m running out of room once again!!!
Old Side-light windows ready for transformation
I’m currently working on Transforming an old picture frame that will frame my Chalk Board that I painted on my office wall.  I’m using the American Paint Company chalk/clay/mineral based paints on this project.
Transforming an old picture frame
One more project to Up-Cycle and I get to go junking again.  For me – I feel I’m giving something discarded new life – keeping our planet a little Greener and I love taking the personality of the piece and adding to it’s natural charm.
Up-cycled projects
Up-cycled projects

 If you are looking for inspiration on your next TrashFormation – make sure to check out my books on line at www.artisticpaintingstudio.com Have fun painting something!!!!

Teaching – My True Passion

I never knew that I had such a heart and passion for teaching until I opened my first retail store in October of 1994 – The Stencilled Garden, located in Fresno, CA.

I had been decorative painting for about 5 years when I decided I wanted to open a place where I could share my love of stenciling with others. Over the years in which I offered my decorative painting services, I had many customers/clients indicate that they would love to learn what I did. This set my mind in action – that not everyone could afford to hire an artist to come paint for them – but there should be a place that offered supplies, specialty products, stencils and classes – so that anyone could learn and paint something beautiful in their home!

The Retail Shop Area

So I opened “The Stencilled Garden” to provide a place to buy stencils/products and learn the art of stenciling so you could do it yourself!!! I started offering classes on the art of stenciling as soon as I opened my studio/store and found that I “loved” teaching others to stencil.

Classroom area of studio

Many people believe that they have no artistic talent and to see someone’s face light up when they start creating with a stencil and how artistic they truly can be – is a Joy and Blessing for me! In the 18 years that my studio was located in Fresno, CA – I think I taught just about everyone in town to stencil 🙂

My studio quickly evolved into a decorative painting studio – where someone could buy products for just about any project. I started offering classes in Faux, Plasters, project classes and just about anything related to painting!!!

Workshop Finishes on Display

Well, I moved my studio January of 2013 to Southern California – can’t say I had much of a plan (other than I was ready for a change and my kids were all settled at college)! I once again opened up a new studio in Huntington Beach, CA – a creative place to inspire others to paint something! My studio offers many different products from stencil brushes and acrylic paints to specialty brushes to create a full wall finish – I’m a decorative painting studio that has everything for your projects, furniture, floors, ceilings, walls, and cabinetry.

Workshop in progress

I still find JOY in teaching others – whether it’s beginner holding a stencil brush for the first time or a fellow artist looking for new inspiration. My place is open to all – newbies – beginners – advanced decorative painters……you will always find the products you need, the advice to complete the project, the training to know what to do with your project from start to finish.

My classes are listed on my web site and private lessons are always an option too!!! www.artisticpaintingstudio.com/classes/

Jennifer having hands on training with a student

What else can I say – I LOVE to teach painting – share my talents and knowledge with others………Be Blessed!

Studio Floor Project

My new Studio located in Huntington Beach, California is starting to come together.

First things first – for some crazy reason I decided I needed a unique floor for the showroom (even at age 48 – I can still get down there, it just hurts more!)  The owners of my building were nice enough to humor me in removing the old carpet, glue, etc and have the concrete floor ready for my creative endeavors!!!

My clean concrete floor

Now it was time for ME to get to work on this project – I primed the floor with Modern Masters Zero VOC Basecoat in Black, two coats were applied (I just rolled this onto the concrete).  Once the MM Basecoat was dry, I tinted some RSCrete that I had left over – using Black and Brown to create a custom Espresso colored floor.  I troweled on two layers of the RSCrete to create the Espresso floor (you could just use a paint that is made for concrete) – the troweling was a lot of work and my age was sure showing!!!

Base color applied
Base color applied

With the concrete overlay complete, it was now ready for some decorative painting – I picked my stencil design – APS525 Verdalee Swirls and I wanted a fun color to go with the Espresso floor.  I decided to use the American Paint Company’s Chalk paint and made a custom color – 50/50 mix of Surfboard and Beach Glass and off to work I went!

Stenciling begins :)
Stenciling begins 🙂

At this point I really thought the stenciling would be easier than the troweingl of the concrete material – BUT I was wrong!!!  The stenciling itself was easy, it was the amount of time I spent on the ground – kneeling, squating, sitting, etc – no position was comfortable after a little while!!!

Almost done stenciling

I will have to say that this is my most favorite floor I have ever created – the colors are wonderful together and I love this design!!!  Once all the stenciling was completed, I top coated the floor with a material that I also tinted with a little Umber to age the stenciling (yes – I aged the stenciling – LOL).  I applied three coats of the top coat and will be protecting it with a final layer of Metropolis Epoxy Waterbased clear coat!!!

The complete Floor!
The complete Floor!

I did say when I was done – this would be my last floor!!!  Two weeks later, I receive a call for a floor project – bidding the job next week!  LOL

Artistic Painting Studio – 15102 Bolsa Chica, Unit E, Huntington Beach, CA  92649 * 714-386-3243  *  Studio Hours:  Monday – Friday 9am – 5pm


Finding the right paint color for you

Painting is one of the least expensive, quickest and easiest ways to immediately transform the look of a room.  With a change of color, any space can immediately take on a new personality.

Choosing the perfect color for a room is key!  There’s is no right or wrong color, it’s simply about people finding the right hue for them.  While it may be tempting to follow the trends, sometimes the “in” colors simply do not mesh with a person’s design style.  In such instances it’s best to go with what feels the best.  Choosing colors that impart a certain mood can also help create a dramatic, comforting or energizing space. Certain families of colors say different things and can create a particular atmosphere.

Here are some common colors and what they can do for design.

Green:  If the desire is for a relaxing, all-natural retreat, green may very well be the color to choose.  Green’s connection to nature makes the shade refreshing and soothing to the eye.  It can instantly create a calming effect in any space and people need not worry about going overboard with shades of green.  Complementary colors to green include shades of red and pink.  Use this accent color in draperies or on prints. Fill a vase with magenta-colored blooms and add a special pop of color.

Blue:  Another calming color is blue. It can make a room serene and soothing.  Blue is a cool color, which means it can also be used in abundance with little worry.  Made a bedroom a quiet retreat with the right shade of blue.  A touch of orange or peach blends well with blue.

Red:  An energizing and dramatic color, red demands attention.  It’s stimulating and provocative, and some people love an entire room of red. However, to others red can be overwhelming.  But red can be used on an accent wall or sparingly to spruce up a neutral color scheme.

Purple:  This color is often relegated to a girl’s room, but purple is elegant and regal and can add a touch of romance to a room.  Individuals torn over painting with red may want to try the drama of purple, which is a bit more subdued and mysterious.

Yellow:  There are few colors more uplifting than yellow.  This hue is reminiscent of a bright, sunny day.  A dark house can be brightened by painting a room in a soft shade of yellow that will reflect any visible light.  From bedrooms to bathrooms to kitchens, yellow is a versatile, illuminating shade.

Orange:  Another vibrant color is orange.  This hue can be captivating and friendly and alos brighten up a dull space.  Orange adds energy to a room, so it may not be best for bedrooms or other calming retreats, like a den.  People needn’t paint a room pumpkin to get the full effect of orange (burnt orange’s are wonderful).  More subtle shades, like apricot or terra-cotta, can also add the power of orange.

Pink:  Pink is a romantic color and ultra-feminine.  Pink has long been considered nothing more than a bedroom color, but when used in the right fashion, it can also add spirited whimsy to a living space.

Brown:  This earthy, wholesome shade is rustic and rich.  It can make a large room seem more cozy.  It also exudes a feeling of sensuality and durability.  Neutral shades of brown are very popular in homes because they can be paired with many other colors, including blue, green and pink.  One of my favorite combinations with brown is teal!

White:  Some people think the absence of color is ideal (not me).  White is fresh, bright and clean.  It’s also a timeless choice for consumers who can’t decide on another color.  White goes with just about anything, but if all white seems too sterile, think about mixing white with shades of beige for just a little color.

Experimenting with color can dramatically change the look of any room in the house.  Consider using a online room simulator to try out different shades before painting.  I also recommend purchase a quart of the color you choose and try it out on all walls in the room to see if it’s creating the feel you desire.

I found this article on color sometime ago – Metro Creative Connection – and felt is was worth sharing, I have added some of my photos to inspire you and some of my personal opinions on color 🙂

Stencil Give-Away!!!

I had SO much fun with the last Stencil Give-Away that I hosted………That I decided to do it once again!!!  What a great way to start off the new year – with a fun way to say “Thank You”!

I will be giving away 3 Stencil Shopping Sprees – YES, there will be THREE Winners!  So, the more times you post on my blog and my facebook pages, the more chances you will have to win.

Here are the different ways to enter:

First, visit my web sites www.artisticpaintingstudio.com or www.stencilledgarden.com and look around at what stencils you may choose for your shopping spree.  Then, simply leave a comment on this blog post about your favorite stencil that you would choose if you win.

Second, go to www.facebook.com and “like” both of my pages “Artistic Painting Studio” and “The Stencilled Garden” – make sure after you “like” the page to leave a comment telling me what stencil you would choose if you win.

Third, if you already “like” me on Facebook, then simply leave a comment and share the post about the give-away.

It’s that easy, just make sure you leave a separate comment on both Facebook pages and here on this blog post to Triple your chances to win.

The winners will be chosen on March 1st @ midnight –  there will be one winner from each place of posting – Facebook page “Artistic Painting Studio – Facebook page “The Stencilled Garden” and from my blog post www.studiojrenee.com

Each winner will win a shopping spree worth $50 of stencils – SO, start entering and good luck to everyone!!!

Thank you so much for your continued support over the past 23 years!  Good luck to everyone, the Winners will be announced on Friday March 2nd…………