Free shipping on orders over $100! **After discounts have been applied & Continental US only

Stenciling

Hammered Metal Drawers – Hometalk Live Demo!

My great find – the Hutch base!

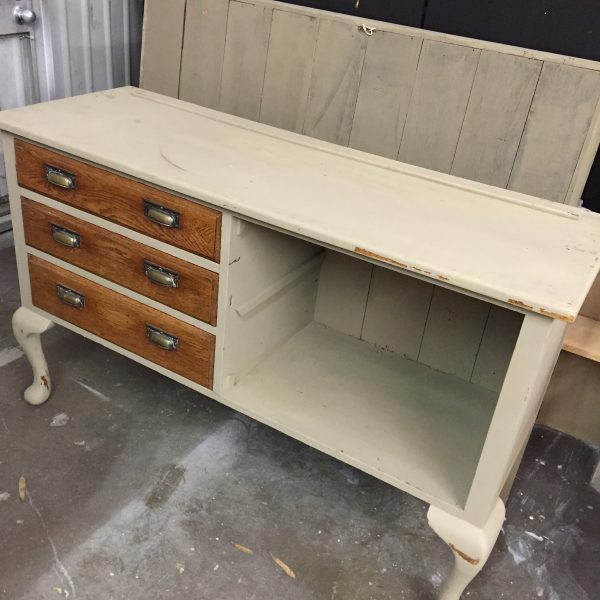
So here is the picture of the Hutch that I’m working on – this is the before picture.  The drawers were never painted, but someone has a love with “Pledge” and I felt it was best to sand it all off – paint and all!!!

Here are my drawers all nice and sanded – ready for a fabulous Hammered Metal Finish!!!

So let’s get started with my favorite primer XIM Bonding Primer – one layer should do the job and then allow to dry.

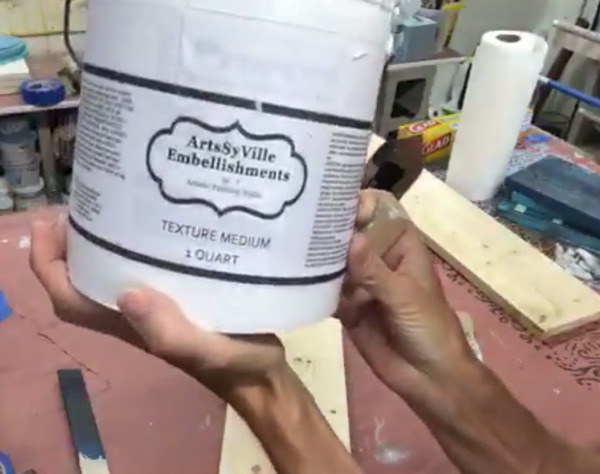
Next, I taped off the center raised panel and was ready for the next step.  I applied a thin layer of my ArtsSyVille Embellishments Texture Medium – you only need it to be about 1/8″ to 1/16″ thick – just enough to get the print of the roller.  I used a trowel to apply the medium, but you can use a hotel room key, styrene applicator, putty knife, or anything that you can get the product onto the surface.

While the Texture Medium is wet – you need to roll through it with the Fauxy Roller Ostrich Pattern.  I rolled through twice to get a pitted/hammered metal look – allow the texture to dry (this can take several hours – but make sure it is completely dry).

Once the texture has dried – you will want to sand down the high peaks – I used 150 grit sandpaper. Remove the tape and clean up the edges if necessary.  Wipe down to remove all the dust and make sure the surface is clean.

The next step is to paint the surface with Modern Masters Antique Copper Metallic Paint – I applied two layers allowing each layer to dry in between.  Metallics can be a little soft – so it’s best to allow the paint to dry overnight before applying the glaze layer.

Next we are going to create a glaze – I used Modern Masters Wall Glaze and Modern Masters Glazing Colors Van Dyke Brown.  My favorite recipe is 1 cup of glaze to 3 tbls of Van Dyke Brown – this creates a nice balanced glaze.

Apply the glaze over the painted surface – 100% coverage and then use Cheesecloth to remove the excess glaze leaving behind enough to get into the details of the wood and texture.  You can remove as much of the glaze as you would like or leave as much behind – it’s a personal thing.

Allow the glaze to dry overnight (at least) glaze can take a good 24 hours to dry completely.  Then make sure to apply at least several layers of Top Coat to protect the finish.

Supplies used for this project:

XIM Bonding Primer (Buy Here)

ArtsSyVille Embellishments – Texture Medium

Fauxy Rollers – Ostrich Skin Roller

Sandpaper 150 to 220 grit

Modern Masters Metallic Paint – Antique Copper

Modern Masters Wall Glaze

Modern Masters Glazing Colors – Van Dyke Brown

Cheesecloth

Application tool – Trowel, room key, putty knife, etc.

Top coat of your choice


Hope that you enjoyed this project!

Blessings,

Decorative Signs: Stenciling Techniques

Some of the decorative signs I started painting with dry brushing techniques and stamping rollers in the previous post are ready for stenciling! I am going to do two different techniques, a dry brush stencil and a foil transfer. See the previous posts in this series: Base Coats and Adding Texture.

On two signs I’m going to dry brush stencil the words “Love” and “Faith.”

You will need:
Word Stencils (Stencil Garden #877)
Stencil Brushes
Paint
Tape
Rulers

Dry Brush Technique:
Start by centering your stencil on your work. Using two quilters rulers which are see-through, one on each side, can help center the stencil easily by allowing you to just move the stencil until the distance from each side is the same. Once you’re happy with the centering left and right, center from top to bottom and then tape down the stencil.

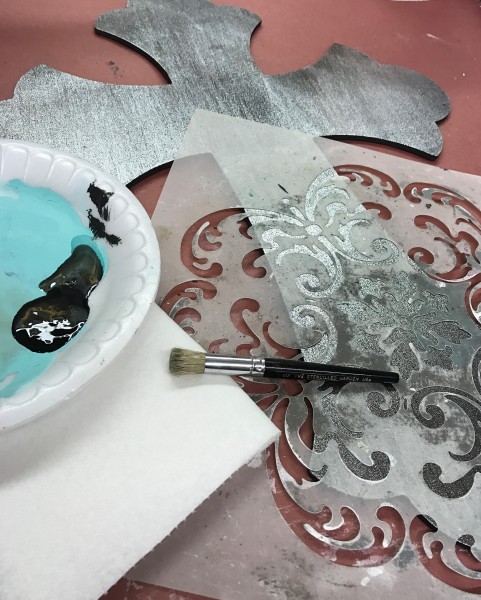
Wet your stencil brush with paint, then swirl on to a foam plate or palette, then dry it again on paper towel. It might seem like you’re taking all the paint off the brush, but this is what you want to keep the sharp lines of your stencil. Use this dry brush to stipple or pounce the color into the void of your stencil. Stencil brushes are round with a blunt cut and have stiff bristles which is necessary for traditional stenciling technique.

You can choose to pounce on the color or swirl it on, but a light color over dark surface will work better with the pounce instead of swirl. You can check on your coverage by lifting up a corner of the stencil, making sure to hold the stencil in place with one hand. Chalk paints will dry lighter, so keep that in mind, but also you can’t keep going back over it or you’ll start to remove some of the paint. You will need to let it dry before doing a second coat.

I used Modern Masters Silver Metallic Paint for the word Faith. I used the same technique as with the word Love, putting a bit of paint on my plate and swirling it into the brush and then wiping it on a paper towel before pouncing it into the stencil areas.

Now these signs just need some time to dry, then I’ll put on a finish coat to protect my work.


On a third sign I’m going to put the word “Hope” on it with decorative foil. Hope is always something good to have! This board was first finished with a diamond pattern and stamping roller which creates a really great textured background.

You will need:
Stencils (Stencil Garden #877)
Foil Adhesive
Foil
Stencil Brush
Scissors

Tip: My ArtsSyVille Foil Adhesive is simple to clean up, water soluble. Your stencil will get some adhesive on it during this process, but it will wash off easily.

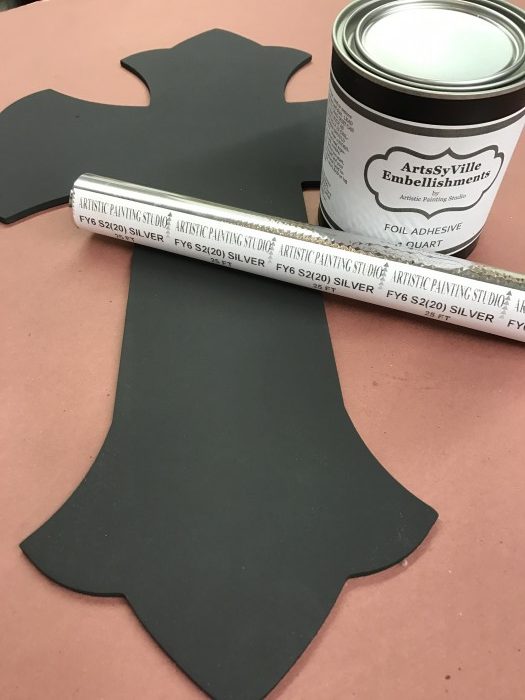
Start by centering your stencil and taping it down. Using the foil adhesive and a stencil brush, pounce on the adhesive through the stencil. Keep the brush rather dry so the adhesive will not bleed under the stencil. Stipple the foil adhesive over the stencil twice to make sure it has good coverage.

The foil adhesive will wash off with water, don’t worry that you’re ruining your stencil!

Remove stencil carefully, and give the adhesive time to dry. Don’t rush to transfer. With the foil adhesive you aren’t limited to a window of time. You can leave it for days and even weeks before transferring the foil!

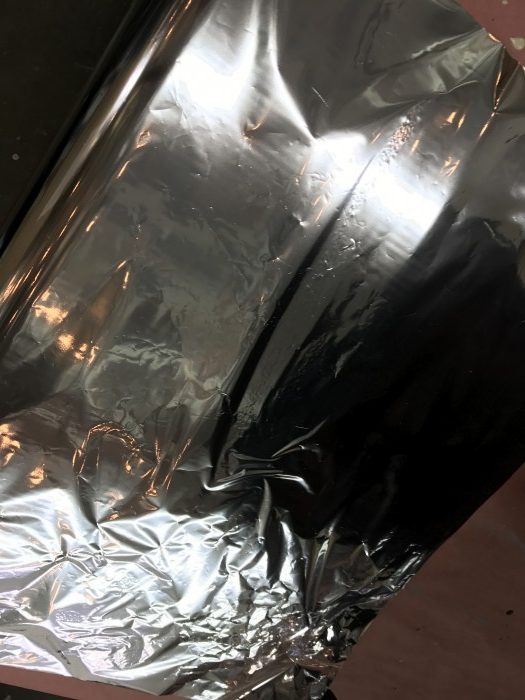
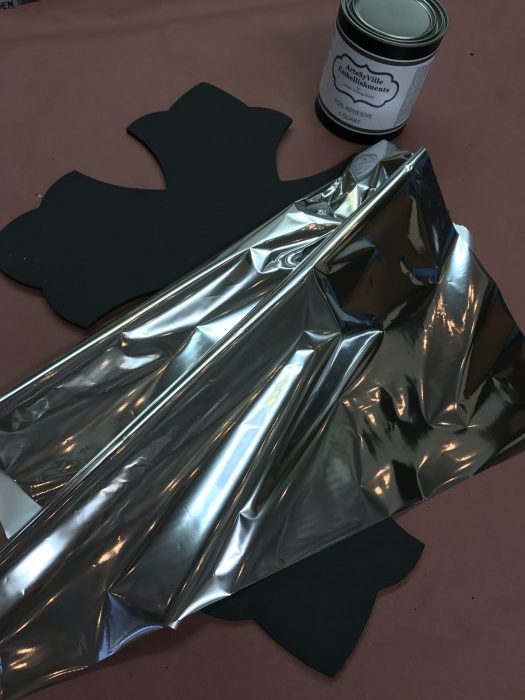
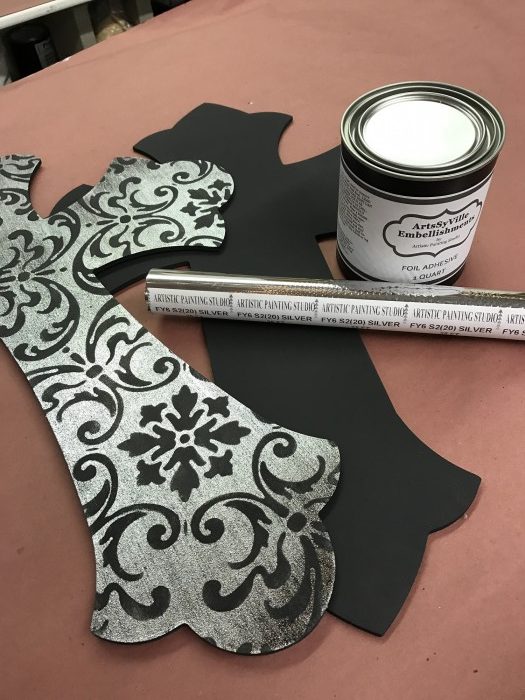
Once your adhesive has had enough time to dry, use scissors to cut your foil to size. With the metallization on the back, lay the foil over your project. Using a soft cloth, rub the foil and then pull back just a part to take a peek at your work.

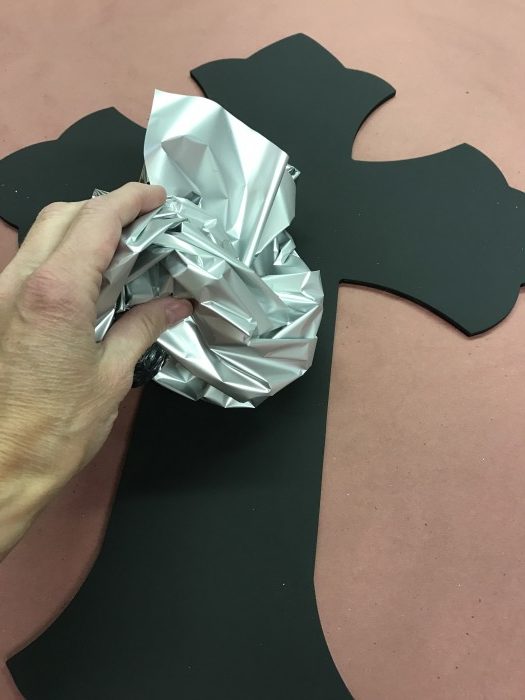
If you want to transfer a lot of foil, use a scrubber brush. You can control how much foil is transferred by varying the pressure you use on the brush. Once you’re happy with the amount of transfer, peel off the film. Top coats are a must when foils have been used to protect the finish and cover any adhesive that hasn’t adhered to foil.

I hope you have enjoyed this series of projects! As always, we love to see what you’ve made with metallic foils and stamping rollers!

Decorative Signs Project Series:
1. Base Coats
2. Adding Texture
3. Stenciling Techniques


Decorative Signs Project: Adding Texture

This is the second in a series on decorative signs. See the first post here: Base Coats.

Another option for adding texture to a project is by using texture medium and stamping rollers. Continuing work on the Decorative Signs that I started in my previous post, I’m going to make two more that have a raised texture background to add interest.

You will need:
ArtsSyVille Texture Medium
Mini Trowel
Stamping Rollers
Board
Chalk Paint
ArtsSyVille Foil Adhesive
Metallic Foils

Apply Texture Medium:
You don’t need to do anything to prep your board, you can put ArtsSyVille Texture Medium right on top of bare wood. It has really good bonding, so you can skip priming. I have two mini trowels I like to use for this, one is 4.5” and the other is 6.75” both are great sizes for small projects like this.

The texture medium is lightweight and creamy. I just use a stirring stick to put some on my project and then use the trowels to smooth it out. Use just just a slight angle when pulling the trowel across and work to minimize lines in the medium. You can also control the pressure of the trowel to get the desired depth of product. It doesn’t need to be thick! One sixteenth to one eighth of an inch is enough for the stamping roller to imprint in it.

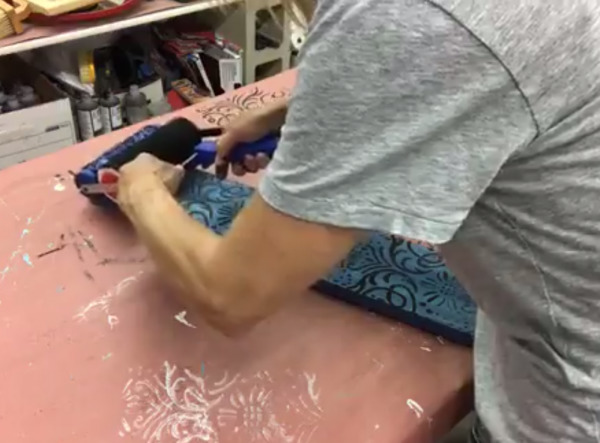
Once you have the texture medium covering your board, use your trowel to remove excess product to get it down smooth. Clean up the edges, I just use my finger to do this, and then you’re ready to roll.


Tip: The texture medium could also be put down with a brush, that would create a texture because the brush lines will be visible.


Using the stamping roller to create texture:
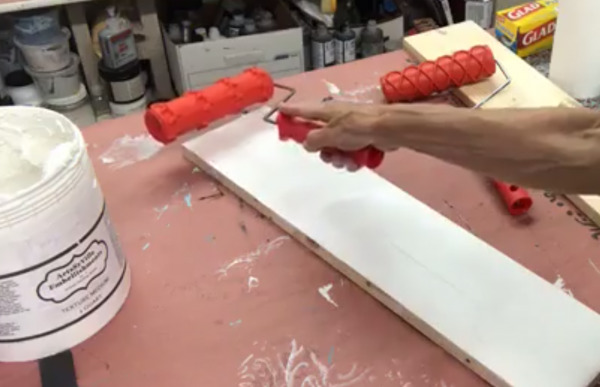
I’m using the “Between the Vines” roller on one of my boards. Just roll your chosen stamping roller down the project, slow and steady. If you aren’t happy with the first try, trowel it out and do it again!  I centered three of the vines on the “Between the Vines” stamp across the length of the board and then rolled it again through the width to create a box pattern. I just eyeballed the spacing, but I think it turned out pretty great!

Use your finger to clean up the edges of your project. Once the texture medium dries, you would need to sand down any of these rough edges, so it’s much easier to take care of it while it’s still wet.

You will need to do some sanding on the design once it has dried to clean up any peaks and ridges. A smooth finish is critical when going back over the project with stencils or foils.

On another board I’m going to use one of my favorites, a diamond pattern that creates a linear elongated diamond shape.

The texture medium will take a few hours to dry, then you can sand it to take care of the peaks that are made when rolling the pattern rollers through the texture medium.

Adding design with a stamping roller:
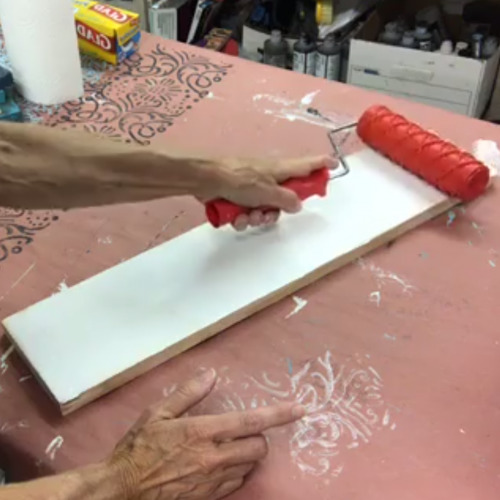
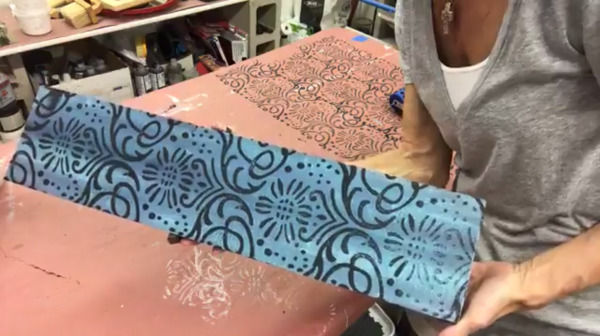
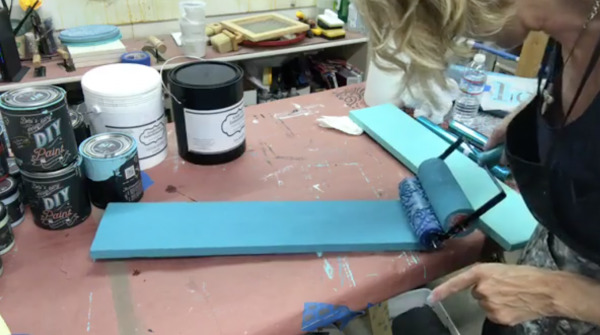
When the texture medium on the board with the diamond shape was dry and sanded down, I painted it, then I added a little more interest with a stamping roller. I used Debi’s DIY Paints in Seaglass with a Chrysanthemum pattern roller.


Decorative Signs Project Series:
1. Base Coats
2. Adding Texture
3. Stenciling Techniques

Decorative Signs Project: Base Coats


Creating your own statement signs is a great way to experiment with different texture techniques and try out different roller designs. Inexpensive wood planks are used so the imperfections can be highlighted with paint to create a rustic, distressed feel.

I’ve used a color palette in shades of blue to give just a little bit of depth to the background while allowing the words I’ve stenciled on top to pop. When using chalk paint, allow each layer to dry thoroughly before moving on to the next color, so this project will take a couple hours to complete.

You will need:
Boards, pine is inexpensive and has texture
Chalk Paints, I recommend DIY Paint by Debi’s Design Diary
Art Wash Brushes
Domed Brushes
Spray Bottle of Water
Cheesecloth
Foam plate or palette
Paper Towels
Tray
Glad Press n Seal

Base Coat:
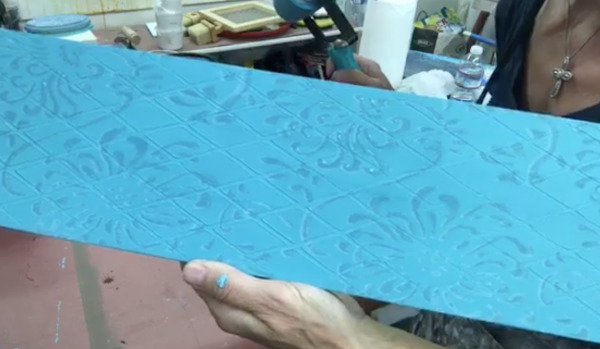
Cover the edges and front of your board in a single color. I like using Art Wash brushes for this because they pull and push the paint easily, allowing the finish to come together smoothly, even over the uneven surface of the wood. Allow this coat of paint to dry. The two base colors I have chosen are Hey Sailor and Mermaid Tail.

Dry Brushing:
This technique pulls out the texture and imperfections of your board and really gives depth to your finished piece. Dry brushing is best done with a domed brush or any stiff bristle brush. These brushes have stiffer bristles in a flat domed shape. They can stand a bit of pressure and won’t lose hair in the process. Brushes that are too soft won’t move the paint around well, you just want it to grab on to bits of the surface.

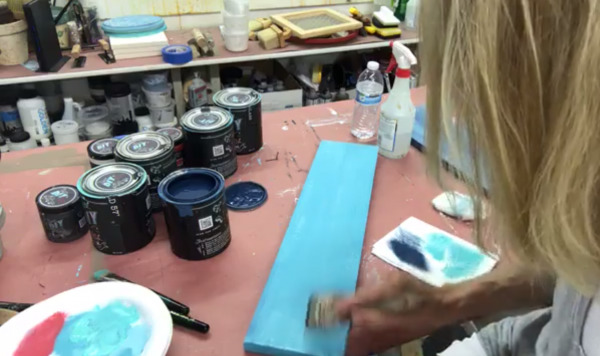
Start by dipping your brush in the paint and then swirl the paint on to a palette or foam plate. Really work it in. Then rub the brush on a paper towel. You want to make sure it’s dry. Now you can start working the paint over the surface of your piece.  Dry brushing is just meant to “highlight” the surface and create depth/texture.  I’ve used a combination of three colors on top of the background during this dry brushing stage. I chose colors in the blue family, but also a warm red, which when mixed with the background color creates a nice purple tone.

Keep your brush dry. The drier the brush, the more control you will have over the color. As each layer of paint dries, the texture will stand out more and you can decide if you want to keep going.

TIP: Try taking a picture of your work and evaluating the photo. You’ll get a different view that can help you decide to keep working or move on to the next step!

Once you have worked in your mix of colors, wet a piece of cheesecloth with a spray bottle of water and rub it lightly over your piece to blend the colors. Any areas you aren’t happy with can be rubbed out in this same way. Let your dry brushed layer dry.

Adding design with a stamping roller:
Stamping rollers create a continuous design that can really add interest to your project. Our stamping rollers are 7” wide which covers a standard plank of wood with a bit of room to spare, making this a perfect first project to get comfortable with the stamping roller.

I like to cover a cafeteria tray with Press n Seal wrap and use this to load the foam part of the roller. It makes clean up really easy! Pour a bit of paint onto your tray and spread it out with a brush. Before loading the foam part of your roller, give the roller a quick spritz of water from your spray bottle. Not enough to soak it, but this bit of moisture will help the roller pick up the paint.

TIP: If your roller has spots that didn’t get completely loaded, use a brush to go over those areas of the foam

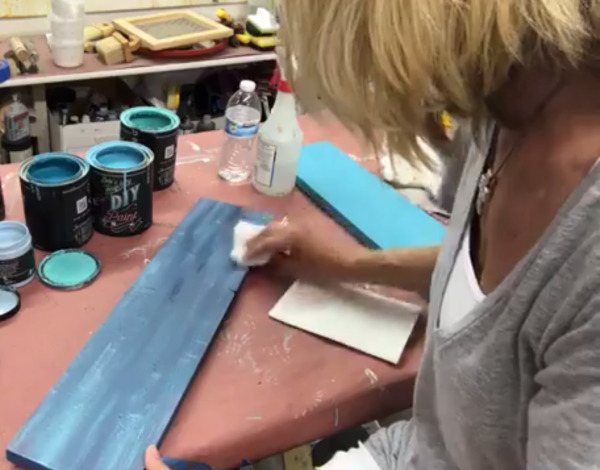
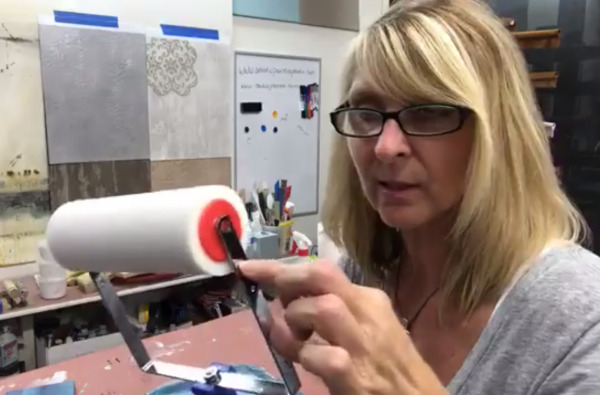
I keep the foam roller in the outermost holes while loading, moving it back when I’m ready to add the pattern roller. When your foam roller is ready to go, move it to the inner set of holes so your pattern stamp can be placed on the outside. Give the pattern roller a few rolls on a clean sheet of paper to transfer the paint to the design. Now you’re ready to carefully roll your design across the plank. I chose colors that create a tone-on-tone feel for the background of my signs. Nothing with too much contrast so it doesn’t take away from the words which I will stencil on later.

Let this layer of paint dry and then it will be ready to stencil!

Decorative Signs Project Series:
1. Base Coats
2. Adding Texture
3. Stenciling Techniques

A Year Long Transformation!!!

I always have high hopes when I find a great piece of furniture to transform!  LOL  But, then reality sets in and I discover that my work schedule is just so busy, that I don’t have much time to paint!

I found this piece (guess is was a China hutch at one point) at least a year ago – thought it would be wonderful for my office and I would use it as a book shelf.  The current book shelf I have is falling apart and needs to be replaced!!!

Whatever paint that had been used on it was just scratching off – so I decided to take it back down to the wood……You know I LOVE to sand – NOT!!!

By the way – those wonder little dollies that the legs are resting on can be found at Harbor Freight – they come in two different styles and I own both!!!

Dollies for furniture

Now, the time that had already passed from the date I brought this to the shop, to the time I started to sand it was over a month or so…….so much for getting anything done fast!

Hutch section

Time to start at least the drawers.  I created my Hammered Metal finish using the Texture Medium and Ostrich Roller.  Tape off the drawer fronts to isolate the area, then trowel or brush on the Texture Medium.  While the Texture Medium is still wet, roll the Ostrich roller through it several times (I like the messy look).  Just allow the Texture Medium to dry and then sand down any of the peaks or rough areas.

Texture Medium & Ostrich Roller
Products used

Once the drawers were dry and sanded – then I painted two coats of the Modern Masters Antique Copper. After the Paint was dry, then I added a layer of glaze to create depth – Modern Masters Wall glaze and Tobacco Brown Colorant.

Textured, Painted and Glazed
Drawers Finished

All the drawers are finished – now it’s time to tackle the rest of this piece……LOL

Adding some color!

Finally adding some color to the base section – I started this in September of 2016 and I hate to admit that it’s April of 2017 and I’m still working on the same piece of furniture!!!  Talk about being a little slow…..

This was painted with DIY Paint Seaglass by Debi’s Design Diary – I love their Chalky paints.  Easy to use and great coverage.

Hammered Metal finish with Embossed Stencil

The ends of the cabinet were created with the same technique as the drawer fronts and I just added the Hampton Medallion stencil embossed with the Texture Medium (TM is wonderful for embossing stencils)!!!

Top of cabinet

I created a “Wet Blending” technique using both the Seaglass and Mermaid Tail DIY Paints and then stenciled with Bronze Foil!

Bottom section completed!

Bottom section of this cabinet finally completed – I think it’s at least June at this point!!!

I used my Foil Adhesive and Bronze Foil to transform the hardware!!!  This was soooo fast and easy!  Just apply one layer of Foil Adhesive and allow to dry to a firm tack and then transfer foil – I didn’t try for 100% transfer, I liked a little of the original color coming through.  Top coat to protect!

The massive hutch finally started – one coat of primer done!!!  This piece is really heavy!

It’s sometime in July and the hutch is moving along.  The back section of each “cubby” was created with the Hammered Metal finish – Texture Medium and Ostrich Roller – apply the first layer of paint.  Modern Masters Antique Copper – applied two coats!

Just about finished with the painting!!!  First coat of DIY Paint, Seaglass – love this stuff!!!

The complete hutch/cabinet – yes, I really do finish things!  I have discovered that if there is NO deadline for something, it takes me a year to do it……..that’s really not funny but it is what it is!

For complete details on the most of the steps to this project, watch the videos posted below – I did tape most of the process!!!

Hope you enjoy watching the process and my goal for my next project is that it only takes 6 months and not a complete year!!!  Next project in line is my dinning room table – hoping to start in October!!!  Let’s see how that works out 🙂

Blessings to all,

Jenn


Hometalk LIVE DIY – Metallic Foiled Crosses!!!

Large Wooden Crosses

When I discovered these large wooden crosses – I immediately fell in love and knew I had to Foil them!  All my friends and family have a cross wall in their homes and I knew these would be great gifts once I was done making them fabulous!

So I ordered a ton of these crosses, knowing that once everyone saw the transformation – you would want one!

Primed Crosses

I started out with priming them (probably not necessary – but I prime everything)!!!  The priming did raise the grain of the wood – so sanding was necessary.  Just a light sanding with 220 grit sandpaper (btw – any paint I had used would have raised the grain of the wood – so sanding would be necessary no matter what) and I was ready for the next step.

Painted with Little Black Dress and ready to foil

I decided I wanted some contrast with the Silver Foil I was planning to use and painted the cross Black using Debi’s Design Diary DIY Paint – Little Black Dress.  I love using this paint – one coat of the Little Black Dress and I was done!

Now it’s time to get Foiling!!!  So, let’s talk about foils and what they are.  The metallic foils I use are a metallization on the backside of cellophane and we need a very tacky surface to transfer them.  You also want to make sure that you are working with easy to release foils – both of these things are necessary for a an easy and fun Foil Finish!!!

Transferring the Foil

First things first – let’s start with my amazing Foil Adhesive and apply one coat to the painted cross.  Allow this to dry to a firm tack (this can take 30 to 60 minutes and it doesn’t matter how long you leave it before transferring – it will never dry beyond a firm tack).  I used a Wooster low nap roller and rolled on one coat, you can easily see where it is – as it is milky white when applying and dries clear.

Now that our Foil Adhesive has dried to a firm tack we are ready to get Foiling 🙂  I have cut a piece of foil large enough for the project (if you have a smaller roll – cut enough pieces for you project). Lay the foil onto the tacky surface with the “shiny/colored” side facing up and smooth out the surface using a terry rag. Start transferring the foil by rubbing back and forth with the terry rag and see how much transfer you are getting – lift up one side of the foil and “peak” under to see the transfer.  If you have not received the transfer you were looking for – place the foil back down and get out your scrubber brush and scrub the surface in a vertical motion, then check again.  Once you are happy with the Foil transfer – remove the foil cellophane and you will have a Bright and Shiny Silver Finish.  No need to wait for anything – we can move onto the next step!!!

Pouncing Foils

(Pouncing Foil Option – crinkle foil up into a ball with the “shiny” side on the inside of the ball and pounce the foil onto the surface.  Keep re-positioning the foil to a new area and pounce as much coverage as you desire).

Stenciling with DIY Paints – Little Black Dress

I choose my Hampton Medallion stencil for this project – I love how it looks with in a all-over-repeat and figured it would be great for this project.  Position stencil at the top of the cross for your first repeat and attach with blue painters tape.  I’m using the DIY Paint Little Black Dress for the stenciling – I know this paint will cover very well.  For detailed stenciling instructions – here is a link to my Stenciling Video. Stencil the Hampton Medallion using the Little Black Dress DIY Paint and a dry brush technique – keep re-positioning the stencil until you have covered the entire cross.

Once everything was dry – I drilled a small hole at the top of the cross so that I could use ribbon to hang the crosses.

Here are a few other samples I created with the same process – just changing up the color options.

For more information on working with foils – check out this video – Installing Foils.

Hope you have enjoyed this fun project and get foiling!!!

Blessings,

Jenn