Free shipping on orders over $100! **After discounts have been applied & Continental US only

Odds & Ends

Chalk Couture: Today I Choose Joy

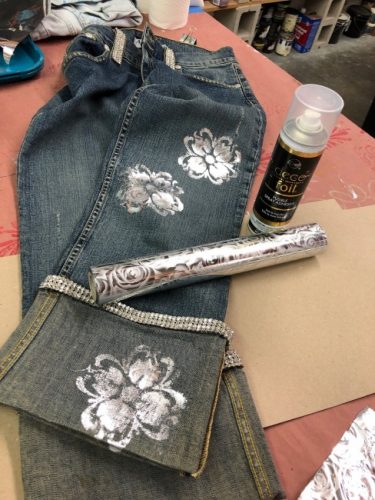
Have you heard of Chalk Couture?? I’m sure you have at this point! It’s pretty dang popular and I had to try it out because I mean, why not?? So far I love the super cute transfers and they work so stinking well with my foils and foil adhesive (:

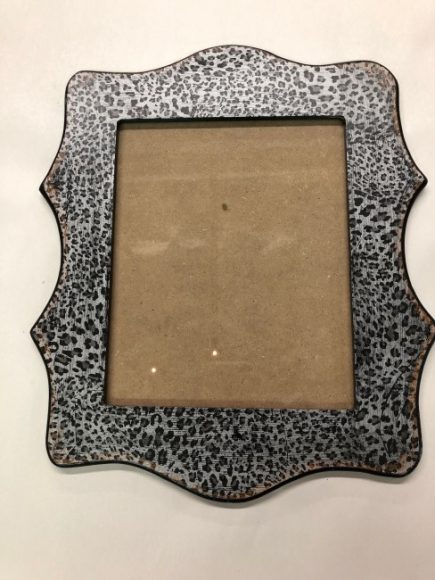
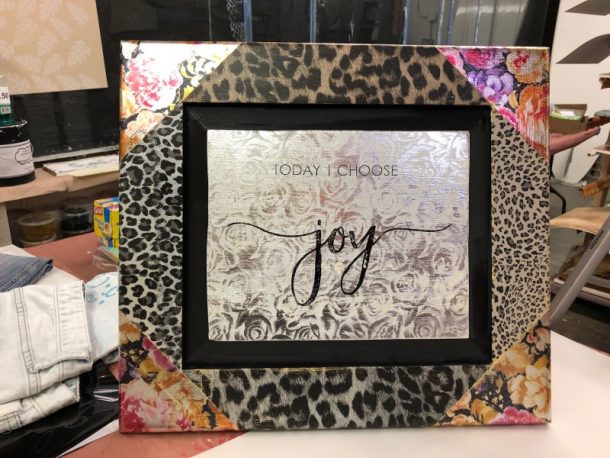
Look at how cute this little project turned out!! I used quite a few of my new foil patterns on the frame and then I used the cute Chalk Couture transfer “Today I Choose Joy”.

Chalk Couture Transfer

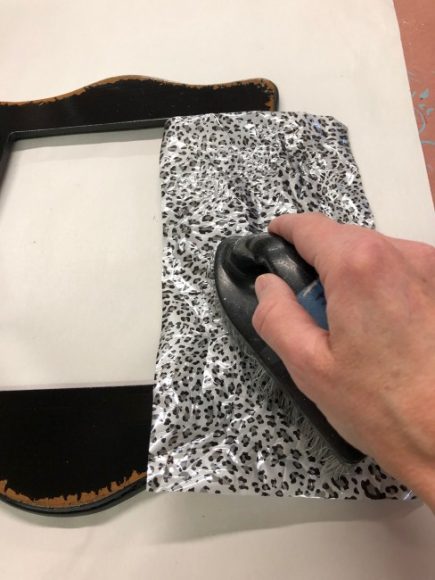
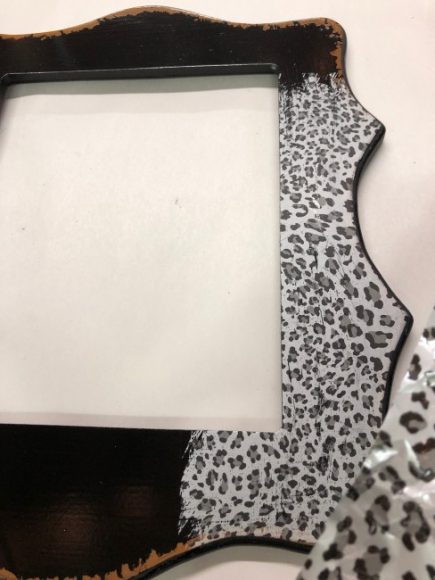
Learn How I Created This Frame…

Now for the Chalk Couture Transfer…
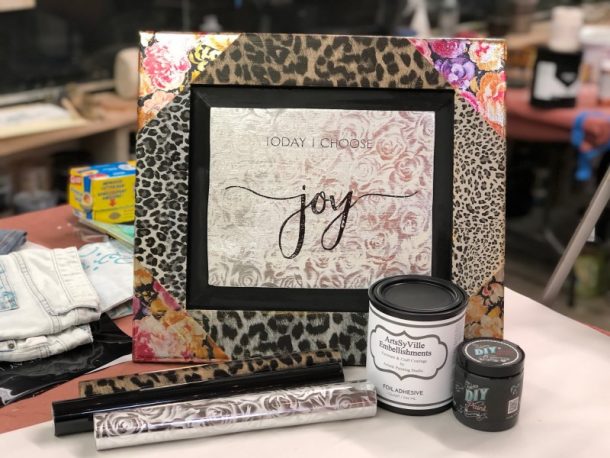
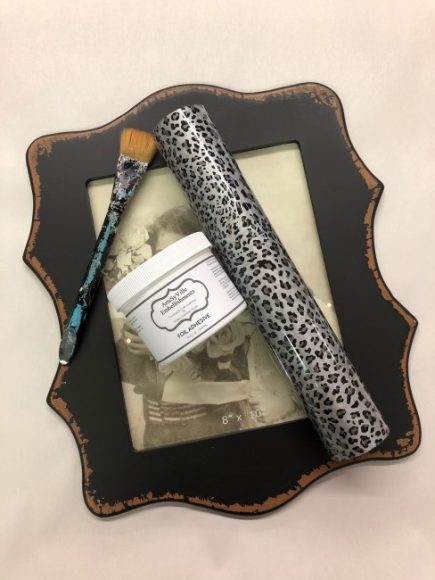
Products I used:

Chalk Couture Transfer

Chalk Couture Kit

Foil Adhesive

Foils

Stamping Roller


Foils & Fabrics: How To Upgrade Your Wardrobe

We are soooo excited about this new Fabric Foil Adhesive Spray that we finally found!  It’s a game changer because it’s washable and so are my foils!  Yes, we can machine wash our projects. Just make sure to not use the dryer! You will have to air dry all of your projects 🙂

So let’s get started…

Grab one of your favorite stencil designs, I choose my Hampton Medallion stencil, and spray the back with a repositionable spray adhesive. Wait a minute or two for it to dry and then position the stencil on your pant leg of a pair of jeans.  You always want to make sure to use the spray adhesive so that you don’t get any under spray on the design when you are spraying the Fabric Foil Adhesive.  Then you will tape around the stencil to prevent any overspray as well.

Now grab your Fabric Foil Adhesive Spray…

Holding the can about 4 to 6 inches away from the fabric, spray over the stencil openings to completely cover the design. Remove the stencil and clean as soon as possible. Yeah… this stuff isn’t that easy to remove, BUT while you’re cleaning your stencil the Fabric Foil Adhesive Spray is drying and it needs to dry for about 10 minutes.  Once the ten minutes have passed, lay your foil over the design covering it completely and use a hot iron to transfer the foil.  Allow the iron to sit in one place for at least 30 to 45 seconds and then move it to another section of the pattern to cover the complete design. Make sure to iron every section!

Once you are sure you have completely ironed over the pattern, allow the foil to completely cool down.  Do not try to remove it while it is hot!  Once it’s cooled off just remove the foil sheet that the foil will be transferred to the stencil design only!

Wow!! This is pretty easy and fun…

Just imagine what all you can do with your current wardrobe!  The possibilities are endless with all of the different stencils and foils there are!

Now it’s your turn!! What piece of clothing are you going to update first?? I cannot wait to see all of your projects 🙂 If you create any cool clothing, please email me pictures! Send them to jennifer@artisticpaintingstudio.com

More of a visual learner?? Check out my Facebook Live!

Products I used…

Hampton Medalion Stencil

Stick It – Spray Adhesive 

Fabric Foil Adhesive Spray

Foils

A Dresser for My Mom

Now, this was a fun piece of furniture to create 🙂 It makes it that much more fun when you are creating a special piece for a special someone in your life! In this case, I was creating this dresser for my mom.

If you don’t already know, I have recently had to move my mom into assisted living as her dementia has progressed rapidly. I found her a great place down by me in Huntington Beach and it has been great having her closer to me and getting to see her often. If you have experienced this situation you also know that it is very stressful, so to say that I haven’t been stressed the last few weeks would be a lie. But everything is finally starting to slow down and get back to our new “normal”.

So since I moved her into a new place I had to create some awesome furniture. The first piece I am going to share with you is this awesome dresser I made for her.

Let’s Get Started…

First, I sanded and cleaned the dresser. 

Then the top two drawers center panels had a carved design that just didn’t appeal to me, so I back filed with Texture Medium. It took about two layers to make the design disappear and then I applied another layer of Texture Medium and rolled the Crocodile Roller through it while the Texture Medium was wet. I then allowed it to dry and then sanded.

Next, we are onto the top of the dresser.  I taped it off and then Texture Medium was troweled on. Try to keep the Texture Medium thin, about 1/8 to 1/16″, and then roll the Crocodile Roller through the wet material.  Allow to dry and sand down all the high peaked areas. The top of the dresser was damaged and the Texture Medium Crocodile finish covered all the damage.  

I then primed the entire dresser and drawers with XIM bonding primer. This is one of my favorite primers to use and you can find it on Amazon HERE.

After that, I base coated with General Finishes Coastal Blue. I did two coats of this. 

Now to the fun part! Foiling! I foiled the drawer fronts, so I taped off the drawer front center panels and then applied foil adhesive and allowed to dry for at least one hour. Then I transferred the Abigail Foil. I allowed a little of the Coastal Blue to peak through, but you can do a complete transfer if that is more your style.

I also decided to foil the insides and sides of the drawers. The top two drawers were well used and even after a ton of cleaning they still didn’t look like something I would want to put my clothes in, so I decided to Foil them and make them very pretty. Also, it definitely added a WOW factor to this beautiful piece of furniture. Again these were Primed with Bondago Black and base coated with Coastal Blue. I then applied foil adhesive and foiled them. 

Lastly, I used the Moroccan Damask roller on the ends of the dresser with Perfetto Steel Blue Metallic Paint. I finished it up with Final Coat to seal. 

This project was so much fun and I am obsessed with the way it turned out. Be on the lookout for my next upcoming project 🙂

Products I Used:

Texture Medium

Foil Adhesive

XIM Bonding Primer

Abigail Foil

General Finishes – Coastal Blue

Crocodile Fauxy Roller

Bondago Black

Moroccan Demask Stamping Roller

Perfetto Steel Blue Metallic Paint (Call to Order)

Final Coat


Foils & Cars: DIY Center Console

So I did something a little out of the box… I foiled my boyfriend’s car!! 🙂 No, not the exterior, but his center console. It needed a little upgrade and he mentioned I should foil it, so I definitely didn’t argue with him LOL!

Before

I won’t bore you with any chit chat. Let’s get to this awesome project 🙂

First, I removed the console from his car and cleaned it. If you don’t know how to remove your center console, I would suggest just YouTubing how to remove your specific cars console. It wasn’t too hard at all. 


Then I lightly sanded the surface area, cleaned it up again, and then applied one coat of my Foil Adhesive. I allowed it to dry for at least an hour or two (the longer the better). Never used my Foil Adhesive before?? Check out this blog to learn all about it!

Now to the fun part! The FOIL! We had to pick a color/pattern that would match his car. So… We went with the Silver Cheetah Foil 🙂 It is a funky pattern, but still pretty neutral. 

I applied the Cheetah Silver Foil using a scrub brush to get the best transfer. I had to scrub a little harder is the creases and weird spots to make sure I got a full transfer. The scrub brush definitely helped with this. 

Next, I applied about 7 layers of Final Coat for protection. This is a fabulous “keep it simple” wipe on varnish. It provides a durable and virtually flawless finish when applied in the following manner. Just pour or spray a small amount of Final Coat into a damp cotton cloth (old t-shirts are perfect) or a staining pad applicator. Gently WIPE the surface you wish to finish. Allow the surface to dry (5 to 10 minutes) and apply another coat. Continue to add layers in this manner until you achieve the finish you desire.

Lastly, I reinstalled the center console back into his car. And voilà! We have our foiled center console. How fun is that?? Who is foiling their car next?? 🙂

Products I Used:

Foil Adhesive

Silver Cheetah Foil

Final Coat

More of a visual learner?? Check out my YouTube Tutorial below!


Easy DIY Picture Frames

When your old picture frames just don’t suit your taste any longer, it’s time to transform them into something new! With just a little bit of Foil Adhesive and Fabulous Foils, you can completely change their look… Let’s get started with this fun and easy tutorial! 🙂

Gathering Supplies

Gather your supplies and let’s have some fun foiling. All you need for this fun project: Old Frame, Foil Adhesive, Leopard Spots Foil and a brush.

One of the things that I love about this project, is there was NO prep! I didn’t do anything to this frame first (well I did wipe it clean LOL) and then I brushed on my Foil Adhesive.

Applying Foil Adhesive

The foil adhesive looks milky white but will dry completely clear. Just brush on a thin even coat (if it seems a like thick just add a little water) and allow the foil adhesive to dry to a firm tack. Dry time is a minimum of 15 to 30 minutes BUT it can take longer during the cold winters!

Foil Adhesive Drying To A Firm Tack

Make sure to allow the foil adhesive to dry completely to a firm tack. Do not rush it! Like I said before minimum dry time is 15 to 30 minutes, but you can allow it to dry for hours, days, weeks, months… It will never dry beyond a firm tack. Yes, it stays sticky forever!

Now onto some fabulous foils

Crumpling Our Foil Transfer Paper

We have a fantastic collection of foils, even Leopard Print! I like to crumple my foils first. Sometimes it helps the transfer but it always makes them easier to handle.

Lay your foils over the dry Foil Adhesive and use a soft rag to smooth them on. ALWAYS have the pattern or pretty color facing up!

If you are not getting enough of the color or pattern to transfer with the soft rag, grab yourself a scrubber brush (stiff plastic bristles) and scrub on the foil for the best release/transfer.

Continue to place pieces of foil across your project and transfer one section at a time until you have completed the entire frame.

WooHoo!! It was that easy to create this fabulous Leopard Print foil project and so much fun!! Such an easy project to do with the family and friends. 🙂

If you are more of a visual person, here is a short video on the process!

Materials I used:

Foil Adhesive

Wild Leopard Spots Foil – Small

Easter Egg Decorating: Foils Edition

So… I stole this idea from one of my retailers and good friend, Morey at PAINTED studio. It was just too cute (and she ordered WAYYYY to many eggs), so I knew I needed to share it with you guys. I finally found some time in my very overwhelming weeks (family stuff) to get back into my studio and be creative, and I am so excited to share this project with each and every one of you!

I am going to Foil some Easter eggs and show off some of me newest Foil patterns 🙂

To start, I put my eggs on skewers. Some were easy to get in and others I had to really poke it in there LOL. These eggs are papier-mâché, but you can use glass, plastic, and basically any other eggs you find. If you are wanting to do some papier-mâché ones, you can find them on Morey’s website, HERE.

Next, I base coated my eggs. I painted them Persian Blue by General Finishes and black. I know black is a little basic, but I have a ton of foils that look great on a black background.

Now let’s get foilin’. Foil Adhesive is a product I created and it is definitely one of my favorite products. It starts milky white and then will dry clear and shiny. Make sure you give your foil adhesive 15 – 30 minutes minimum to dry. It drys to a firm tack and will never dry past that. You can let it dry for a day or a year and it will still be sticky 🙂

Once your Foil Adhesive is dry, you will pick out your favorite foil colors, patterns, and your glitters, and we are going to get foilin’ and glitterin’.

Set your egg in the foil, and remove from the skewer. Then wrap the foil around the egg and grab your toothbrush or scrub brush to help you get the best transfer possible. Make sure to leave some areas without foil if you want to add some glitter to your eggs.

Once you have foiled all your eggs, you can now get out your glitter. Grab a plate, bowl, or tray to put your glitter in and roll your egg around in the glitter until you get as much glitter as you want on your egg. YES, there will be glitter everywhere 🙂 LOL!

WOW! These turned out fabulous! So stunning and different than anything I have ever seen 🙂 What are you waiting for?? Grab your supplies and get Foilin’! Your Easter decorations will be the talk of the town (or at least your family HAHA) 🙂

More of a visual learner? Check out the complete tutorial below!

You can purchase Foils HERE! You can purchase Foil Adhesive HERE!