Free shipping on orders over $100! **After discounts have been applied & Continental US only

metallics

Hometalk LIVE DIY – Metallic Foiled Crosses!!!

Large Wooden Crosses

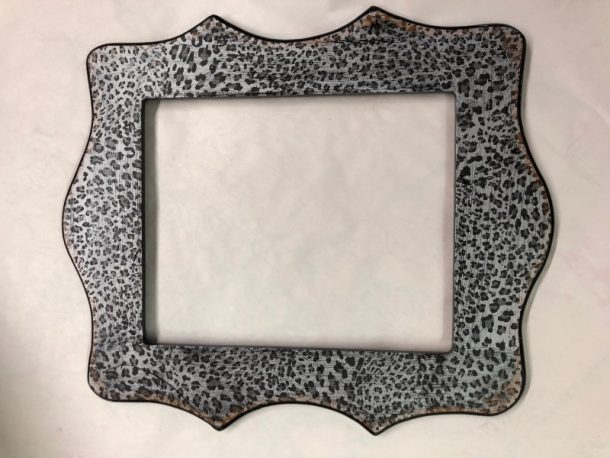
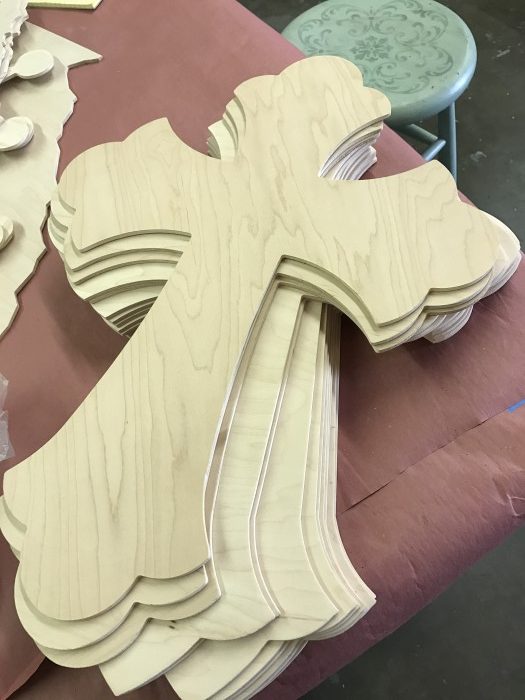
When I discovered these large wooden crosses – I immediately fell in love and knew I had to Foil them!  All my friends and family have a cross wall in their homes and I knew these would be great gifts once I was done making them fabulous!

So I ordered a ton of these crosses, knowing that once everyone saw the transformation – you would want one!

Primed Crosses

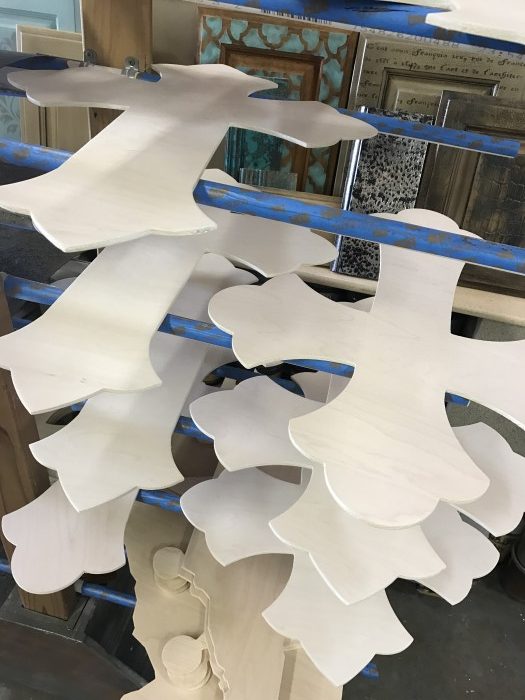
I started out with priming them (probably not necessary – but I prime everything)!!!  The priming did raise the grain of the wood – so sanding was necessary.  Just a light sanding with 220 grit sandpaper (btw – any paint I had used would have raised the grain of the wood – so sanding would be necessary no matter what) and I was ready for the next step.

Painted with Little Black Dress and ready to foil

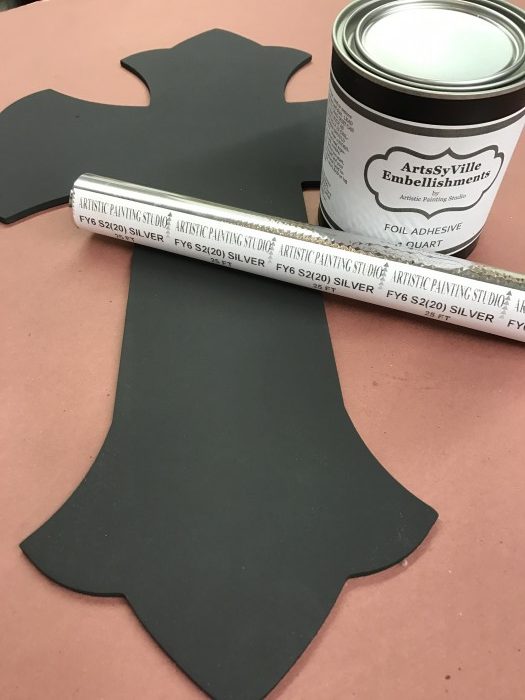
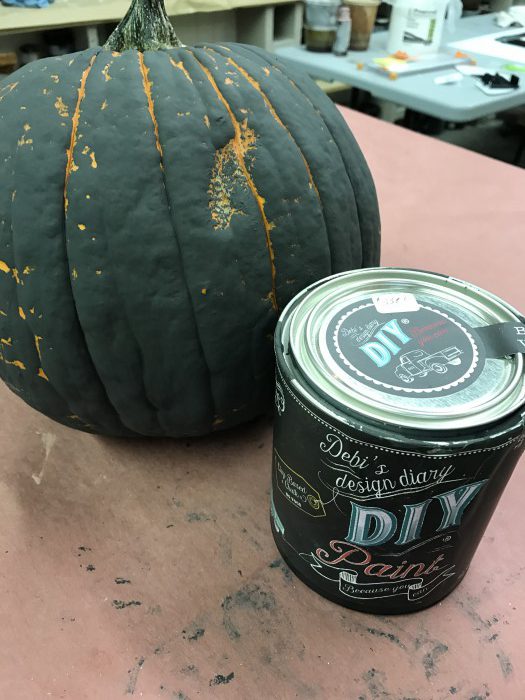
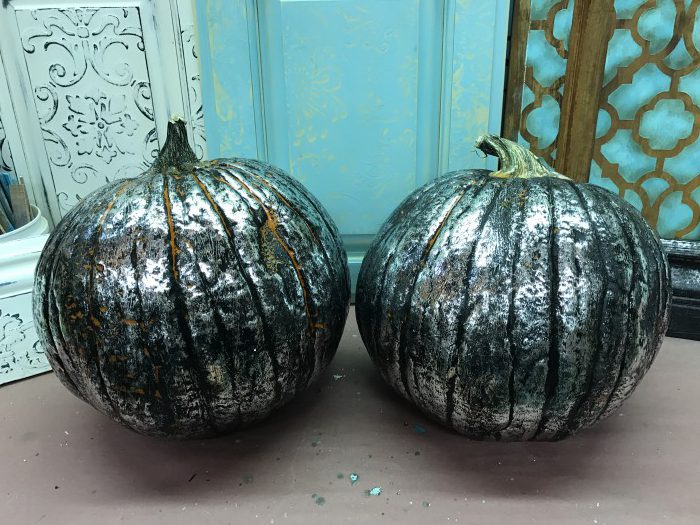
I decided I wanted some contrast with the Silver Foil I was planning to use and painted the cross Black using Debi’s Design Diary DIY Paint – Little Black Dress.  I love using this paint – one coat of the Little Black Dress and I was done!

Now it’s time to get Foiling!!!  So, let’s talk about foils and what they are.  The metallic foils I use are a metallization on the backside of cellophane and we need a very tacky surface to transfer them.  You also want to make sure that you are working with easy to release foils – both of these things are necessary for a an easy and fun Foil Finish!!!

Transferring the Foil

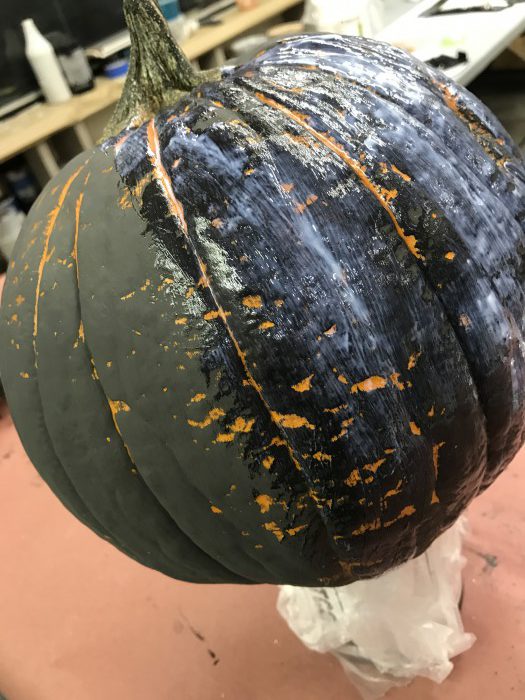
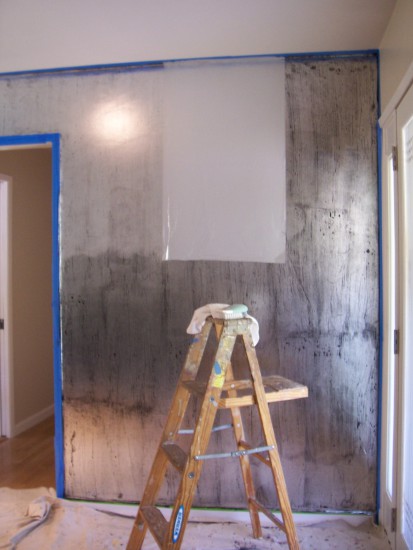
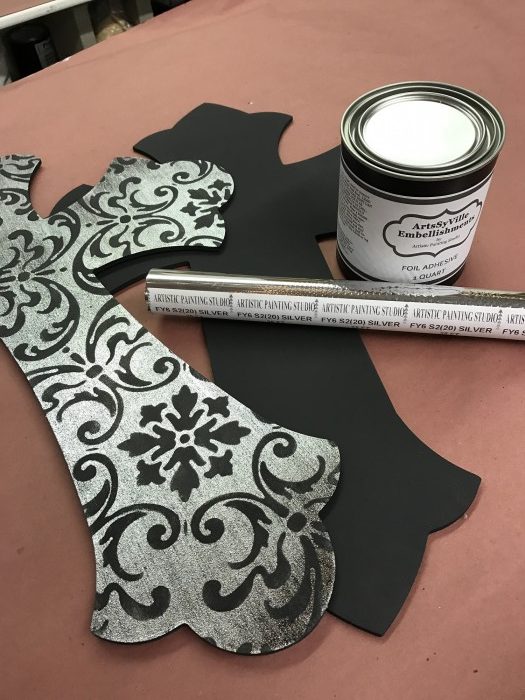
First things first – let’s start with my amazing Foil Adhesive and apply one coat to the painted cross.  Allow this to dry to a firm tack (this can take 30 to 60 minutes and it doesn’t matter how long you leave it before transferring – it will never dry beyond a firm tack).  I used a Wooster low nap roller and rolled on one coat, you can easily see where it is – as it is milky white when applying and dries clear.

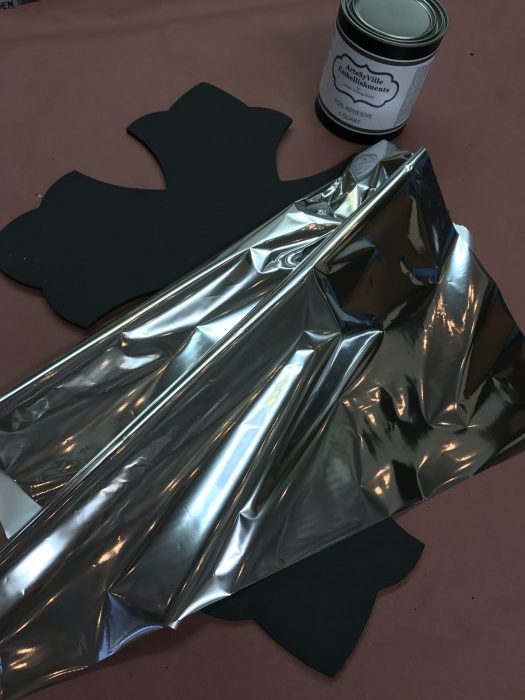
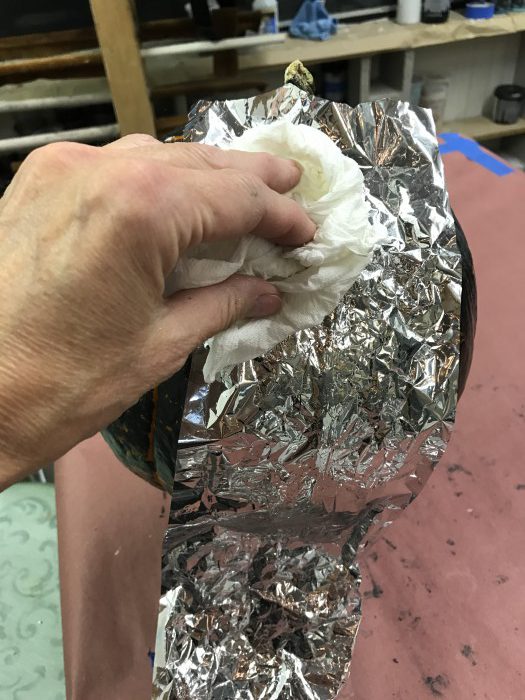
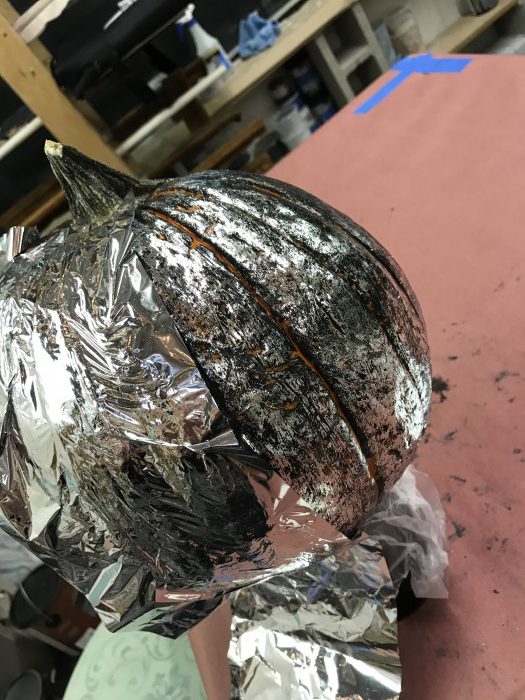
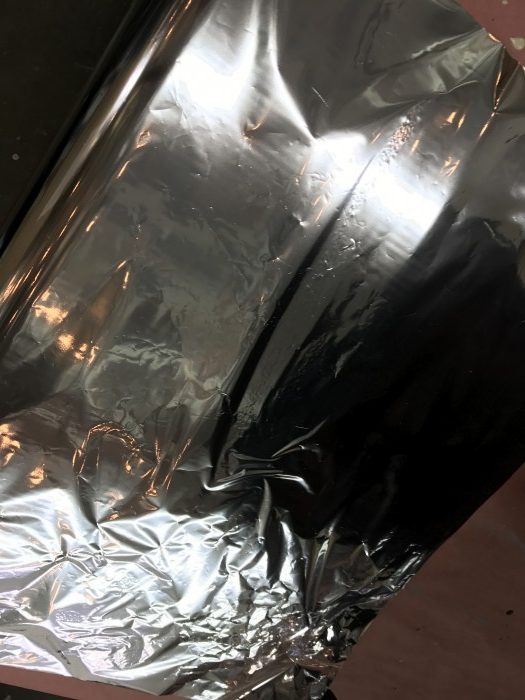
Now that our Foil Adhesive has dried to a firm tack we are ready to get Foiling 🙂  I have cut a piece of foil large enough for the project (if you have a smaller roll – cut enough pieces for you project). Lay the foil onto the tacky surface with the “shiny/colored” side facing up and smooth out the surface using a terry rag. Start transferring the foil by rubbing back and forth with the terry rag and see how much transfer you are getting – lift up one side of the foil and “peak” under to see the transfer.  If you have not received the transfer you were looking for – place the foil back down and get out your scrubber brush and scrub the surface in a vertical motion, then check again.  Once you are happy with the Foil transfer – remove the foil cellophane and you will have a Bright and Shiny Silver Finish.  No need to wait for anything – we can move onto the next step!!!

Pouncing Foils

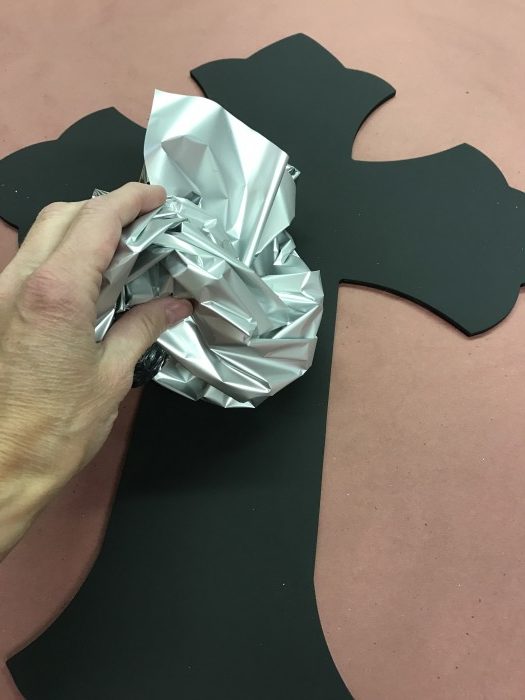
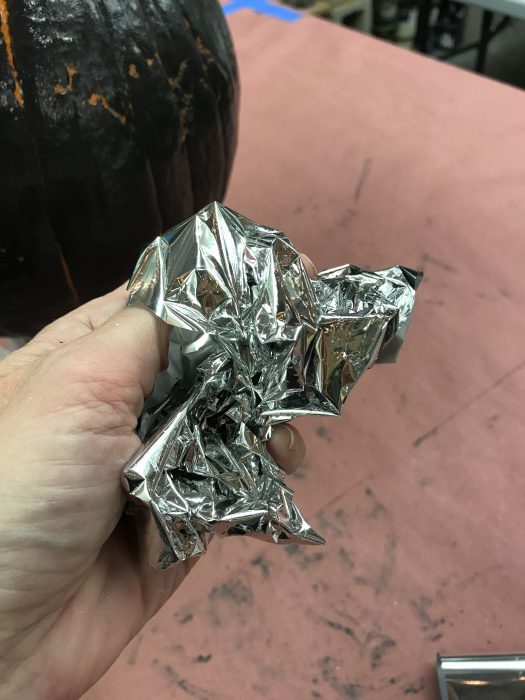
(Pouncing Foil Option – crinkle foil up into a ball with the “shiny” side on the inside of the ball and pounce the foil onto the surface.  Keep re-positioning the foil to a new area and pounce as much coverage as you desire).

Stenciling with DIY Paints – Little Black Dress

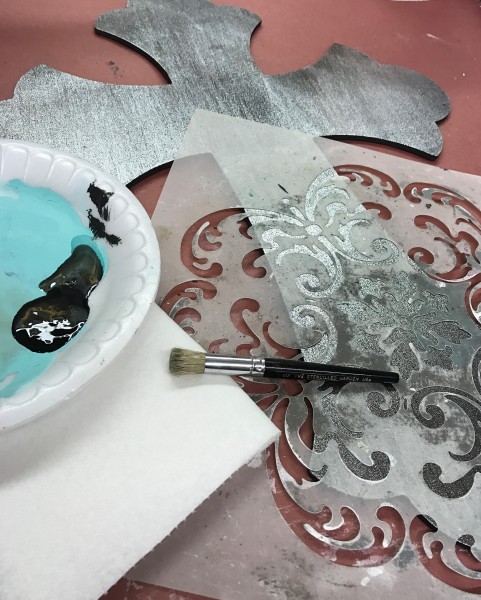
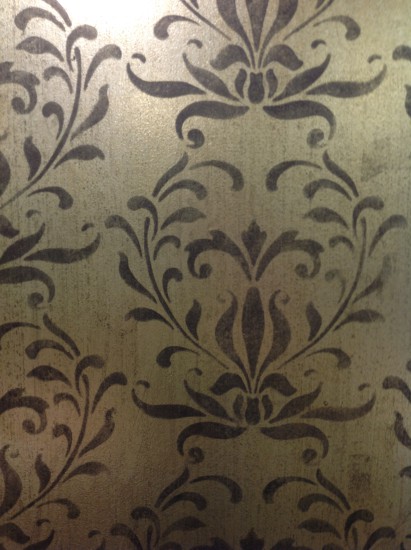
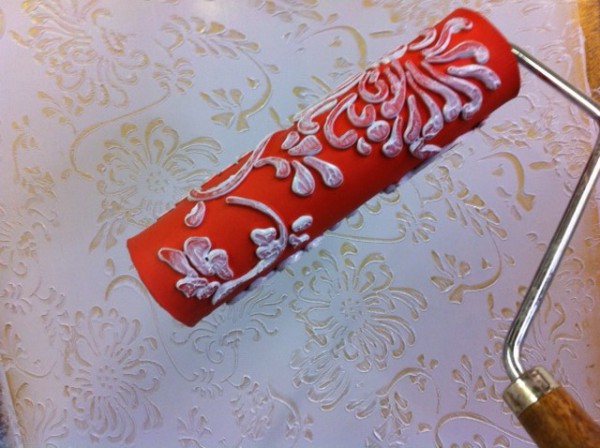
I choose my Hampton Medallion stencil for this project – I love how it looks with in a all-over-repeat and figured it would be great for this project.  Position stencil at the top of the cross for your first repeat and attach with blue painters tape.  I’m using the DIY Paint Little Black Dress for the stenciling – I know this paint will cover very well.  For detailed stenciling instructions – here is a link to my Stenciling Video. Stencil the Hampton Medallion using the Little Black Dress DIY Paint and a dry brush technique – keep re-positioning the stencil until you have covered the entire cross.

Once everything was dry – I drilled a small hole at the top of the cross so that I could use ribbon to hang the crosses.

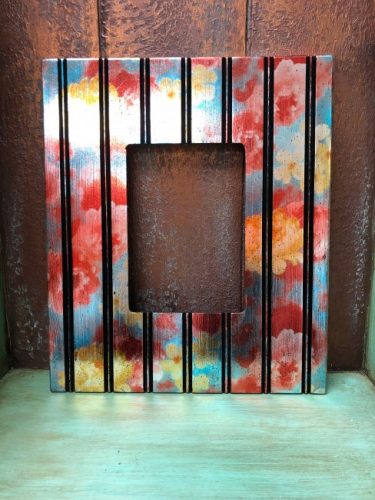
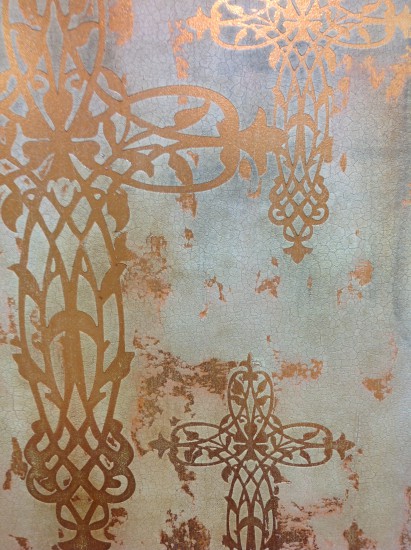
Here are a few other samples I created with the same process – just changing up the color options.

For more information on working with foils – check out this video – Installing Foils.

Hope you have enjoyed this fun project and get foiling!!!

Blessings,

Jenn


Hometalk LIVE – Coffee Table makeover!!!

Yard Sale find -  score!!!
Yard Sale find – $10 score!!!

I hope you had the chance to join or watch me on Hometalk Live – if not, make sure to watch it on Facebook at Hometalk Live with Jennifer 🙂  This was a ton of fun and I’m looking forward to my next project in December!!!  WOOHOO 🙂

As I always start my projects, this table went out the back door for a good sanding and cleaning – the previous owner had a “love-affair” with Pledge!  Many layer and layers of build-up needed to come off. Once the sanding was complete, I cleaned the table with a mixture of Vinegar and water 50/50 – this helps to remove dirt and grease.  Even with all my efforts – I still felt there was some of the Pledge build-up left and I was done with sanding (if you know what I mean)!!!  So to insure that all my efforts would stick – I decided to prime the entire piece with XIM Primer for adhesion (XIM has lot’s of different primers – make sure to find the one you need for your project).

Taping off center panel and priming

I wanted to get the center panel done first, so I taped off at the recessed grove in the table and primed with XIM primer.  Allowed this to dry and then started on the Crocodile pattern.  Using my brand ArtsSyVille Embellishments Texture Medium – I troweled on a thin (1/16″ to 1/8″ thickness) layer of Texture Medium using my Japanese Trowel.  This takes a little practice using a trowel – but check out my YouTube Video’s for more instruction on this technique.  I troweled the Texture Medium over the entire center panel and while it was wet, I rolled the Crocodile Roller through the wet material.  As you can see the top had a stripe of wood that went down the middle of the panel – this was my guide.  I rolled through the center following the wood stripe and then rolled to the right and left – centering the pattern on the panel.

Crocodile Roller through wet Texture Medium
Crocodile Roller
Crocodile Roller

After rolling the Crocodile Roller through the wet AE Texture Medium – I removed the tape and allow the Texture Medium to dry completely.  While I was waiting for that to dry, I finished priming the rest of the table.  Once the Texture Medium is dry – you will need to sand down the “peaks” that the roller creates as it lifts up the material a little – I just sand by hand, using 150/220 grit sandpaper and sand by feel, not sight.  You just want to smooth out the rough areas – don’t element the pattern you have created.  Once it was sanded, I dusted and cleanup up the top to get it ready for it’s first layer of paint!!!

Table painted in Smoke and Old 57

The center panel with the Crocodile roller was painted in the Modern Masters Metallic Smoke color – this paint color covers very well and I actually did get full coverage with one coat.  When you watch the video, you will notice that the metallic paints show very distinctive brush/roller marks – this is due to the metallic particles in the paint.  As you brush or roll in one direction, it’s laying the particles down in that direction, which shows the brush marks.  Best to brush in one direction to element as many brush marks as possible – I wasn’t worried with this project, I knew I was layering over it and everything else I was doing would hide those marks!!!  (But, I do suggest practicing with metallic paints – they are a little tricky).  The rest of the table was painted in Debi’s Design Diary DIY Paints Old 57 (one of my favorite colors) – I applied two coats for complete coverage, allowing the first coat to completely dry before applying the second coat.  Once all the base painting was completed – it was time for some Dry Brushing 🙂

Dry brushing Teal over Smoke
Dry brushing Seaglass over Old 57

I love the Dry Brushing technique – this adds depth and dimension while highlighting the texture.  To create a dry brush technique – first, you want to start with a Filbert style stencil brush or an older stiff Chip brush (it’s best with a stiffer bristle).  Pour a little paint onto a palette (or foam plate) and pick up a little paint on the bristles, work the paint into the brush and then off-load all the paint on a paper towel (yes, this seems crazy – but it’s the only way to create a true Dry Brush).  The dryer the better, this puts you in control of the paint and so you can place it where you want. With a light touch, brush over the area you want to highlight – on the top, I highlighted all the Crocodile pattern, bringing out the edges and creating depth – this was done with Modern Masters Metallic Teal (such a beautiful combination).  Then as I went onto the Old 57 on the rest of the table I used the SeaGlass by DIY Paints – I was looking to create a little more interest and highlight all the detail – this will be subtle when completed, but adds that extra depth that you don’t see all the time!

Sealing with Final Coat

So, with my choice to use the DIY Chalky Paints – I did add another step for myself.  Which meant I had to seal the paint before glazing – Chalky paints are way too porous to glaze directly over and have any control of your glaze.  This is one of my FAV sealers and I love that you just wipe it on – Final Coat the Wipe on Varnish.  Just tip the bottle onto a staining pad – just allow a little product to come out and wipe onto the surface – it’s meant to go on paper thin and it dries within minutes!!!  Allowing you to go to the next step fast 🙂  I only wiped on one layer, which I knew would give me some control but I also wanted the glaze to grab a little and create a very distressed/aged look.  Once the Final Coat was dry – it was time to glaze this baby!!!

Black Glazed applied over Old 57/Seaglass

I did start with the center panel over the Metallic Smoke – which I knew would glaze easy.  I brushed on the American Paint Company Black glaze using a Chip Brush and then wiped off the excess, just leaving a little in the recessed ares of the Crocodile texture – this creates so much depth and dimension to the top and brings out the pattern!  I wiped most of the glaze off – still wanting to see the Teal that was dry brushed on 🙂  Then I started the top edge and worked my way down all around the table – it’s pretty scary brushing on a Black Glaze!  I worked in one section at a time, knowing that I only had one coat of the Final Coat and it was just giving me a little working time, but also still grabbing the glaze fast (but that was the look I was going for – Distressed/Aged).  I brushed on the glaze using the chip brush and wiped off the excess with Cheesecloth (I love using this stuff) – I left a lot of glaze behind, left more in the edges and corners to enhance the style I was going for.

If you want a cleaner more refined look with the glaze, make sure to use a least two layers of the Final Coat or a brush on varnish, which will give you better coverage and a more sealed surface. This will allow you to control the glaze better and you can almost pull all of the glaze back off, just leaving it where you want it.  There are so many looks that can be created with glaze – I think that’s why I love it so much – lot’s options and looks!!!

I waited for the entire piece to dry completely and with glaze this can be overnight.  I applied the America Paint Company Hard Coat for a durable finish (remember I have a household full of boys most of the time – we need durable)!!!

Make sure to check out my Fauxy Rollers page on Facebook – a great place to be inspired!!!

Completed Table
Completed Table


nov-22-149

Products Used:

XIM Primer

ArtsSyVille Embellishments Texture Medium

Decorative Pattern Roller – Crocodile

Modern Masters Metallic Paints – Smoke & Teal (you will have to call the studio for these products – not on website at this time)

Debi’s Design Diary DIY Paints – Old 57 & Seaglass

American Paint Company – Black Glaze & Hard Coat

Final Coat Wipe on Varnish – Semi-gloss

You can purchase all the materials and supplies through Artistic Painting Studio – If you don’t find something online, please feel free to call the studio at 714-386-3243.

Blessings and Happy Painting!!!

Jenn


Foiled Pumpkins

oct-18-014

So I’m sure that I’m not the only one that has these ideas that just come to me and then it’s finding the time to make them happen!!! I had been so inspired by all the fabulous pictures I have seen over the last month of everyone’s front porch all decorated with painted, glittered, carved pumpkins!  I actually went to Michael’s and Hobby Lobby to find some plastic or paintable pumpkins – but by the time I was shopping (which was last Friday) there wasn’t much to pick from.  So when I was grocery shopping, I picked up a couple more real pumpkins – I love the character of the real pumpkins – not perfect, leaning to one side – dents and all!!!

Well the clock was ticking to get these pumpkins painted – it is already October 18th and I not only wanted them for Thanksgiving, but also wanted them done before Halloween!  So, I get the call late in the afternoon that my Honey is working overtime and the youngest has a meeting a school until 8pm……WOOHOO!!!  Guess what – I get to paint my pumpkins 🙂

Oh, course I just couldn’t paint these all by myself – it would have been fun, but not as much fun as going Live on Facebook……this way I would have some friends to paint with.  Now, I was also hoping that my idea was going to execute well – I really didn’t try this out first!  LOL  So I gathered my supplies and started to prepare one of the pumpkins to speed up the time on Live video and then had you all you join me.

This was a fun project and Thank Goodness – it really turned out awesome – just like I imagined!!!  Whew – dodged that bullet – this could have been awful…..

So here is what I did – step by step – so if you have been dying to paint or Foil some pumpkins here are the instructions and it was pretty fast project (just needed to wait for things to dry and I actually used a blow dryer to speed up the process).

My Vons Pumpkin
My Vons $4.00 Pumpkin

Start with some great “real” pumpkins from the pumpkin patch or Vons, like I did.  I didn’t even wash them – just brushed off any dirt that I saw and started painting.  I used Debi’s Design Diary DIY Paint – Black Velvet.  Turn the pumpkin on the side and paint the bottom first – I blow dried the bottom so that I could stand the pumpkin upright and finish the painting.  I used a 2″ paint brush and didn’t try to paint 100% coverage – allow some of the Orange pumpkin color to still show (it looks great)!

Debi
Debi’s Design Diary – DIY Paints – Black Velvet

Once all the painting is done and dry – you will apply a layer of my APS Foil Adhesive.  This stuff creates a prefect “tacking finish” for the foils to transfer to.  When you apply the APS Foil Adhesive it looks milky white but will dry completely clear, shiny and tacky.  Allow the APS Foil Adhesive to dry to a firm tack – this can take anywhere form 15 minutes to 1 hour depending on the humidity.

The shiny are is where the Foil Adhesive has been applied.
APS Foil Adhesive being applied.
Crinkle up Foil first for this project.

I used my Silver HS Foil – cut your foil into manageable pieces and I crinkled the foil first.  Make sure to adhere the foil to the tacky surface with the “shiny” side up facing you.  Foils are a metalization on the back of clear plastic – with a great foil adhesive and an easy release foil, they transfer to the tacky surface.  Using your hand or a soft rag, rub the shiny side of the foil and transfer as much of the Silver foil as you would like.  I left a lot of the Black showing (that was my personal favorite – but transfer as much as you like).

Rubbing the foil to transfer
Shiny side of foil facing me and rubbing the foil to transfer
Transfer as much of the Silver Foil as you like
Transferring as much of the Silver Foil as you like

Once the foil is transferred – you can move to the next step if you have one.  I decided I liked the pumpkins just as they are – I have some of the Orange showing, the Black is a matte finish because I used DIY Paints chalky paint and then the shiny Silver foil – I love all the contrast of the different textures.  My pumpkins are still a little sticky because of the Foil Adhesive – but, these will be thrown out after the holidays – so I’m leaving them as is!!!

Finished Pumpkins

Happy Holidays to all of you – hope you have as much fun as I did painting & foiling my pumpkins!!!

You can see the Video on my YouTube Channel – make sure to subscribe so you don’t miss anything!!!  Jennifer’s Foiling Pumpkin Video 

Blessings,

Jenn


APS Foils & APS Foil Adhesive

APS Foil Adhesive was designed to provide you with the best adhesion for foil transfers and my foil collection has fabulous release!  What a nice combination to work with and makes foiling projects enjoyable!  I know that my foil Obsession is due to creating my own Foil Adhesive, which has made the transfer of foils amazingly easy.

Here are a few tips and tricks for using the APS Foil Adhesive (APSFA) and installing/transferring foils:  First, it’s not a bad idea to stir up the material if you see any separation in the bucket…..I have yet to see this happen!  You will also get the best transfer of foils when applying the APSFA over a sealed surface – if your surface is porous/adsorbent, the APSFA will soak in and not provide as great of a transfer (you could also try a second layer of APSFA for a better transfer – this is only recommended on a porous surface) – so, keep in mind the substrate that you are working on.  My favorite roller for applying the APSFA is the Wooster low-nap roller and just ONE coat of the APSFA will do you!  (my APSFA should save you time and money – only one coat needed for a great transfer)!  Pour the APSFA into a paint tray and work it into the roller and then apply a thin, even coat of the APSFA to the surface.  Allow the APSFA to dry to a firm tack – this will be approximately 30 to 45 minutes – best to wait longer than try to apply too soon!  The APSFA will never dry beyond a firm tack – so you have from the time it tacks up until whenever you get back to the project to transfer the foil (the surface will be tacky – I don’t recommend days – anything can stick to this surface)!  I love working my days, if possible, that the last thing I do is roll up the APSFA and allow it to sit overnight – come back the next morning and install/transfer the foil!!!

Now that your APSFA is applied to the surface and dried to a firm tack – it’s time to transfer the foil!   Not all foils are manufactured the same and they release different – some better than others. My collection has a very easy release and works wonderfully with my APSFA.  So, let’s talk about foils – what they are and how they work.  Basically, you have a very thin film of color that is applied to a clear plastic backing material, that needs something stick enough (APSFA) to grab the color and transfer it to another surface.

There can also be a learning curve or two with transferring foils……You knew it couldn’t be that easy!!!  One of my best tips is to make sure you are trying to transfer the correct side of the foil – I tell everyone to make sure the “pretty” side is facing you and you sure don’t want to the get the wrong side stuck onto the APSFA – this can actually de-activate the APSFA.  Because the APSFA is so sticky – if the wrong side gets on it, there is nothing to pull off and it will stick really well…….when you finally pull it off, it will take some of the adhesive off and you will not get a good transfer in that area.  You can always repair this area – just apply another layer of the APSFA and again, allow it to tack up.

Foiling by Nicole Nichols

I do recommend having a helper when installing/transferring foils – so recruit a friend for the project!!!  It’s nice to have someone hold onto the other end of the foil and keep it away from the surface until you are ready to smooth it onto the surface area.  So, have one person at the top of the wall – starting at the top left corner and trying to keep it straight, apply the foil to the surface by rubbing it with your hand or a terry rag works well.  Continue down the wall, smoothing out the piece as you go down towards the bottom of the wall.  If the walls are tall or you are working alone – cut sections in manageable lengths, i.e. 10-foot wall – cut sections 3′, 4′, 5′, 6′ and 7′ long.  This way you can handle the length of the foil and have the joint lines staggered at different heights – you don’t want to end up with a horizontal line going through the wall at the same height.

This picture shows the first layer of foil installed – I did this alone and just cut the pieces in manageable lengths to handle by myself.  Another thing you need to know about transferring the foils is how you scrub them.  When I’m installing a sheet – I use a terry rag to smooth it onto the surface, trying not to get too many air bubbles.  But, transferring the foil will take a little more pressure then just lightly rubbing it.  Now, another one of those learning curves is that the way you scrub the foil will also transfer in the pattern – i.e., if you use a circular motion, you will see this in the foil transfer.  I find it best to use a scrub brush and keep the motion of scrubbing the surface vertical.  Also, if you get any air bubbles in the foil, lift up one side to release the air bubbles and re-smooth out that area and scrub again.

036
Apply the second layer of foil – Pewter

I like to stress the fact – that nothing is perfect about transferring foils – so embrace the imperfections – I refer to them as “happy accidents” or “features”!!!  As you apply your sections – try not to scrub all the way to the edge of the foil and leave a little salvage edge – you’re better off with imperfect edges than straight lines.  Overlap the next section of foil, so that you can blend into the irregular lines you create.  I also recommend that you protect your foil finishes – you can glaze over them, clear coat over them – you just allow them to be part of the finish.  Make sure to create a sample board 🙂

Here a few foil finishes that I have been creating – love working with all my foils and incorporating them into beautiful finishes 🙂

Stenciling over foil background
Foil back ground under Cross
Foil background under Cross
Using a stencil pattern when transferring foil

I really hope that this information helps with your foiling projects – my best advice is to practice on some sample boards and get the hang of it…..it really is an easy process and so much fun!  There isn’t anything else that shines like foils other than Leaf!  But foils are cheaper and faster than leafing…….

Check out my web site for the complete collection of foils – over 75 different colors, patterns, and holograms.  You can order a sample pack for $10 – which includes 40 different foils in a 4″ square – also all foils are available for purchase by the foot and several different size rolls.   APS Foil Adhesive is available in pints, quarts, and gallons to accommodate any size project.   You will find everything at www.artisticpaintingstudio.com  –  Also please feel free to call with any questions – you can reach the studio at 714-386-3243 or email to Jennifer@artisticpaintingstudio.com

Happy Foiling…..:)

Before Foils
After Foils by Jenn Ruoss Lamb


Pattern Rollers – Another Obsession

Chrysanthemum Roller

Pattern rollers have been around for a long time and I played with them a few years back, but never embraced  their possibilities. Over the last year or so, I started looking for these rollers once again and have been playing around with the different textures that I can create with and how FUN they are to incorporate in my decorative painting.

Roller collection
Roller collection

I have been posting on Facebook over the past several months, showing the different roller patterns/textures I have found and have been using in my decorative painting.   My friends/followers have been asking many questions about using them in decorative painting and I thought it would be fun to address these concerns/questions/issues in a blog post…….hopefully I answer everyone’s questions – but if not, please feel free to post questions here!!!

Python - Diamonds - Crocodile and more
Python – Diamonds – Crocodile and more

To start with – there are many different patterns and textured rollers available to work with and I have found that I can just about roller through any texture material (all the products I use are made by Proceed by Golden or Modern Masters).  The texture materials that are a little more heavy bodied, like Smooth Absorbent Texture (Proceed by Golden) is a little easier to work with than a “slick” texture like Smooth Translucent Texture…….the roller can possibly slide, instead of roll through these textures.  But you can always mix the two of these products together and make a “new” wonderful texture material to play with (that’s a hint – love them mixed together – 50/50)!!

Artsy Leaf Pattern
Artsy Leaf Pattern
Tiger Skin roller
Tiger Skin roller

But, with a little practice and playing around – you can work with any texture material  and may discover you end up with a favorite texture or two!!!

When working in different texture materials – I use my Japanese trowel to apply the texture to the surface, working in sections 2 to 3 feet wide and ceiling to floor if possible (depending on the open-time of the material you are working with).  Once the texture has been applied to the surface, it helps to “wet” the roller in a bucket of water and then roll through the texture – you can clean the roller off in the water bucket to prevent the roller from getting loaded with too much material (I even learned this trick recently and love it).

Crocodile Skin Roller

There are many different patterns to choose from (www.artisticpaintingstudio.com/shop/tools/rollers/) – the patterns can be rolled vertically – horizontally – create stripes or random application – you are the artistic creator with these rollers and there really are not any rules!

One question I have been asked over and over:  How do you handle corners, crown molding and baseboards?  There are several options to handle all these areas.

1st option:  There is a tool that has a rubber tip and you can uses this tool to hand carve the pattern into the areas that the roller is not reaching or continuing to print.

Carving pattern tool

2nd option:  Purchase two rollers – cut one off the roller and use this as a stamp to print the pattern into the hard to reach areas.

3rd option:  Be creative in the layout of your design – you could always frame a wall, leaving a border all around the pattern roller – creating more interest to the design.

Chrysanthemum Roller Random application

You will find that the rollers will “peak” up the edges of the material as you roll through it – which will require some sanding once it is dry.  Sand the surface using 150 to 250  grit sandpaper to remove the “high pecks” if necessary.  Complete the finish using your creative juices – using foils, glass beads, glaze, optional plasters, etc.

Sanding high peaks
Sanding high peaks

So far I have discussed all negative options for working with these rollers but you can also create a positive effect by rolling into paint and rolling the design onto a painted wall/surface.

I love working with them on furniture – drawer fronts are wonderful to work on and no issues of corners/etc.

From floral to animal skins – there are many pattern options to work with and the possibilities are endless…..I have been playing for many months and feel I have not even scratched the surface of options.  You can order these on line for Art Rollers – they range in price from $12.95 to $20.95 for the Rubber style rollers and $49.95 for the Shamie style rollers.

Snake Skin roller
Snake Skin roller
Cascade Roller
Cascade Roller
Chrysanthemum Roller

Durability and life of a pattern roller is another question that I have been asked – these are all rubber material rollers and all materials that I have worked with to date and washed off the surface with no issues and as long as you take care of the roller – they should last a long time!  The Shamie style rollers have also held up very well – I rinse well and then use a little soap to clean out residue left behind.

I have most of the rollers available on my online store – but some of them have just come in and have not been loaded on the site – if there is a roller you’re looking for and can’t find – please just call the studio at 714-386-3243 and I will help you out.  I also teach many classes that incorporate using these rollers – so you can get hands on experience working with different rollers and different textures.

Blessing to all, Jenn

Dumpster Diving – TrashFormations

I think there are many different things they call it these days – but I always referred to it as “Dumpster Diving”!  Not that I actually ever dove into a dumpster – but I have been known to look carefully through a few to find a “treasure” or two…..
Recovered "junk" to repurpose
Recovered “junk” to repurpose
I personally have been “junking” for at least the past 20 years. I think it’s kind of an addiction – once you get the BUG, it’s very hard to pass up a Yard Sale, Antique shop, Thrift Store or something that was “kicked to the Curb”……I like to say, I’m Junking 🙂 I started Junking with a friend many moons ago – we both loved to paint and felt the NEED to transform everything we bought. Our Junking days lead to a couple of books that we wrote together – Painted ChairsPainted WhimsiesTrashFormations and Painted Fabric Fun.
TRASHformations
TRASHformations
Painted Chairs was the first book I wrote and chairs had always been one of my favorite pieces to paint……I started collecting chairs with the vision to transform them all and write a book.  I was lucky enough to “score” the deal and Painted Chairs was published.  BUT, my addiction to buy chairs just couldn’t stop……at one point I had to rent a storage unit to store them all!  LOL  I finally had to give up and had the biggest YardSale of the neighborhood back in 2008…..most people assumed it was a multi-family event (but it was just my obsession to buy everything I saw)!!!
Old chair - ready for transformation
Old chair – ready for transformation
My Junking days had to be spread out – after letting go of the storage unit and Paying to store my “great finds” – I realized there just wasn’t enough hours in the day to paint all my junk and I had to quit buying everything I found!!!
Big score on frames!
I do have a few weaknesses – Old Sash Windows – Vintage Doors and Frames……these items are always hard to me to pass up!  I think part of my love for Junking is the search for something unique that speaks to you – whatever that may be.  Searching through Antique shops, yard sales, Vintage shops – Good Will and Salvation Army are two of my FAVS!!!
Old Sash Windows
Old Sash Windows
I have made myself a promise that I can’t buy anything else until I paint two items I already have…….I’m running out of room once again!!!
Old Side-light windows ready for transformation
I’m currently working on Transforming an old picture frame that will frame my Chalk Board that I painted on my office wall.  I’m using the American Paint Company chalk/clay/mineral based paints on this project.
Transforming an old picture frame
One more project to Up-Cycle and I get to go junking again.  For me – I feel I’m giving something discarded new life – keeping our planet a little Greener and I love taking the personality of the piece and adding to it’s natural charm.
Up-cycled projects
Up-cycled projects

 If you are looking for inspiration on your next TrashFormation – make sure to check out my books on line at www.artisticpaintingstudio.com Have fun painting something!!!!