Free shipping on orders over $100! **After discounts have been applied & Continental US only

Odds & Ends

Upcycled Sofa Table

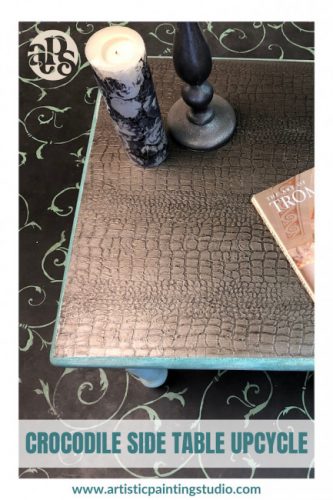
Here is a great make-over project for your Home Décor! I am so excited to share this gorgeous upcycled sofa table I created with some of my favorite foils!

Upcycled Sofa Table

This was an old sofa table that needed a make-over! I gave it a little update to match the current colors and décor of our home!

This piece had already been primed and was ready to go, so started by base coating it in Black Bondago. This was the best color choice for the foils I wanted to use! Black Bondago is such a great product to base coat with under the foils. The adhesive properties are wonderful and also provide a sealed surface for the foil adhesive to work at its best!

Once the entire piece was base coated, I allowed it to dry overnight.

I decided to create an elongated diamond shape on the top of the table and measured the table vertical and horizontal to get the center points of all four sides. Then I used a ruler to connect the points.

Next, you will tape off the diamond shape and apply the Foil Adhesive inside the diamond shape using a low nap roller and smooth out all your application marks. Continue to tape off the areas that you want to put your different foils. I used the same pattern on top in the diamond as well as on the front and sides of the table. Apply the foil adhesive to those areas as well and allow to dry for at least an hour or better.

Once the foil adhesive has dried for an hour or better, you will transfer your foils. I started with the Ramsey Rose Silver Foil on the top of the table. You will apply the foil to the surface with the pretty side facing up and smooth it out with a soft rag. Then use a scrubber brush to transfer as much of the foil design as desired.

Once you have transferred foils to the top of the table…

You will clear coat the foil in the diamond section with a top coat to protect the surface. I used our Golden Paintworks Gloss Topcoat and applied two coats before removing the tape.

Then you will continue to foil the other areas that the foil adhesive is dry and ready for transfer. I chose Ramsey Rose for all of these sections. You can use a toothbrush, scrub brush, or even your fingernails to get into the edges and corners.

I also created an elongated diamond on the front of the drawer and started using the other foil design, Leopard Silver! Follow the video instructions for more detail and apply the top coat after each section.

Once you are done with the first foil…

Remove the tape and then tape off the sections needed for your other foil option.

You will apply the foil adhesive again in the open areas, allow them to dry, and then transfer the leopard print foil on all the rest of the table sections.

Once everything is done, you will apply another full coat of topcoat to protect the entire piece and enjoy!

Don’t you just love working with foils and the endless possibilities?? Every project can be enhanced and updated with the Art of Foiling!!

4th of July Project Compilation

We are getting excited for the upcoming 4th of July holiday, so I figured what better way to start the weekend than a 4th of July project compilation.

DIY Americana Cross Project

First, you will basecoat the Cross with Vintage Linen DIY Paint and apply two coats. Allow each coat to dry before applying the next coat. Allow your Cross to completely dry before moving on to the next step.

Next, you will free-hand paint the Foil Adhesive creating diagonal stripes. Take some of the foil adhesive out of the container and put it onto a foam plate. Then add some water (just about 1-2%). Using a 1/2″ artist wash brush or foam brush, brush on the foil adhesive in a diagonal stripe. I just eye-balled the distance between the stipes. Remember beautiful things are never perfect!

Find the full blog post HERE.

American Door Hanger DIY 

First, you will pick out four different foils you want to use for your project. I used: Glitter Stars Red, Glitter Stars Blue, Glitter Stars Silver, and Stripes – Red/Blue/Silver foils.

Then you will take your sign and lay it over the foil that you are planning to use for each letter and star. I marked on the foils with a Sharpie making lines that I wanted to cut to keep the foils on each section (watch the video for this process).

You will then basecoat the entire surface with black Bondago paint and allow it to dry.

Find the full blog post HERE.

Finishing Touches on our 4th of July Projects

Xo, Jenn

Custom Epoxy Serving Tray

Everyone needs a fancy serving tray and you are going to LOVE this custom epoxy serving tray project! Head to your local craft store to pick up a tray and handles, and grab your foils & epoxy. Now we are ready to get started!

Custom Epoxy Serving Tray

I started with a wooden box (I had this custom made) but you can find something similar at Hobby Lobby or Michael’s.  This tray is about 18” x 12” x 2” in case you want to build something custom.

You will then base coat the entire surface of the tray or box with the Bondago Black Paint and Primer, and apply two coats for complete coverage. Then allow this to dry.

Next, you will use the ArtsSyVille Embellishments Foil Adhesive and apply this only where you want to transfer your foil.

When applying the foil adhesive to the surface, add a tiny bit of water as seen in the video (about 1-2%). This will help with applying the foil adhesive as smoothly as possible.

Brush onto the entire bottom surface area of the tray and the outside edge on all four sides.  Allow the foil adhesive to dry for at least an hour to get to a firm tack.

Let’s get foiling…

I picked Baylee’s Flowers Foil for this project, but you can choose whichever foil catches your eye.  You will cut a piece large enough for the bottom area of the tray and apply the foil to the surface with the pretty side facing up.  Smooth out the foil using a soft cloth and then use a toothbrush to get into the corners and a larger scrub brush to transfer the foils to the surface.  You can always peak under the foils to see how well they are transferring and then put them back for more coverage.

Once you are complete with the inside of the tray, transfer the foil to the outside edge on all four sides.

Now for some epoxy…

To provide the most durable surface to the bottom of the tray I decided to do an epoxy pour!  I used our Liquid Glass Epoxy for this project. Make sure to wear a mask, gloves and be in a well-ventilated area when working with epoxy.

You will mix Part B and Part A together in this order, measuring equal amounts of each, and stir together for at least 2 minutes.  Mix approximately 3oz for a 12” square area.

Once I had the epoxy mixed together, I added a little Diamond Dust for added sparkle. A girl can never have too much sparkle!

I poured the epoxy into the middle of the tray and used a brush to move it to the edges. I used my gloved hand to spread across the surface area.  Once the surface was covered, I used my blow torch across the surface area bringing all the air bubbles to the surface and clearing out the epoxy. You may need to do this more than once but allow it to cool off between passes.

Epoxy is a self-leveling product so make sure that your surface area is level for the drying time and allow your serving tray to dry overnight.

Once the epoxy is dry, you will use the Bondago black paint and primer to paint over any areas where the foil got onto the inside edges. Then you will apply Golden Paintworks Topcoat in Gloss to the rest of the surface area.

Add some decorative handles and you are ready for company!! If you create your own custom epoxy serving tray I would love to see it 😁 Text me a picture to 714-202-9356!

Xo, Jenn

Crocodile Side Table Upcycle

This side table has had a few different finishes on it over the years! As a girl that likes to change her mind, sometimes it’s just time to update and do something different.

This crocodile side table upcycle was super fun to create and I am so excited to take you through the process of how easy it is to use the crocodile roller. Nothing better than a simple tabletop to show you this super cute and easy process!

Crocodile Side Table with crocodile pattern on top.

Crocodile Side Table Upcycle

First, I taped off the edges of the table where I wanted the finish to go. This helps to keep the finish only on the top surface of the table.

Then I used our ArtsSyVille Embellishments Texture Medium to apply a thin layer of texture to the surface area.  The texture medium only needs to be 1/16th to 1/8th of an inch thick. That’s all you need to get a great print from the rollers.

Just trowel on the texture medium using a trowel, spatula, or a chip brush if that’s all you have.

Let’s get rolling…

Once you have the surface completely covered with the texture medium, you will use the crocodile roller to roll through the wet texture medium.  Line up the left edge of the roller with the left side of the tabletop and roll straight down for your first pass. Then just line up the left side of the roller with the last pass to keep it straight.

So easy and it looks awesome just rolling through the texture medium!  Allow the texture medium to dry for at least 4 hours (or as long as it takes to be completely dry).  Once the texture medium is dry, you will need to sand off the high/rough areas that are peaked.  Because this is a tabletop, I sanded to a smooth surface without losing any of the pattern/design.

Next, you will need to brush/clean off the surface after sanding. You don’t want any “dust/particles” to get in your paint for the next part of this table transformation.

Let’s add some color…

Apply two layers of the Modern Masters Metallic Paint in Pewter, for an even opaque coverage allowing each layer to dry.  Metallics can stay soft a little longer than regular paints, so allow to dry overnight before glazing.

Mix up your glaze mixture using the Golden Paintworks Glazing Medium and Van Dyke Brown Hue. I use 1 cup of glaze to 3 tablespoons of van dyke brown hue colorant.

Apply the glaze mixture to 100% of the surface area using a chip brush, making sure it’s in all the groves of the crocodile texture.

Then using cheesecloth or a soft rag, you will remove the excess glaze wiping back and forth. Pulling off the top layer and leaving it in the recessed areas to create depth and dimension to the crocodile pattern.

Protect your project…

Allow the glaze to dry for at least a day, and then topcoat with the Golden Paintworks Topcoat in your favorite sheen for protection.

Side table with candle and magazine on it.

I would love to see any and all projects you create with our APS products!! Text us a picture to 714-202-9356 😁

Xo, Jenn

Update Your Wardrobe with Foils

We LOVE our foils and all that you can create with them.  So let’s not forget those jeans that you already own that could use a little extra flair! Update your current wardrobe with a little foil 😍

Using our metallic foils on fabric is really easy and I’m going to take you through the steps of how I updated these stylish jeans!

Update Your Wardrobe with Foils

First, you want to pick out the foil you would like to use and make sure it is one of our Textile Foils. All foils on our website have a description box and at the bottom, it will indicate if it’s a textile foil or not.

Then you will need to grab some of our Deco Foil Spray Fabric Adhesive for this project along with the beautiful Nora Paige Stencil.

I prefer to use a hard surface when transferring foils to any fabric. I like to use the iron with some pressure for the best release.

Smooth out the area of the jeans that you want to foil.  Take your stencil outside and spray the back of it with our Stencil Repositionable Spray Adhesive and allow this to tack up for a minute or two. Then you will position your stencil on your jeans where you want the foil.  I decided to add the stencil to the bottom of the pant legs and at an angle.

Now for some stenciling…

Tape the Nora Paige stencil in place and then tape off the part of the design you are not going to use.  Completely tape around the outside of the stencil to create a barrier for overspray, so that the adhesive doesn’t get anywhere else but in the stencil openings.  Make sure that the stencil is secured to the surface so that no over-spray gets under the design as well (that’s what the Stik-it is for).

Shake the Deco Foil Spray Fabric Adhesive really well before using and then hold about 6 to 8 inches from your surface and spray the openings of the design. The adhesive should look white but not thick when done properly.  Remove the stencil and clean it as soon as you are done. We like using Awesome from the Dollar Tree to help clean the adhesive off of the stencil.   Allow the adhesive to set for at least ten minutes and then you will be ready to transfer your foil.

Grab your iron…

Turn on your iron and set it to medium heat to start with.  Every iron is different so best to be careful the first time.

Jeans stenciled with a silver floral pattern

While the iron is heating up, cut a piece of foil large enough to cover the stenciled design and lay it over it with the pretty/color/pattern side facing you.  Then cover the foil with parchment paper and iron.  Keep moving the iron over the surface using some pressure for about a minute or two.

With jeans, you will find that you have to really push where the stitching is or any place there is a seem.  Take your time and make sure that you have ironed over the complete design. Then allow the foil to completely cool off.  DO NOT remove the foil while it is hot.  Once the foils have completely cooled off, just peel the foil off of the stenciled design and you will have a beautifully foiled stencil design on your project.  I stenciled both sides of each leg.

Women dressed in a paint covered apron and jeans.

To care for you project, wash inside/out on delicate cycle and NO DRYER. There could be a little foil that comes off over time but for the most part it all stays right where you put it!!

Just think of the possibilities with all these fabulous foils! If you try this awesome project, please share pictures with us 😁 You can text them to us at 714-202-9356

Xo, Jenn

Dollar Tree Flower Pots DIY

I found a large display of mini flower pots at the Dollar Tree a month ago and just couldn’t help myself! I bought way too many of these! But, they were so cute and I figured I could use them for many different projects because I love small containers.

Dollar Tree Flower Pots DIY

First, I cleaned the pots with a damp cloth to remove all of the dust and then allowed them to dry completely.

Next, I primed them with our Paint/Primer Bondago everywhere I wanted to apply my metallic foils. I painted the complete outside (yes, even the bottom) and on the inside. Allow them to dry completely.

After the flower pots dried, I applied my Foil Adhesive to the entire pot. When brushing on the foil adhesive, put a small amount out on a foam plate and add a tiny bit of water (about 1-2%) to thin it down so that it will brush smoother. Make sure to apply neat brush strokes, this product does not self-level and you could see your brush strokes through the foils. So make sure and be neat with those strokes! Allow the foil adhesive to dry for at least one hour, the longer the better.

Mini flower pots covered in cheetah print.

Then grab some of your favorite foils and transfer them to the flower pots. I used two of my favorites, Wild Leopard Spots Gold Large and Wild Leopard Spots Gold Small. I mixed them together on the pots, using one of them on the base and the other on the rim. Transfer one section at a time, creating a transition line at the bottom of the rim area. Use a plastic scrub brush to transfer the foils.

Lastly, you need to protect these pots! I used our Modern Masters MasterClear Supreme Satin Finish and applied it everywhere, inside and outside of the pots. Make sure you seal them 100%, if water absorbs into the inside of the pot, it will want to push the foils off of the pot. Apply two good coats at 100% coverage.

Mini flower pots covered in cheetah print with pink and white flowers planted in them.

Plant your favorite seasonal flowers and find a windowsill to proudly show off these adorable pots!

Xo, Jenn